Dynamic Credential Management in n8n: One Workflow, Many Clients
You built a brilliant n8n workflow. It syncs data, scores leads, generates reports – whatever the automation is, it works. Now you want to sell it to ten clients. Each client has their own SaaS accounts, their own API keys, their own data. Your workflow uses your Gmail, your OpenRouter, your Airtable. How do you run the identical workflow for multiple clients, with their credentials, without duplicating it ten times?
The answer is dynamic credential management: decouple the workflow logic from the authentication tokens so the same workflow can execute on behalf of any client, at runtime.
This post is for developers and agencies who want to build once and deliver many times – the architecture, the licensing reality, and the implementation detail that makes it scale.
The n8n Licensing Reality: What You Can and Cannot Do
Before we go technical, let’s cut through the licensing confusion. n8n’s Sustainable Use License (SUL) restricts commercial use to internal business purposes. The FAQ states you generally cannot “use users’ own credentials to access their data.” That sounds like it kills the whole idea.
But the nuance matters. n8n’s own support team has clarified that running workflows for clients using their credentials is acceptable as long as clients never access the n8n instance. The distinction:
- If you’re building a SaaS product where end-users connect their accounts and use your app – this requires a commercial license.
- If you’re an agency delivering an automation service – the client gets the outcome, never sees n8n, and you charge for the solution – this is considered “internal business purposes.”
The tooling described here is built for developers and agencies to manage client deployments. It is not a client-facing n8n interface. You use it internally to onboard clients, store their credentials safely, and trigger workflows.
Prefer Watching Over Reading?
If you’re a visual learner, we’ve got you covered. Check out our complete video walkthrough below, where we build this dynamic credential architecture from scratch using n8n
The Architecture: HTTP Nodes Instead of Credential Nodes
The dirty secret of native n8n credential nodes: they bind a workflow to a single set of static credentials. You cannot dynamically swap Gmail accounts at runtime using the built-in Gmail node – the node picks the credential you configured when you built the workflow.
To achieve true multi-tenancy, you must replace all native service nodes with HTTP Request nodes. Instead of clicking “Connect to Gmail” and using n8n’s credential manager, you make raw API calls and supply the authentication headers yourself, fetched per-request.
Here’s the simplified runtime pattern:
- The Client Dashboard Authenticates: Your frontend handles the user’s login or stores their specific API keys.
- The Webhook Fires: The frontend triggers the n8n webhook, passing both the execution instructions and the authentication tokens directly in the JSON payload.
- The Workflow Executes: Subsequent HTTP Request nodes use Absolute Referencing to pull those tokens straight from the webhook data and inject them into their headers to call services like OpenAI, OpenRouter, or Google Sheets.
- The Loop Closes: The workflow runs using the client’s own connections and returns the results back to the dashboard, without you ever storing their passwords in your n8n vault.
This way, the exact same workflow code serves every client. You maintain one source of truth, and when a client’s token refreshes, you update the vault, not the workflow.
Making It Work: Credential Vault, Webhook Injection, Client Dashboard
Building this from scratch means writing a secure credential vault and a web UI. We have developed a portal that provides all three, connected directly to your n8n instance.
- Credential Vault: Each client’s API keys and OAuth tokens are stored encrypted in Five’s managed MySQL database, scoped per client ID.
- Parameterized Webhooks: When a client action triggers a workflow, the portal sends the
client_idand necessary tokens to your webhook URL. n8n receives them and uses the data to populate HTTP Request nodes dynamically. - Client-Facing Dashboard (White-Label): Clients log in to see their own analytics—execution success, failure rates, time taken – without ever touching n8n’s canvas.
- The Result: the client never accesses n8n and you are delivering a service (not reselling n8n).
Critically, the portal is your tool. You configure which workflows map to which client. The client side is pure business reporting.
To make this architecture work, you need a frontend dashboard where your users can actually input their API keys or log in via Google SSO.
Instead of leaving you to figure that out on your own, we’ve actually built a complete frontend template for you, and it’s specifically designed to securely capture client credentials and fire them directly into your n8n webhooks. If that sounds like exactly what you need, feel free to reach out to us here
Implementing the HTTP Node Strategy: The Golden Rule
Once you commit to dynamic credential management, you must stop using n8n’s native service nodes (like the “OpenAI” or “Google Sheets” nodes). Instead, you will rely entirely on the HTTP Request node.
The Golden Rule of Dynamic Variables
To grab the data sent from your frontend, you use n8n’s expression engine. While n8n allows you to use shorthand like {{ $json.body.your_key }} to grab data from the node immediately preceding it, this is dangerous. If you ever add a formatting node or a timer between your webhook and your API call, the shorthand breaks.
To make your workflow bulletproof, always use Absolute Referencing to point directly back to the Webhook node. Use this exact syntax in your HTTP Request nodes:
{{ $('Webhook').item.json.body.your_key_name }}
$('Webhook'): This tells n8n to look specifically at your trigger node. (Important: If you rename your webhook node in the canvas, you must update this name!).your_key_name: This is the name of your variable; the naming should be the same for you to reference it
The Webhook Response Trap
Before configuring your HTTP nodes, double-check your Webhook trigger node settings. By default, n8n webhooks sometimes “Respond Immediately.” If this happens, your dashboard receives a success message before the workflow actually finishes. Ensure your Webhook node’s “Respond” setting is set to When Last Node Finishes (or use a dedicated ‘Respond to Webhook’ node at the end of your workflow).
Here is exactly how to configure the HTTP nodes for three of the most common integrations using this robust architecture.
1. The OpenAI Setup (Standard Bearer Token)
OpenAI uses a standard OAuth-style Bearer token for authentication. Instead of selecting an OpenAI credential from n8n’s vault, you will inject the client’s key directly into the request header.
Let’s look at a common example: generating a quick summary.
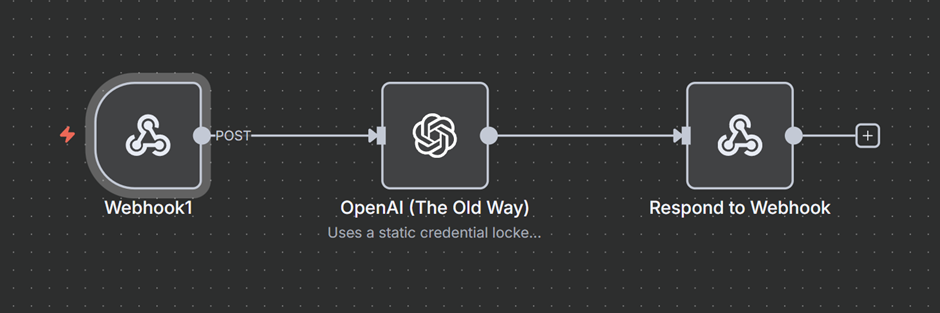
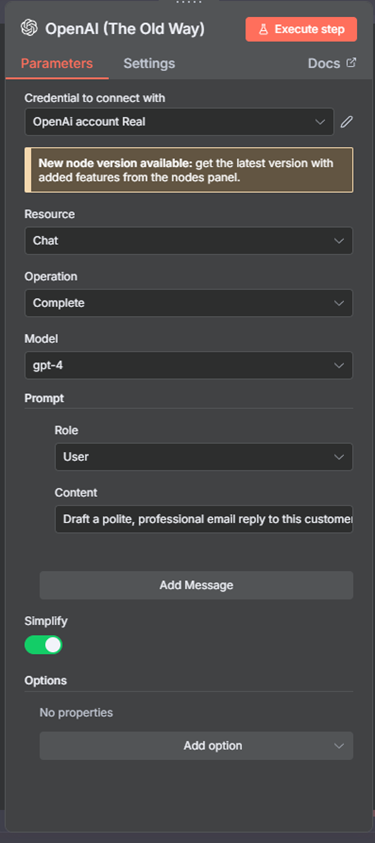
Normally, you drag the native OpenAI node onto the canvas, select your static credential from the dropdown, choose the gpt-4 model, and type a simple prompt like “Draft a polite, professional email reply to this customer inquiry”. Behind the scenes, n8n takes those nice UI buttons and turns them into a raw API request.
Now let’s say you want to extend this workflow to other users who can use your Workflow in a way that everything remains the same. The users can just hook their API key to your workflow and run it.
To make this multi-tenant, we just have to build that raw API request ourselves using the HTTP Request node. Primarily because predefined nodes like OpenAI don’t support ‘expressions’, so now our workflow will look something like this.
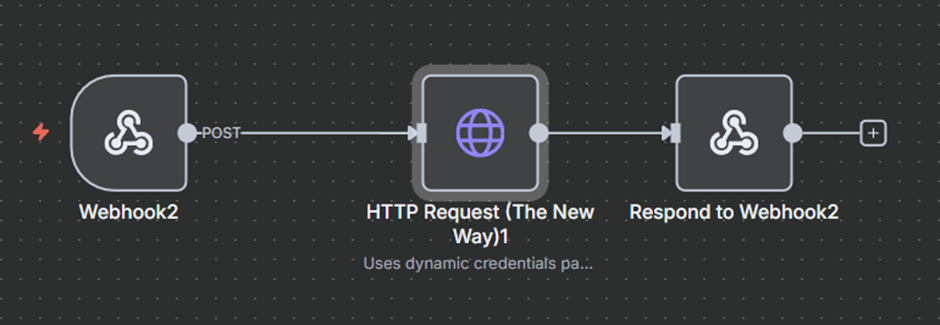
Since we are using an HTTP request, we will now have to point it to OpenAI and pass our credentials. It looks something like this.
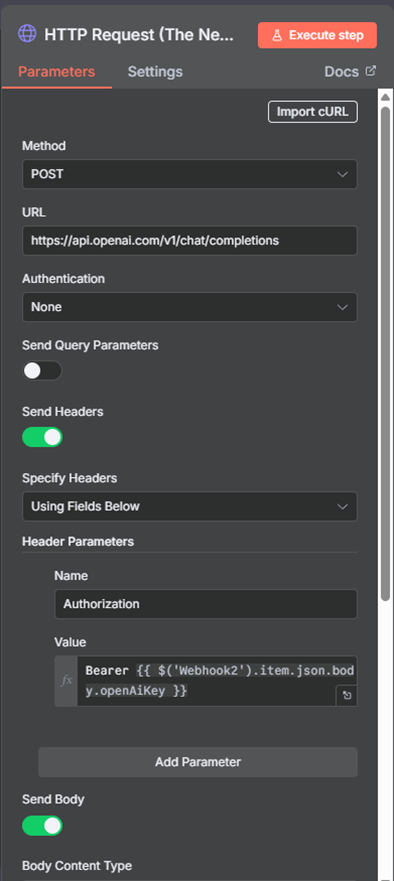
HTTP Node Configuration:
- Method: POST
- URL:
https://api.openai.com/v1/chat/completions - Authentication: None
- Send Headers: Toggle to TRUE
- Header Parameters:
- Name:
Authorization - Value:
=Bearer {{ $('Webhook').item.json.body.openAiKey }}(Assuming your portal passes the key as openAiKey)
- Name:
- Send Body: Toggle to TRUE
- Body Parameters: Format your standard OpenAI JSON payload here; this is where you define your prompts, model, etc. In this use case, we are using a static prompt as we want our workflow to behave the same way always. If you have a workflow where you want even the prompt to be defined by the user, then instead of this, we can use something like:
$('Webhook').item.json.body
It looks a bit more technical, but it does the exact same thing, except now, the workflow can run for ten or more different clients using different API keys, without you having to duplicate the node.
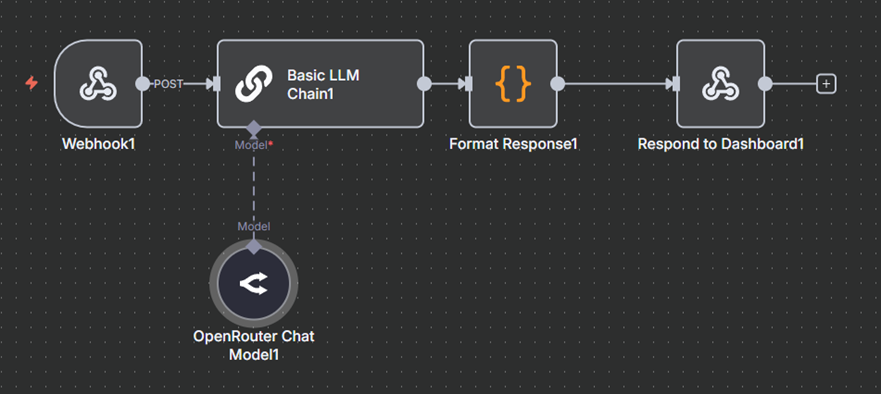
2. The OpenRouter Setup (LLM Agnosticism)
OpenRouter is incredibly useful because it lets you access dozens of different AI models (like Claude, Gemini, or LLaMA) through a single API endpoint. Like OpenAI, it uses a standard Bearer token for authentication. Instead of locking a workflow to your personal OpenRouter credential, you will inject the client’s key directly.
Let’s look at a common example: processing data through a specific model like Gemini Flash 2.5. Normally, you might configure an API node on the canvas, select your static OpenRouter credential from the dropdown, type your target model, and enter your prompt.
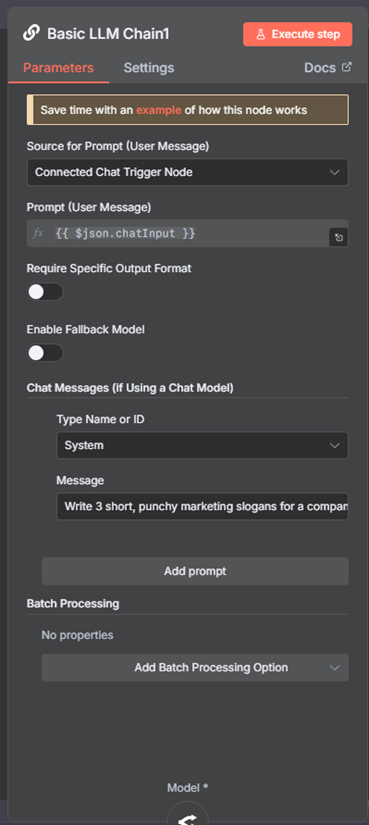
Now let’s say you want to extend this workflow to other users who can use your Workflow in a way that everything remains the same; the users can just hook their OpenRouter API key to your workflow and run it, and for this use case, let’s make the prompt dynamic too so that the user of your workflow has an option of sending their own prompt.
To make this multi-tenant, we just have to build that raw API request ourselves using the HTTP Request node, so instead of two nodes for LLM and Open Router, we will be replacing that with a single HTTP request node.
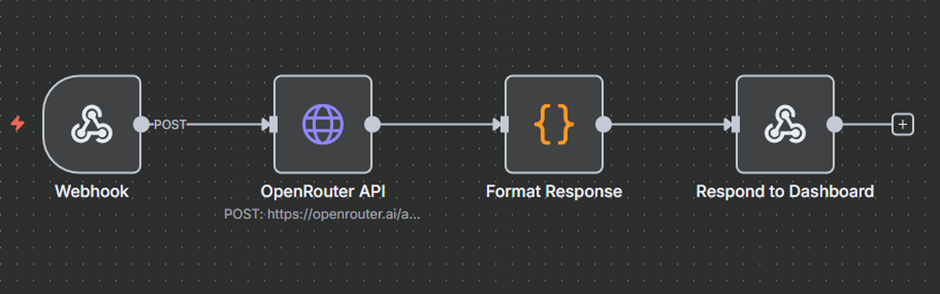
When we move away from the dedicated OpenRouter node, we lose the “dropdown” convenience but gain full control over the data. Here is how you transform that static setup into a dynamic, multi-tenant HTTP request.
In your HTTP Request node, you will set the Method to POST and the URL to OpenRouter’s standard chat endpoint: https://openrouter.ai/api/v1/chat/completions.
The magic happens in the Authentication and Body sections:
- Headers: Instead of selecting a credential from the list, you add a Header named
Authorization. Its value will beBearer {{ $json.openRouterKey }}. This pulls the key directly from your incoming Webhook or a database. - The Body: This is where we make the model and prompt dynamic. You’ll send a JSON object that looks like this:
{
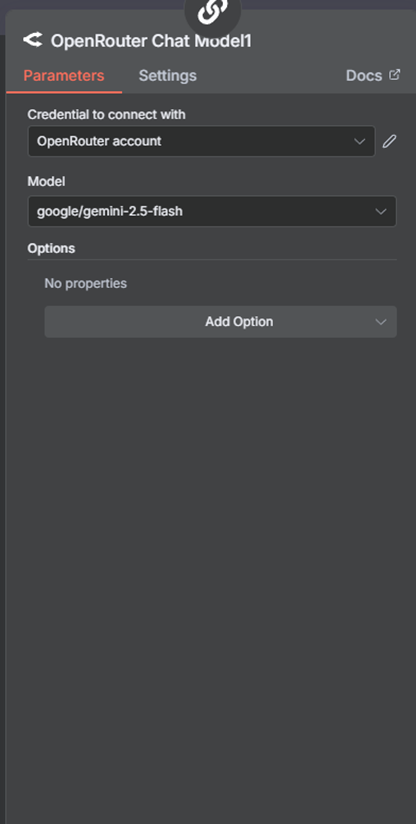
"model": "{{ $json.target_model || 'google/gemini-2.5-flash' }}",
"messages": [
{
"role": "user",
"content": "{{ $json.chatInput }}"
}
]
}What happens: The user sends “Write 3 slogans for a coffee shop” in their chatInput, and the AI does exactly that, with the model of their choice.
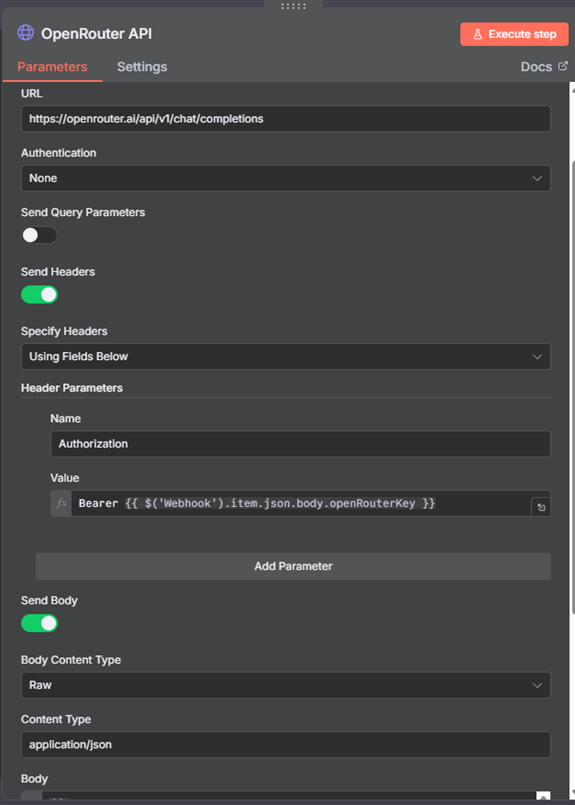
HTTP Node Configuration:
- Method: POST
- URL:
https://openrouter.ai/api/v1/chat/completions - Authentication: None
- Send Headers: Toggle to TRUE
- Header Parameters:
- Name:
Authorization - Value:
=Bearer {{ $('Webhook').item.json.body.openRouterKey }}
- Name:
- Send Body: Toggle to TRUE
- Content Type: raw
- Raw Content Type: application/json
- Body: Switch to the expression editor (
fx) and structure your standard chat completion array here. Since we want the entire prompt to be defined dynamically by the user sending the webhook, map the content directly to your webhook variable like this:={{ JSON.stringify({ "model": "google/gemini-2.5-flash", "messages": [ { "role": "user", "content": $('Webhook').item.json.body.userPrompt } ] }) }}
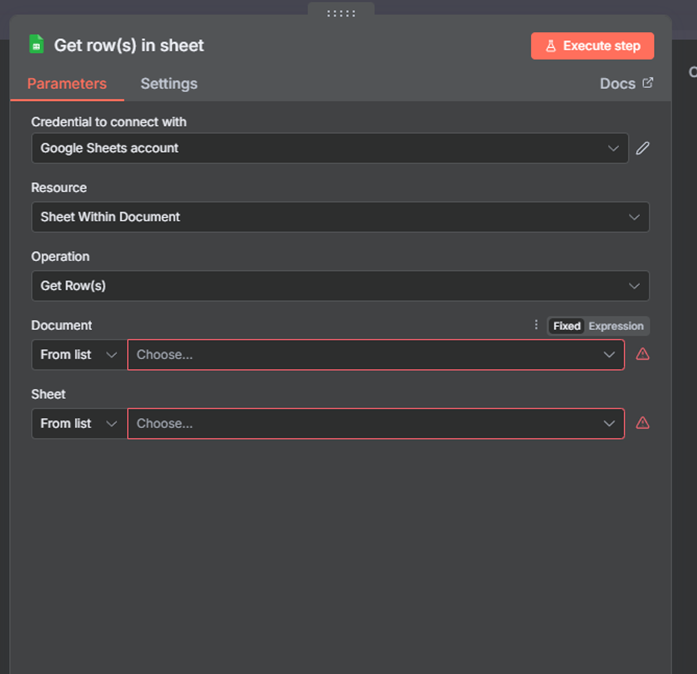
3. The Google Setup (Custom Headers & OAuth)
Google APIs often require a slightly different approach depending on whether you are using a dynamic OAuth token (like for Google Sheets, Drive, etc.). This is the token Google generates when you click an SSO button to log in to websites. Let’s take an example of connecting to Google Sheets here.
Let’s look at a common example: adding a new row of customer data to a spreadsheet.
Normally, you drag the native Google Sheets node onto the canvas, select your personal Google OAuth credential from the dropdown, choose the “Append Row” operation, and use the built-in dropdowns to find your specific Spreadsheet and Worksheet. Behind the scenes, n8n takes those nice UI buttons and turns them into a raw API request.
Now, let’s say you want to extend this workflow to other users. You want Client A to trigger the workflow and have the data appear in their personal Google Sheet, using their Google account, without you ever having to ask for their password or set up a new credential in your n8n vault.
To make this multi-tenant, we just have to build that raw API request ourselves using the HTTP Request node.
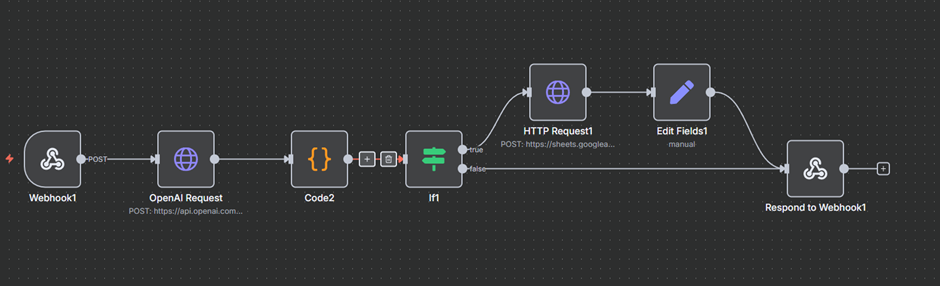
For this use case, our workflow looks something like this: we ask the user to write what data they want, which we pass into OpenAI, which then treats the user’s input as a prompt, creates data, and sends it to Google Sheets.
In this, our HTTP Request looks something like this:
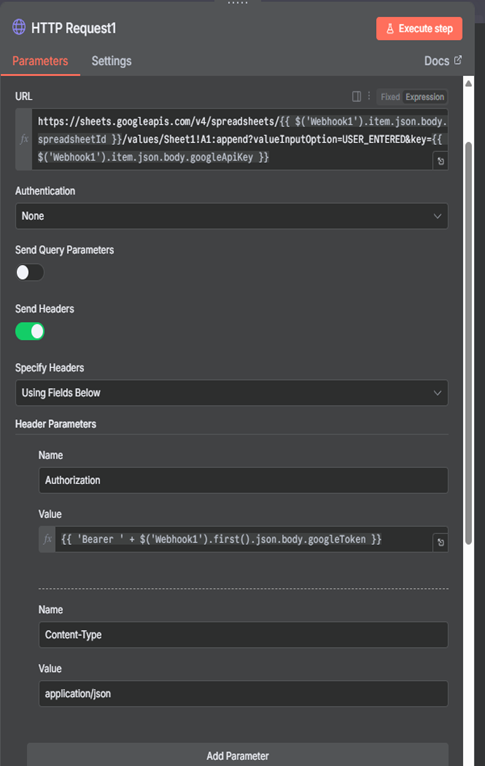
HTTP Node Configuration:
- Method: POST
- URL:
=https://sheets.googleapis.com/v4/spreadsheets/{{ $('Webhook').item.json.body.spreadsheetId }}/values/Sheet1!A1:append?valueInputOption=USER_ENTERED
(Note: If your specific setup also passes an API key alongside the OAuth token, you can append&key={{ $('Webhook').item.json.body.googleApiKey }}to the end of this URL). - Authentication: None
- Send Headers: Toggle to TRUE
- Header Parameters: You will need to pass two headers here for Google to accept the data.
- Name 1:
Authorization - Value 1:
=Bearer {{ $('Webhook').item.json.body.googleToken }} - Name 2:
Content-Type - Value 2:
application/json
- Name 1:
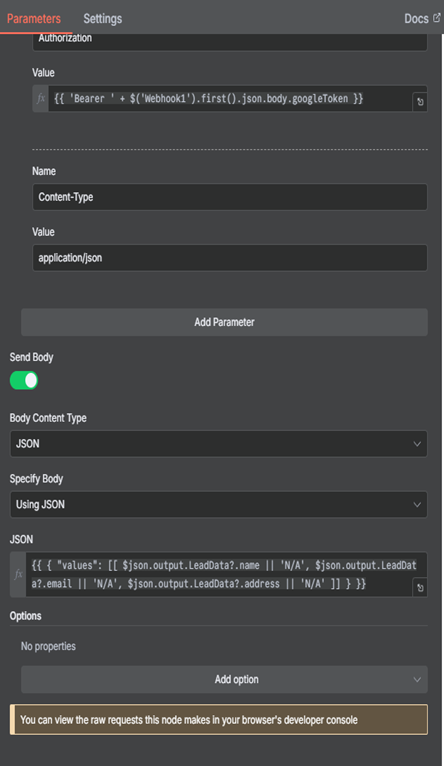
- Send Body: Toggle to TRUE
- Specify Body: json
- Body: Switch to the expression editor. Google Sheets requires your row data to be formatted as an “array of arrays.” Here is how you map dynamic data (like a name, email, and address) directly into the new row:
={{ { "values": [[ $json.output.LeadData?.name || 'N/A', $json.output.LeadData?.email || 'N/A', $json.output.LeadData?.address || 'N/A' ]] } }}
To make this work, the front-end dashboard connected to your n8n workflow must support Google SSO and pass the resulting token as a variable named googleToken.
A Note on Referencing: In the Body configuration above, we use relative referencing ($json.output...) instead of the absolute Webhook reference. This is because the structured LeadData was freshly generated by the OpenAI node immediately preceding this step, not the Webhook. You only use the absolute Golden Rule to bypass middle steps for original data (like the googleToken).
Why This Matters: One Fix, Everywhere
Without dynamic credentials, a bug fix means updating ten duplicated workflows. With this architecture, you fix the single master workflow and every client instantly benefits. You stop copy-pasting and start shipping.
The HTTP-node approach requires rethinking how you build, but the payoff is a fully automated, sellable service, without a per-client instance overhead.
You now have a bulletproof, multi-tenant n8n backend. But your users still need a place to log in and provide those API keys and OAuth tokens.
You don’t have to build this from scratch. As mentioned earlier, we’ve built a dedicated frontend app designed to pair perfectly with this n8n architecture. It supports dynamic credentials, Google SSO out of the box, and secure webhook proxying.
If you’re ready to scale your workflows and offer this experience to multiple clients, you can contact us today to get access to a frontend to manage credentials.