Advanced Forms – Part 9: Display Types Hi…
Advanced Forms: Using Labels to Structure Your Form
Blog
Advanced Forms – Part 2: Labels in Forms
Hi and welcome to Five’s Advanced Forms series. This series of blog posts teaches you how to design the perfect form in Five. From changing the layout of your form to adding calculated fields – we cover everything you need to know to give your users access to a custom-designed form that does exactly as needed.
In this blog post, we introduce Five’s Form Labels, which lets you add explanatory texts or headings to your form.
About Five: More Than Just Forms
Five is a rapid application development environment with advanced form-building features.
With Five, you can easily launch sophisticated forms to the web in minutes. For an example of a form developed in Five, check out this hypothetical booking form, which combines several of Five’s features.
Unlike traditional form builders, which only store submitted data, Five allows you to directly connect your form to a database. This connection enables you to query your database and generate visual representations of your data. Most traditional form builders require exporting data to third-party tools for analysis, adding extra steps and potential for errors.
While traditional form builders may suffice for very basic data collection tasks, they often struggle with large datasets or high data volumes. Five’s database-connected solution, on the other hand, is designed to handle substantial amounts of data efficiently.
One of the standout features of Five is the ability to create login-protected forms. This ensures that only authorized users can access and process data. Traditional form builders often lack these advanced security features, leaving your data vulnerable to unauthorized access.
In addition to its advanced data management and security features, Five allows you to build dashboards and generate detailed reports directly from your data. You can create visual data representations such as charts and graphs.
To see your form submissions, Five gives you a full-fledged, login-protected submissions admin interface.
Five’s Form Designer: Using Labels to Structure Your Form
Labels are a useful feature to
1. Give forms a structure,
2. Group related information, or
3. Guide users through your form to increase useability (and submission rates).
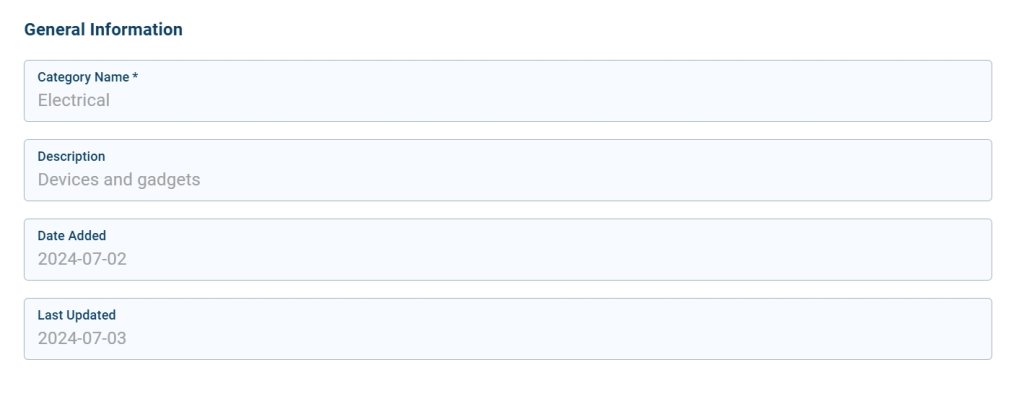
In the image below General Information is a label, introducing the form fields below.
Here’s another example of a more sophisticated form with two labels: General Information and Address Details.

This form uses both labels and an adjusted form layout. This is accomplished using Five’s Form Designer.
Last, check out this form and see how labels guide the user through the form, providing helpful questions or instructions:
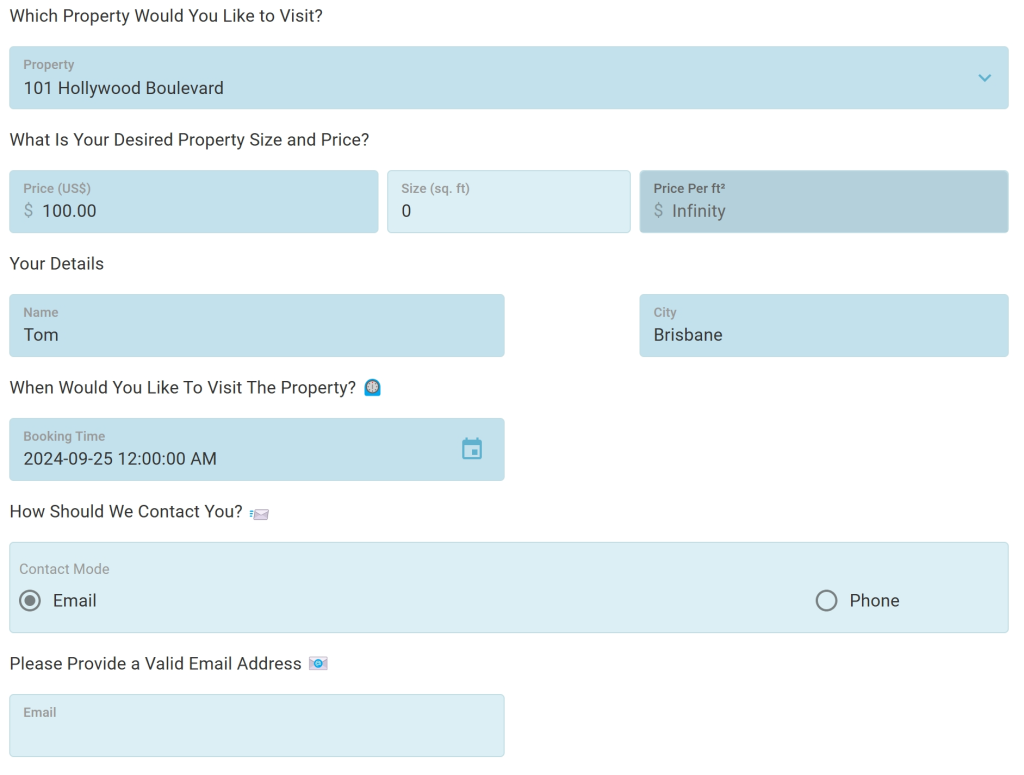
Note how through the use of Labels and the Form Designer, we can group related information, reduce the width of certain fields, and provide an overall better interface for our users. This makes forms look less overwhelming and more user-friendly, important considerations when trying to increase submission rates, for example.
Next, let us explain how to add labels to a form.
Adding Form Labels
To add labels to your form, follow these steps:
Prerequisites:
Have at least one application with one database table and one form ready to use in Five.
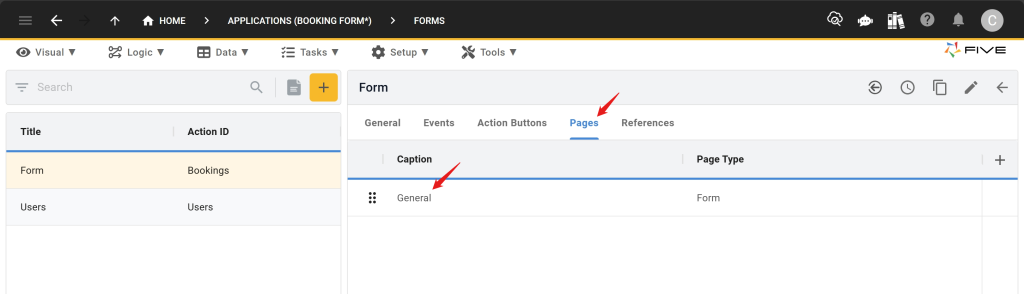
1. In Five, go to Visual > Forms, and select the form you would like to add labels to from the list.
2. Next, click Pages and select the page with your form. By default, your form’s first page is always the General page, as shown here:
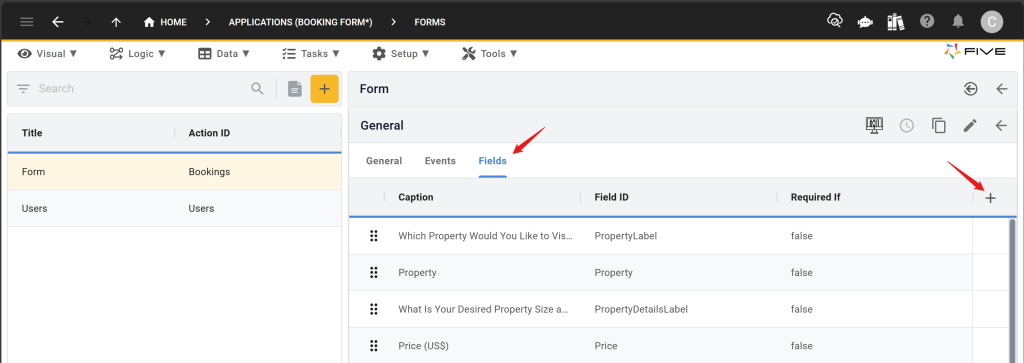
3. Select the General page (or any other page that is a Page Type Form).
4. Next, click on Fields to see an overview of all fields inside your form.
5. Click the Plus button on the right side of the screen to add a new field to your form.
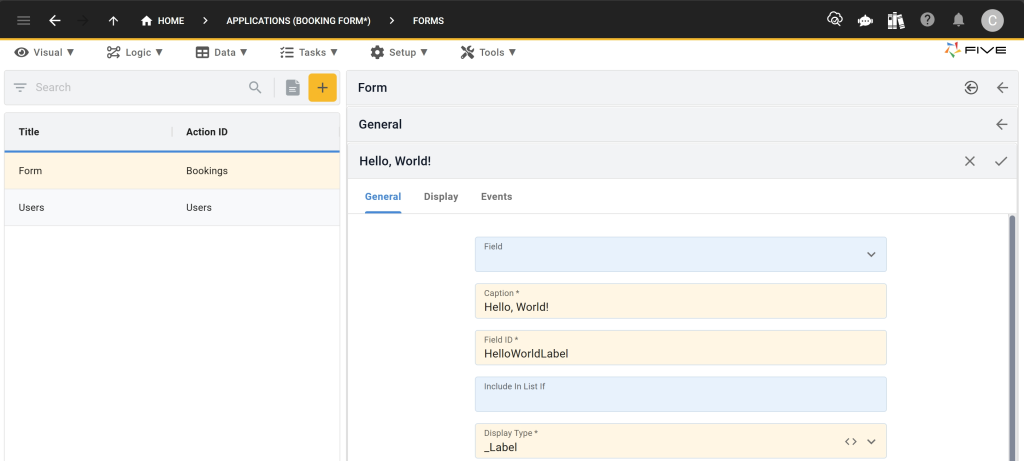
6. To create a form label, first select the Display Type as _Label. Second, provide a Caption. The Caption contains the text that will be visible in your form. Last, give the field an ID by filling in the Field ID field.
Here is an example of a label that adds “Hello, World!” as a text into our form:
7. When you are done creating your label, it will appear in your list of form fields. You can now drag it to the right position, or you can use Five’s Form Designer to do so.
8. Last, make sure to hit the Save button.
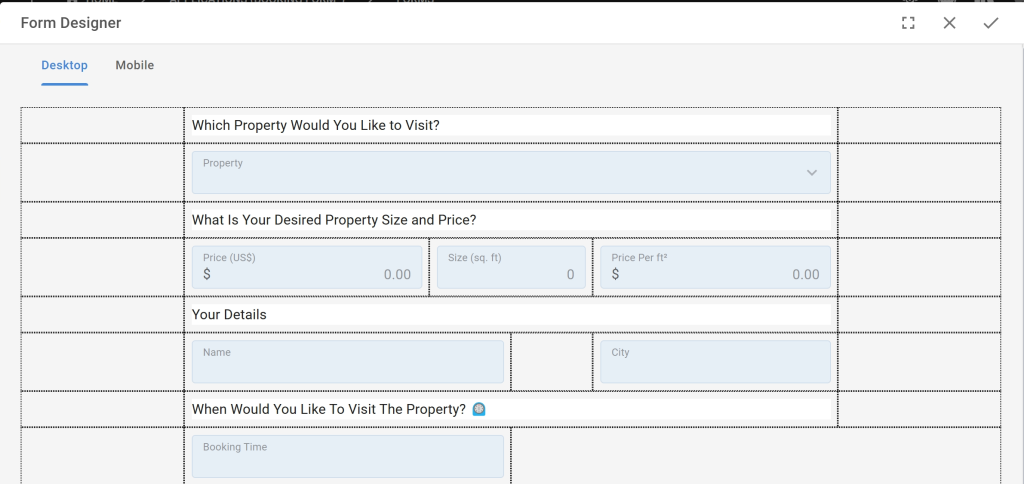
Labels in Five’s Form Designer
Inside Five’s Form Designer, labels appear as text and they typically occupy one row. Which Property Would You Like to Visit? is a label, for example.
Form Labels: Practical Tips
When designing a form, labels are your best friend. They are an easy, yet powerful way to structure your form. By using labels wisely, you can guide users through your form or provide short explanations.
There are alternatives to labels, such as providing a Default Caption in a form field or adding Help Popups to a field. However, these features are more field-specific, whereas labels have an impact on the perceived flow of the overall form, as they give a visual clue to related fields.
In the next part of this Advanced Forms series, we take a closer look at Help Popups.
Finding Help
Have more questions? Join our user community to connect with others and get answers.