How to Send Mail Merges in Just 3 Steps
Five Labs: Sending Mail Merges
Welcome to Five Labs, a step-by-step guide to building applications using Five. You will develop and test this integration locally using Five’s free download.
This lab guides you through how you can send mail merges from an application built with Five. The objective of the tutorial is to learn:
- How to write Mail Merges
- Executing Mail Merges through the end-user application
To get started, here’s what we need:
- Have Five installed in your system or run Five on the cloud (with a paid subscription).
What Are Mail Merges
The ability to send targeted emails to multiple recipients is a crucial need for businesses and individuals alike. Despite its significance, many find the process of sending personalized emails to a large audience time-consuming and technically challenging.
Mail merges allow for the sending of a single templated message to multiple recipients, with each email being customized to include specific data relevant to each recipient, such as their name or personal details.
However, the challenge lies in seamlessly integrating this functionality into an application in a way that is both user-friendly and efficient. This guide aims to equip you with the knowledge and tools to effortlessly incorporate mail merge functionality into your applications built with Five.
Don’t Feel Like Reading?
Watch the YouTube video instead.
Step 1: Creating An App in Five
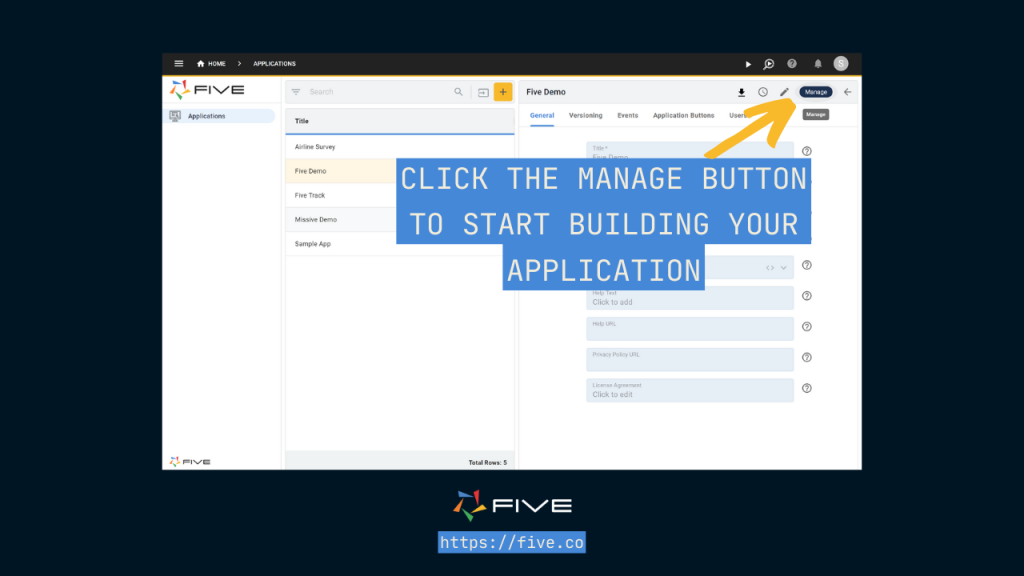
First, let’s launch Five and click the yellow + button to create a new application. Assign it a name and press save. Then, select Manage to begin developing your application.
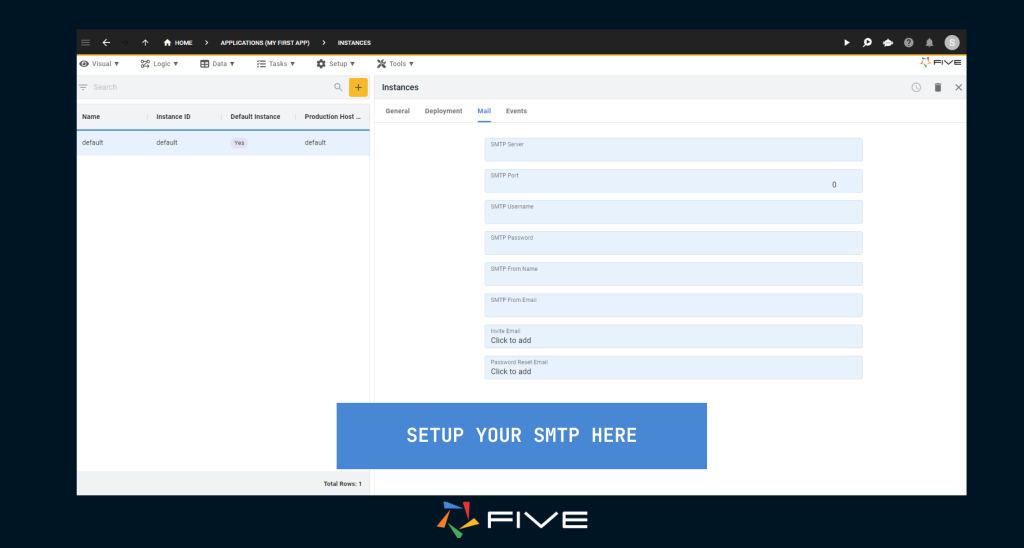
Before getting started with writing mail merges, we need to first set up our SMTP server inside our application.
Navigate to ‘Setup‘ in the menu, and then select ‘Instances‘. Here, click on the default instance of our application.
Once we have selected the default instance, we will be presented with a list of details of the current instance, such as the theme, logo, user interface, etc. Here we click on the ‘Mail‘ tab on the top and then we can enter the details.
Step 2: Creating a Database Table
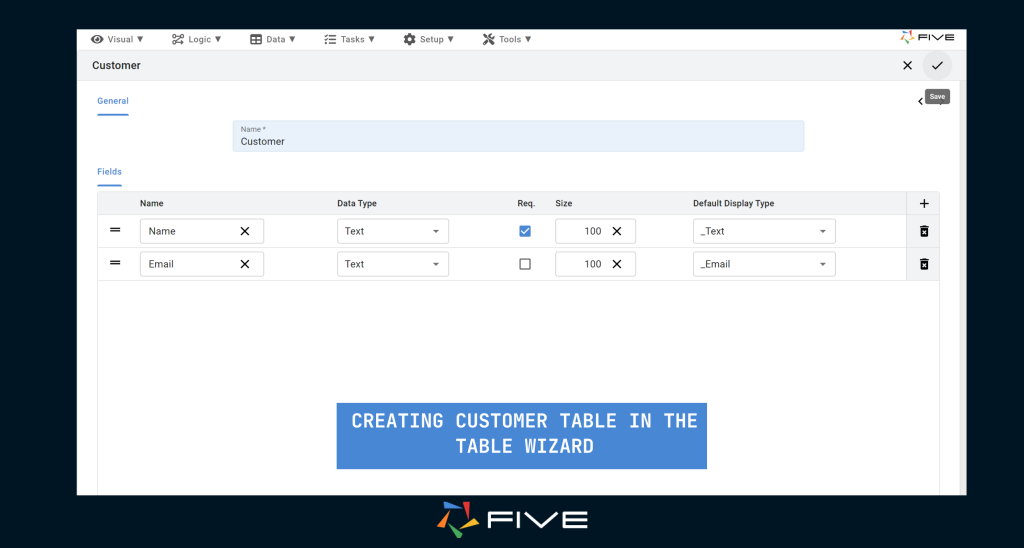
We will create a ‘Customer’ table in our database to store the names and email addresses of customers. This table will hold the contact information to which we’ll send the mail merges.
Start by clicking on ‘Data‘ and then select the Table Wizard, give the table a name, and add two fields to store a name and an email address.
After completing our table, let’s link it to a form. This will allow us to input records into our database directly.
To create a form in Five, click on ‘Visual’, then select ‘Form Wizard’
Select the Customer table as our main data source and then Five will automatically fill in the rest of the details for you.
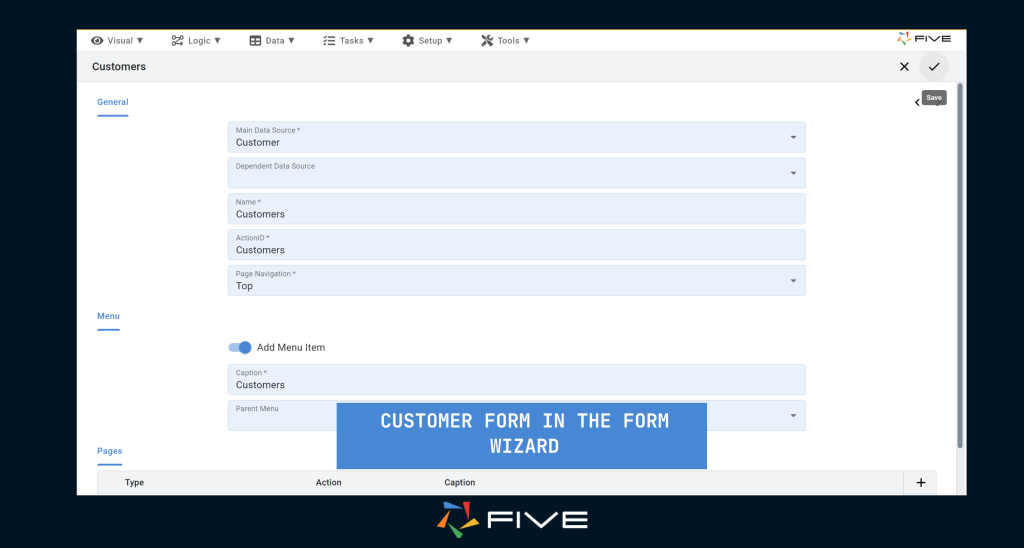
Now we can click on save and run our application. We can use the form to add records to our table.
We can run our application by clicking the play ▶️ button located in the top right corner, as shown below.

Now when our application is running, we will be greeted by an interface similar to this:
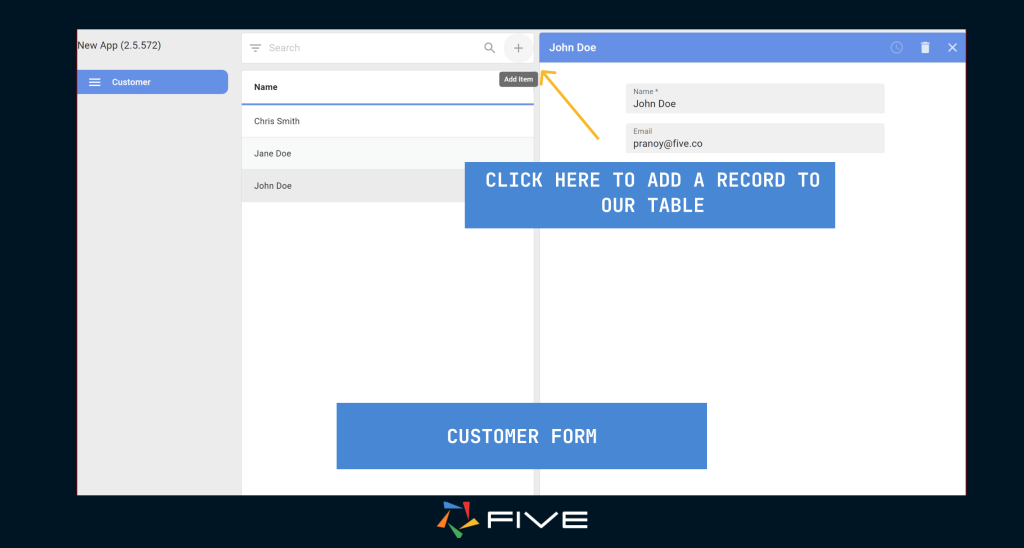
Here, it’s time to start populating our Customer table. Click on the ‘Add Item’ button to begin adding records. As you go through this process, remember to input at least one real email address among the records because we’re going to test sending emails out to these records. So, make sure one of them can receive your test email.
Step 3: Writing Mail Merges
Now that everything is set up, let’s start with our mail merges. Begin by clicking on the ‘Task‘ menu, then ‘Mail Merges’, and click on ‘Add Item’.
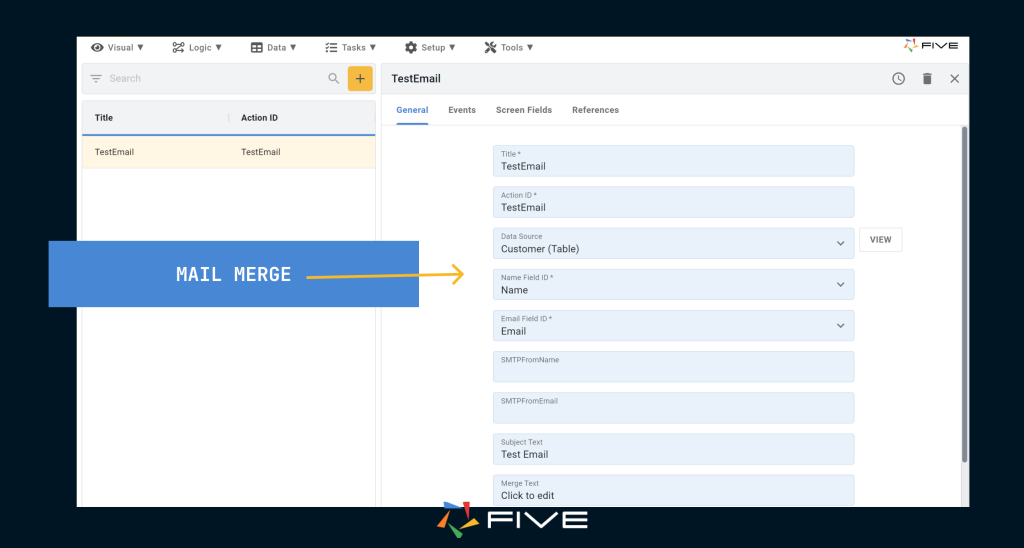
Start by giving it a title. Next, in the data source lookup, select the ‘Customer’ table. From here, choose the ‘Name‘ and ‘Email‘ fields as the ‘Name Field ID‘ and ‘Email Field ID‘ respectively.
Proceed by clicking on the ‘Click to Edit’ field. This action opens up Five’s rich editor, where you can craft the content of your email. Once you’ve composed your email, click on save.
Now, it’s time to integrate our mail merge into the end-user application. Head over to the ‘Visual’ section and select ‘Menu’. Here, we’ll create a new menu item. In the ‘Action’ field, select the mail merge we just created.
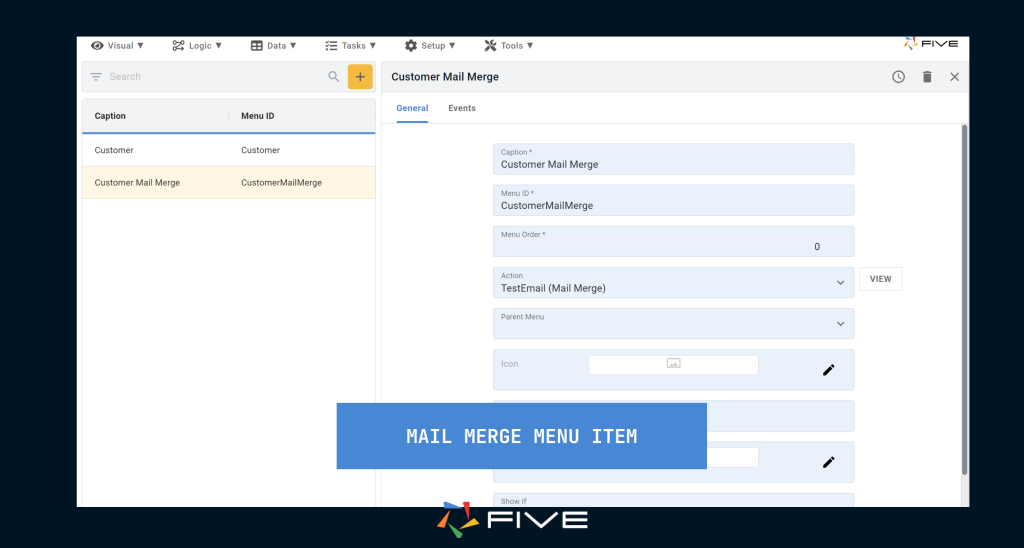
Let’s launch our application again and click on our mail merge menu item

Simply click on the ‘Run’ button to activate your mail merges. With the customer table set as the data source, and the email and name fields clearly defined, Five will dispatch our test email to all the customer records in the table. It’s a seamless process, ensuring that each customer stored in your database receives the test email without any additional input needed from your side.
Conclusion
Congratulations! By following these straightforward steps, you’ve successfully set up and run mail merges in Five. We started by setting up our SMTP server, progressed to creating a database table and form, and then dived into writing and integrating mail merges.
This process, from creating a customer database to integrating a mail merge into your end-user application demonstrates the versatile nature of Five. Keep exploring the vast functionalities of Five and elevate your development skills to new heights.