Code-Along: How to Develop an OData Data View
Hi, and welcome to our step-by-step guide on building your first web application with Five. This application leverages the power of OData, a universal data access technology.
Follow the steps below to build a responsive web app with a data view that connects to an OData service as a data view.
Goals and Outcomes: How to Develop an OData Data View
By the end of this step-by-step guide, we have developed a responsive web app connected to the OData reference service, which is available on OData’s official website here.
Our application will not store data locally. It solely requests and queries data from the OData endpoint. This step-by-step guide is ideal for all those who plan to build custom apps on an OData data source.
OData is a data access technology promoted as the “easiest way to REST”. OData’s standard protocol for REST APIs lets us query data from external systems with an SQL-like syntax.
Before we continue, make sure to sign up for free access to the Five development environment.
- Goals and Outcomes: How to Develop an OData Data View
- Resources and Downloads: Build an OData Data View
- Step 1: Creating a New Application
- Step 2: Running Your Application
- Step 3: Data > Connection Wizard: Adding an OData Service As a Data Source
- Step 4: Visual > Data Views: Creating an OData Data View
- Step 5: Visual > Menus: Adding Menu Items to Your App
- Checkpoint: Run Your Application
- Extensions: Adding More Features
- Finding Help in Five
Resources and Downloads: Build an OData Data View
Preview The Application Online
To preview the application we are developing, click here. Click Data View from the main menu to view the data coming in from the OData data source inside your application.
Note: This application is just a prototype. Beyond creating a read-only data view on OData, you can use Five to:
✅ Add forms, charts, dashboards, and PDF reports directly on an OData data source
✅ Define who has access to what data through Role-Based Access Control (RBAC) and CRUD permissions
✅ Deploy your application to development, testing or production environments
✅ Leverage OData filters to control what data you are requesting for display in Five
Step 1: Creating a New Application
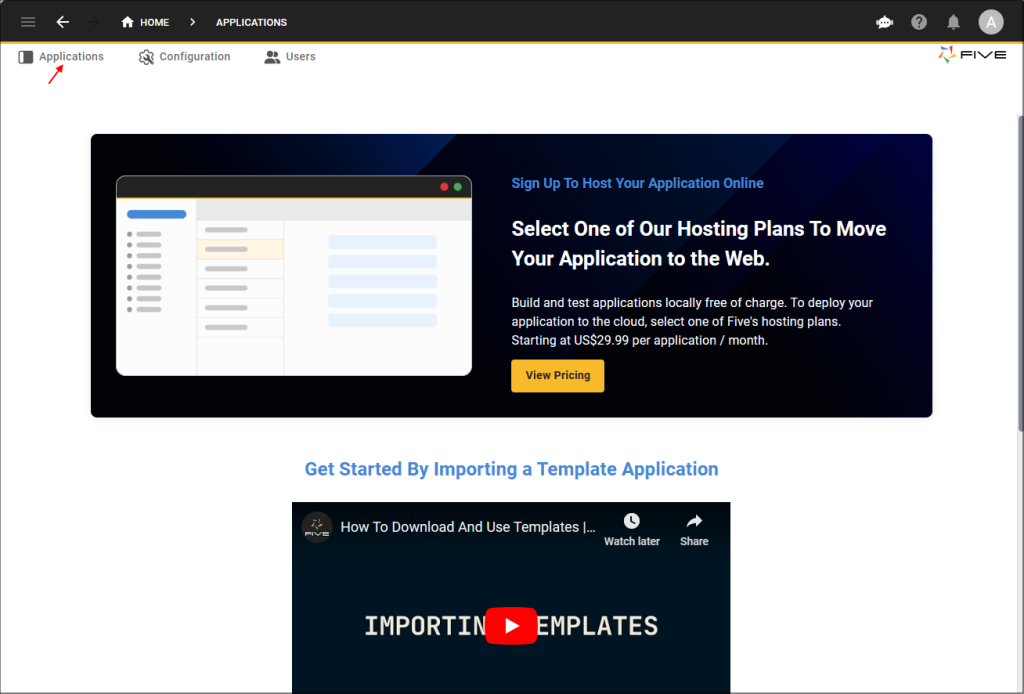
1.1. To create a new application in Five, click on Applications.
1.2. Next, click on the yellow Plus icon.
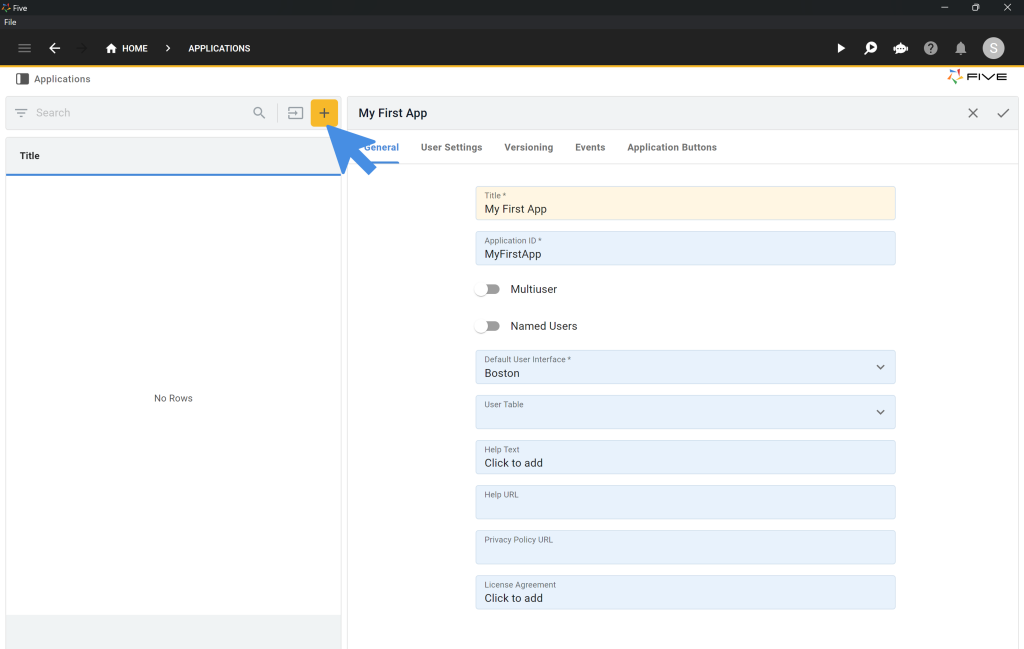
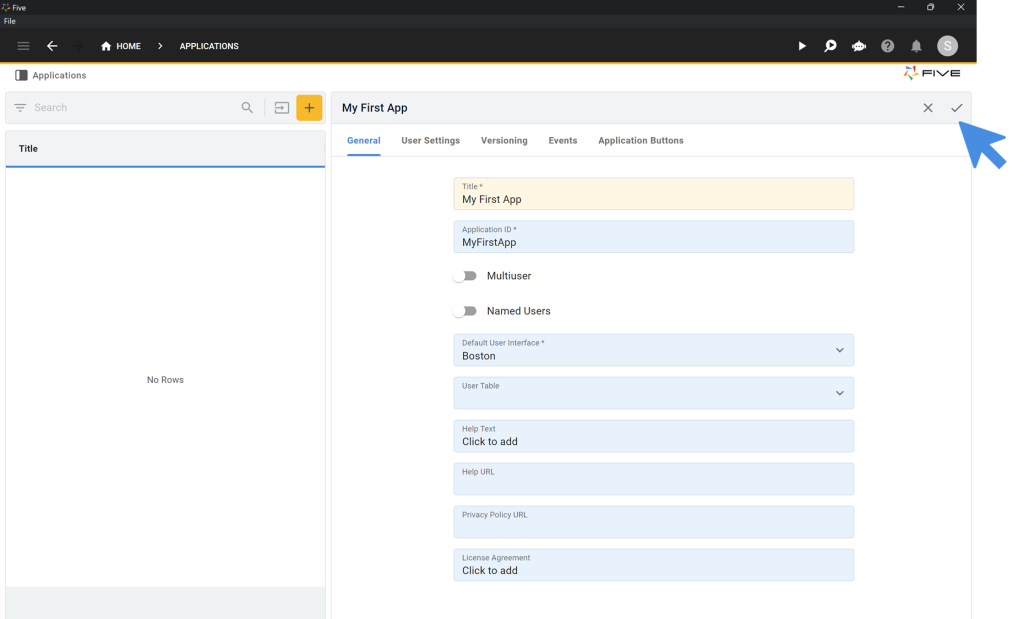
1.3. Type My First App in the Title field.
1.4. Click on the Tick ✔️ icon to save.
Step 2: Running Your Application
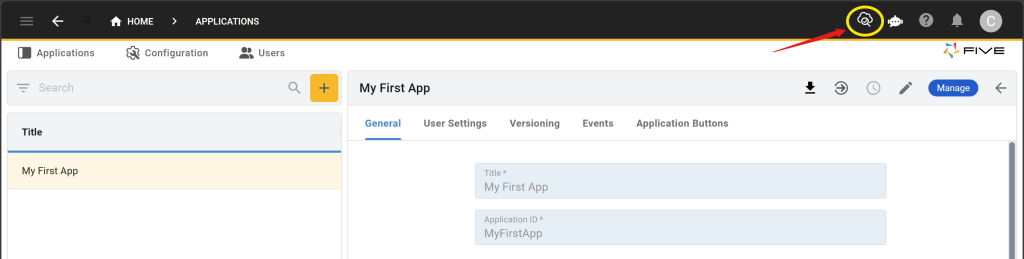
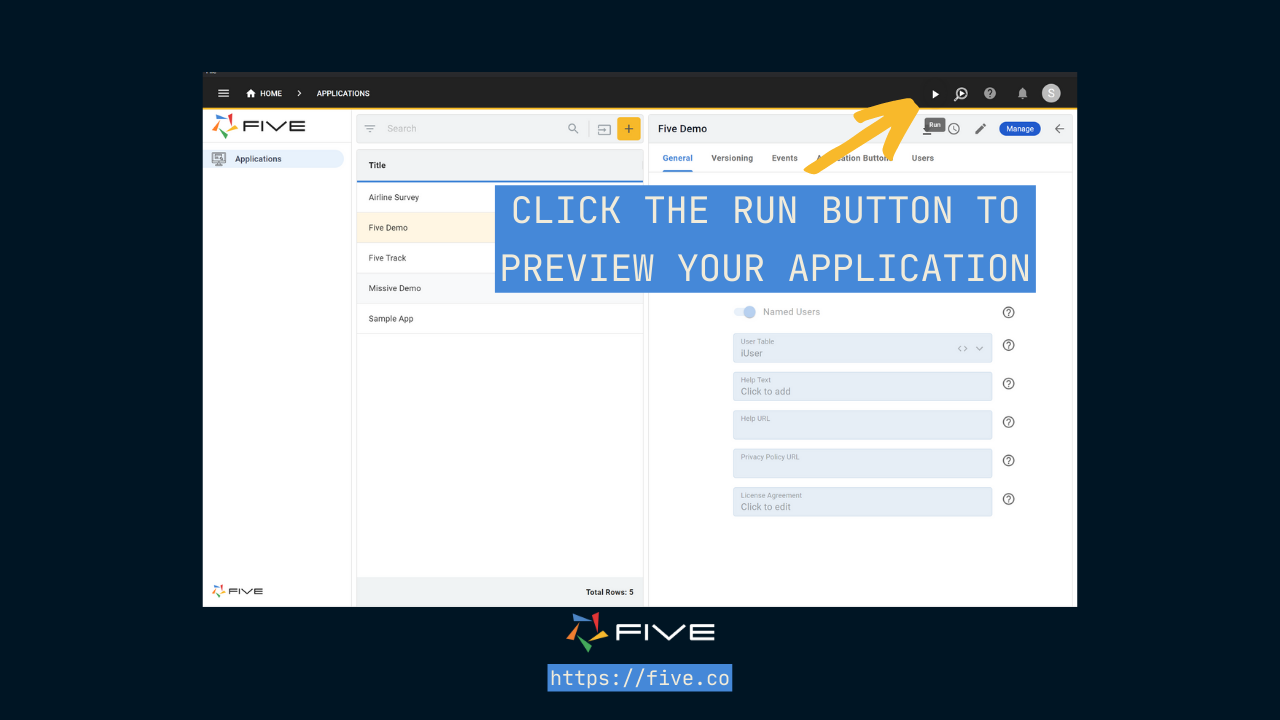
You can run and preview your application at any time. To do so, click on the Deploy to Development button in the top navigation bar. The first deployment of your app can take some time, as Five provisions the cloud resources required by your app.
Once your application is deployed, the Deploy to Development button turns into a Run ▶️ button in the top right corner.
Every time you click on Run ▶️, a new window opens up, showing the current state of your application.
Step 3: Data > Connection Wizard: Adding an OData Service As a Data Source
Note: The ‘Connection Wizard’ menu is not available in the basic version. Upgrade your Five account here.
We will now use Five’s Connection Wizard to connect Five to an OData service. Once the connection is set up, the OData service can be used as a data source inside of Five.
3.1. Click on Data > Connection Wizard.

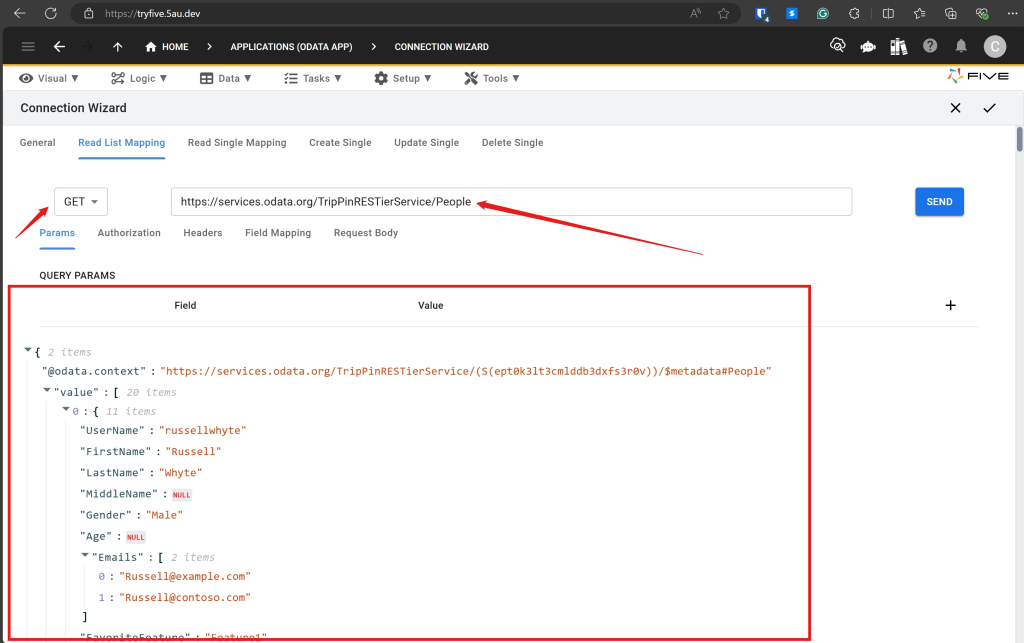
3.2. Next, click on Read List Mapping inside the Connection Wizard.
3.3. Copy and paste this URL into the box next to “GET”.
https://services.odata.org/TripPinRESTierService/PeopleThis URL is available from the OData reference service and is available here.
3.5. Click on Send. Five now shows you the API’s response: a list of people in JSON format.
3.6. Click on Field Mapping to understand how Five treats the API response: Five maps the fields from the OData service onto fields, and lets you select the primary key of the data.
3.7. Inside Field Mapping, tick the Primary Key box for UserName.
3.8. Next, click on Read Single Mapping.
3.9. Inside Read Single Mapping, paste the URL for getting a single person from the API:
https://services.odata.org/TripPinRESTierService/People('russellwhyte')3.10. Click on General.
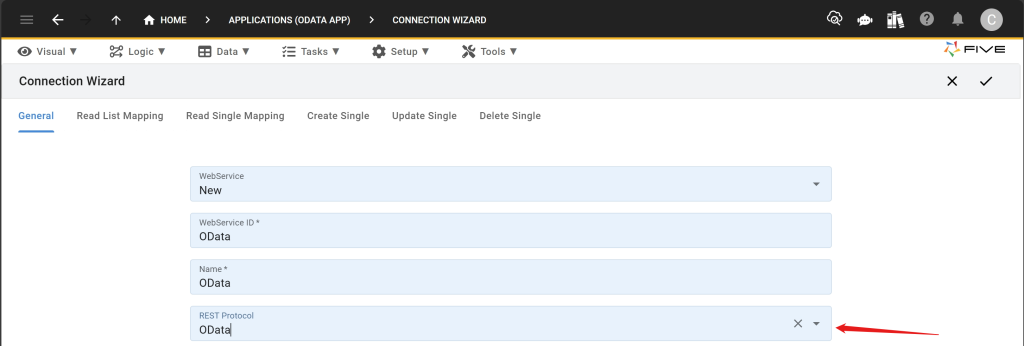
3.11. In the WebService dropdown, select New.
3.12. Fill in the required fields. Write OData into the WebService ID and Name field.
3.13. Change the REST protocol dropdown to OData.
3.14. Here’s what your API connection should look like. Click on the Tick ✔️ icon to save.
To confirm that your API has been set up as a data source in Five correctly, click on Data in the top navigation, and then on Connections. Your OData API connection should now appear in the list of connections.
Note: if you are working with a non-public OData service, such as your ERP’s data, make sure to set up authorization in the connection wizard first. Five supports both bearer tokens or basic auth for authorization.
Step 4: Visual > Data Views: Creating an OData Data View
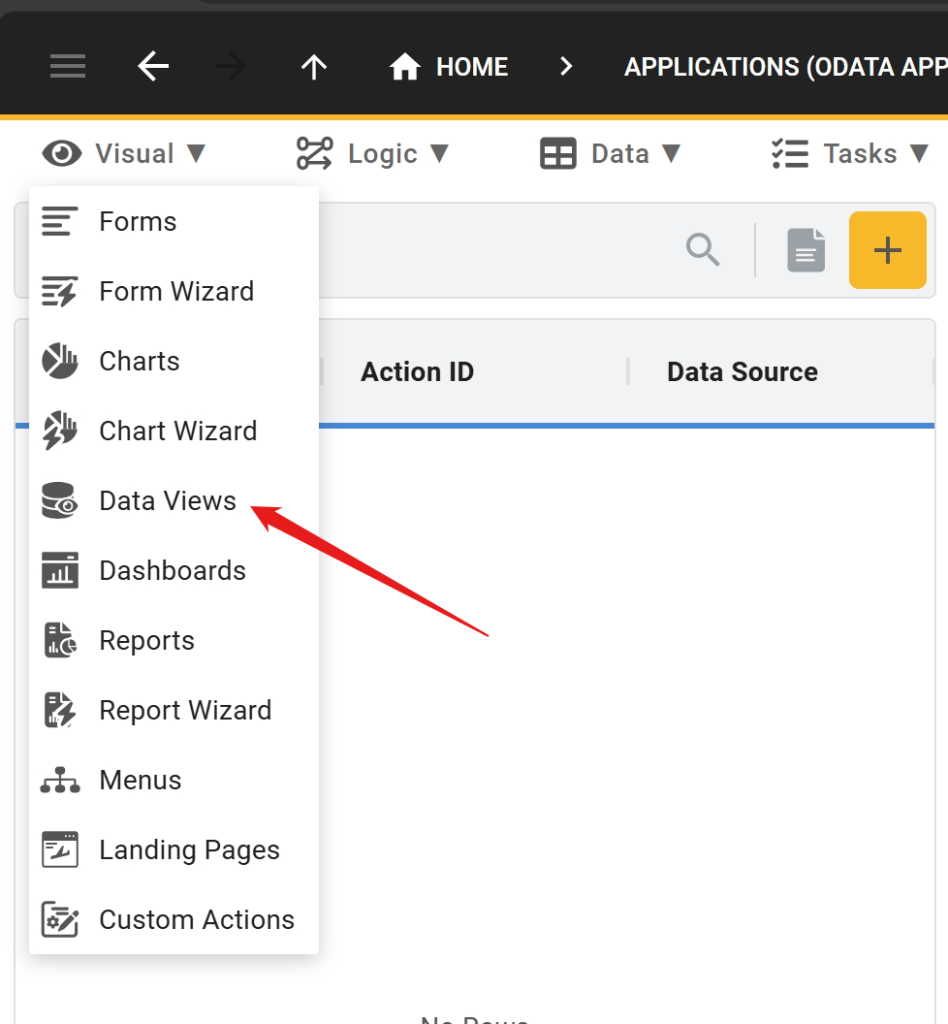
4.1. Go to Visual and select Data Views, as shown in Image 4.1
4.2. Click the Yellow plus icon to create a new data view.
4.3. Fill in the Title by typing OData Data View. Note how the other required fields are automatically populated. Both ActionID and Data Source have their relevant values filled in. Data Source refers back to our OData connection which we created in the previous step.
4.4. Optionally, click on Data Fields to view the fields that will be included in the data view. By default, Five selects all fields that are provided by the OData endpoint.
4.5. Click on the Tick ✔️ icon to save the data view.
Step 5: Visual > Menus: Adding Menu Items to Your App
5.1. Go to Visual > Menus.
5.2. Click on the yellow Plus icon.
5.3. Type Data View into Caption.
5.4. Type 1 into Menu Order.
5.5. In the Action drop-down select ODataDataView (Data View) as the action.
5.6. Click on the Tick ✔️ icon to save your new menu item.
Checkpoint: Run Your Application
It’s time to run your application again. As shown in Step 2 above, you can always preview your application by clicking on the Run ▶️ icon in the top right corner.
Here’s what your app should look like. On the left, you should now see a new menu item called Data View. Occupying the largest part of the screen is our actual data view that contains all of the fields from our OData API (scroll to the right to see additional columns).
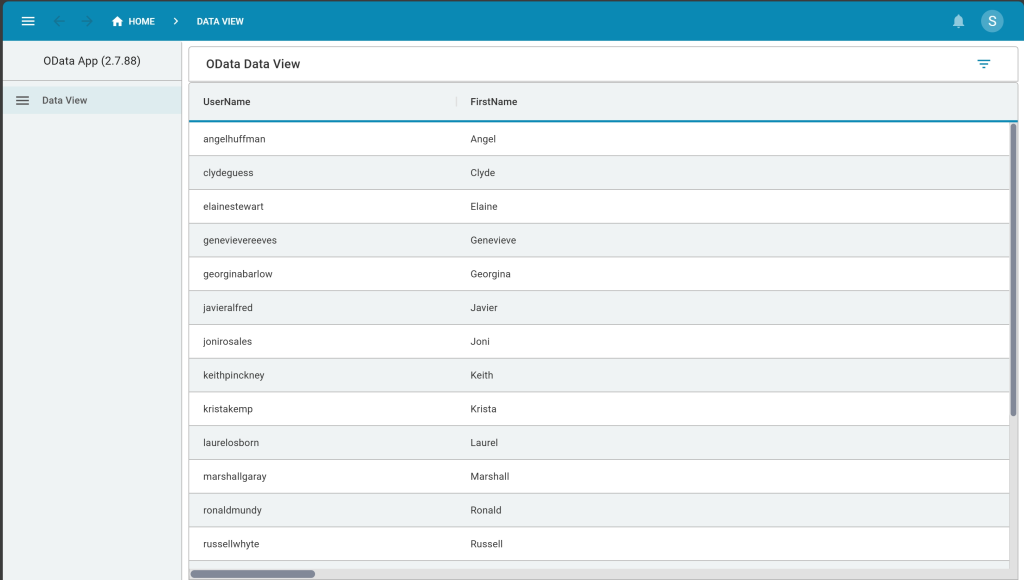
Because we have not set up our API for the PATCH/PUT, POST, or DELETE methods our data view is read-only.
Extensions: Adding More Features
Beyond this simple data view (which took us just a few minutes to develop and launch), we can use Five to build more complex applications that use OData as a data source.
For example, Five lets developers
1. Add complex forms to their applications,
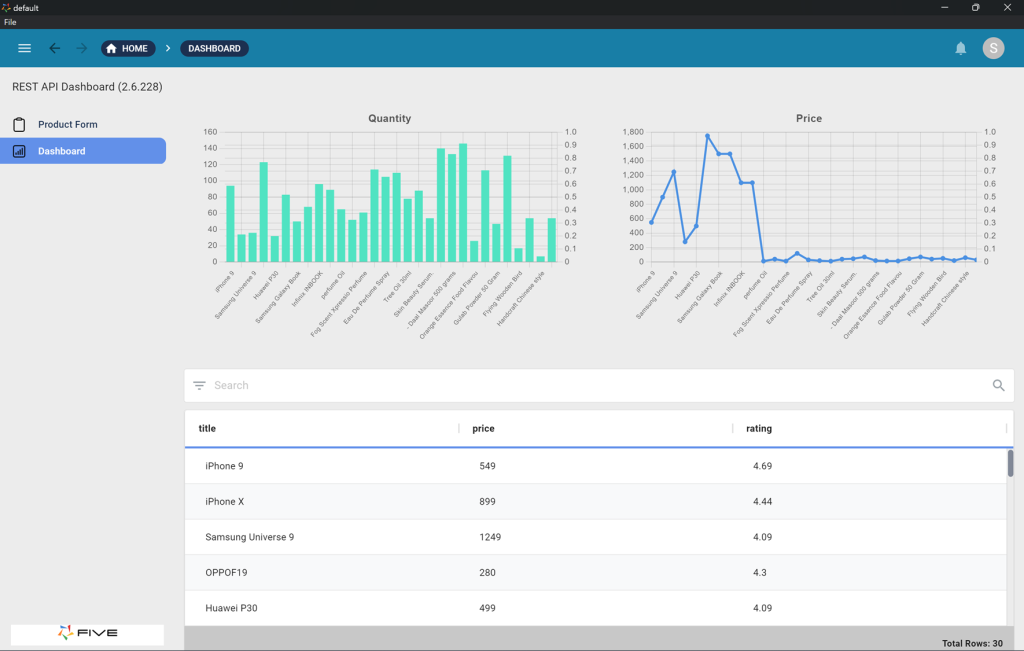
2. Create charts and dashboards that visualize data from an OData service,
3. Generate PDF reports, or
4. Add logins, multi-factor authentication or Single Sign-On to their applications.
Let’s recap what we have developed:
- We have a responsive web app that visualizes data from our OData REST API. The OData API serves as a data source for our end-user GUI.
- We have developed a simple data view, which end-users can use to view the data that our OData endpoint returns. We can’t update this data in our app, but this could easily be changed using Five’s Connection Wizard.
- We could extend this application by adding user logins, creating a theme, a PDF report, email notifications, or workflows. Five lets us write SQL, JavaScript, and TypeScript, making it an extremely flexible coding environment.
- We could even extract data from the API and push it into a purpose-built MySQL database. It’s very easy and fast to create a database in Five.
Finding Help in Five
In case you get stuck during the development process, we’re here to help! Continue developing your application by accessing these resources:
- Five’s User Community: Visit https://five.org to ask questions or get inspiration from other users.
- Five’s Documentation: Visit help.five.org to access Five’s comprehensive documentation.
Five’s In-App Help
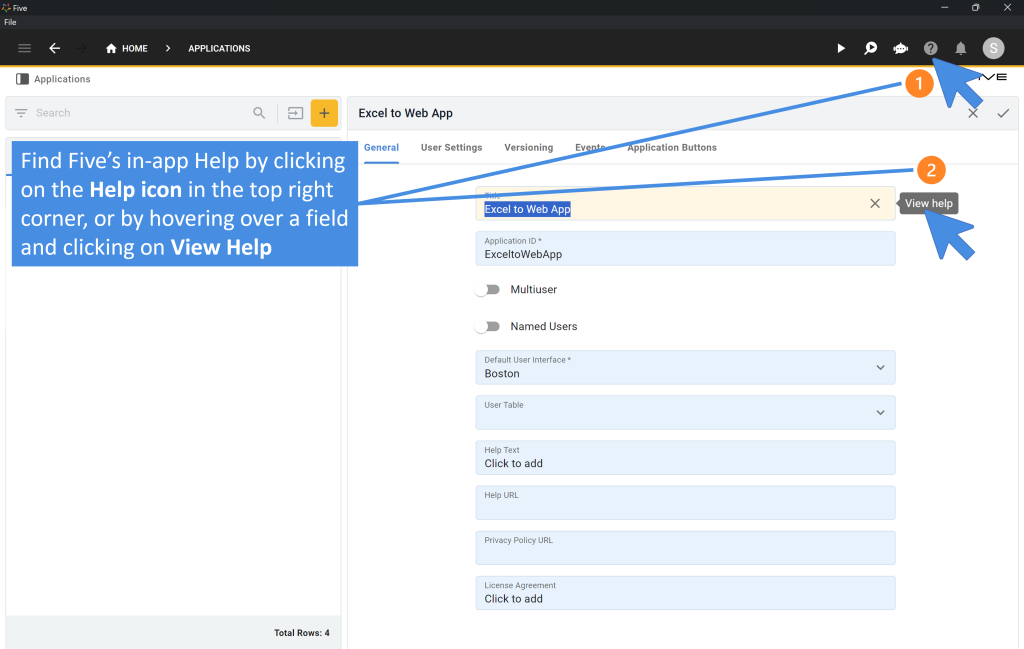
Last, find useful tips for your application development by clicking on Five’s in-app help available in the top right corner or on almost any field.
Get Your App Online For US$29.99 Per Month
Five lets you develop and deploy applications from right inside your browser. Get started for free and develop your first app today.
To deploy your application, sign up for one of our paid plans, starting from US$29.99 per month and application.