Develop a CRUD App on the Northwind Database
In this code-along tutorial, we develop a CRUD web application using the popular Northwind database as a sample data set.
Our objective is to build an application that lets us manage the Northwind data in a modern web interface that provides CRUD features for our end-users. Through forms and data grid, we let users interact with the Northwind data.
Don’t Feel Like Reading? Watch the Video Instead and Learn How to Use Five to Build a Database Application.
How to Build a Web App on the Popular Northwind Database
The Northwind Database: Exploring a Classic Sample Database
Aspiring database enthusiasts and developers often find it helpful to work with sample databases to gain practical experience. One such popular and widely-used sample database is the Northwind Database, which contains fictional data about a specialty foods company.
The Northwind Traders database represents a small trading company and contains data related to customers, products, orders, suppliers, and more.
The database schema is designed to showcase various aspects of a typical business scenario. It is an excellent resource for learning and practicing SQL queries.
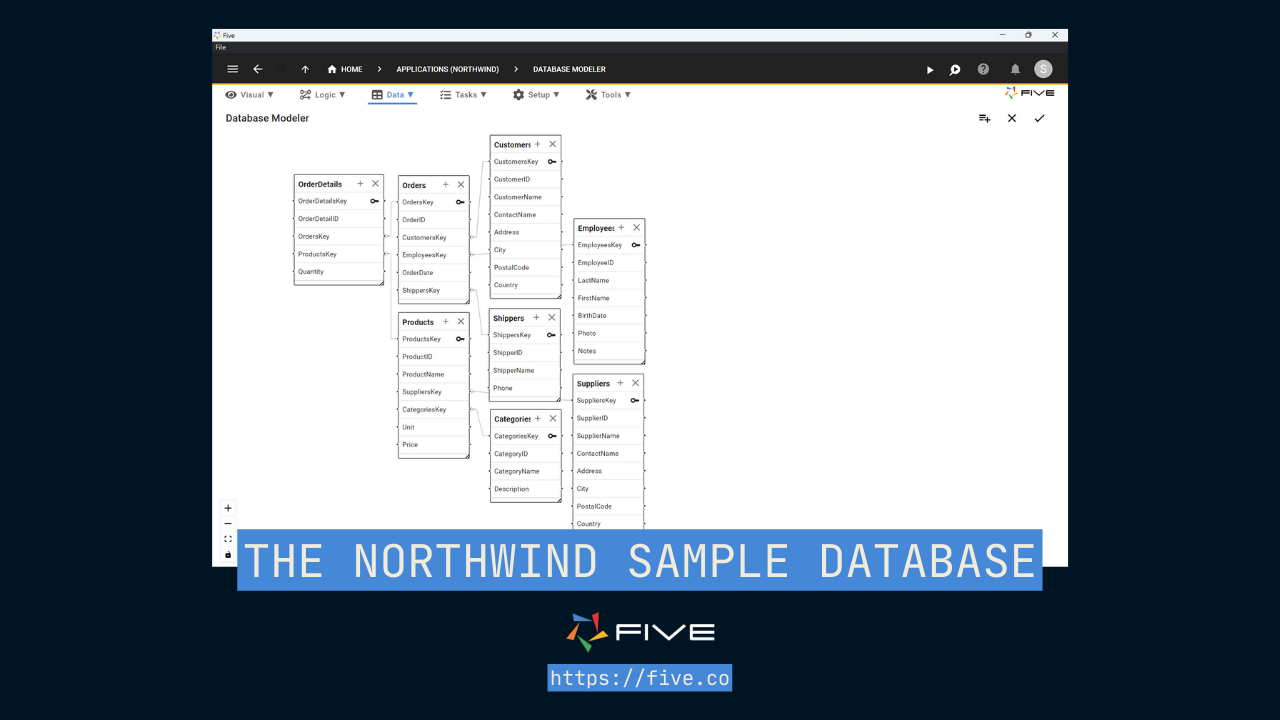
Here is a screenshot of the Northwind sample database Entity-Relationship Diagram taken from inside Five’s visual database modeler. This is our starting point for this application development tutorial.
Prerequisites
This article is for SQL enthusiasts, database administrators, and data analysts who want to learn how to build a simple CRUD application on a MySQL database.
At a minimum, readers should have a basic understanding of relational, SQL databases.
Using the popular Northwind database, we use Five, a rapid application development environment, to build and deploy a custom web application that deals with customers, orders, employees, and shippers.
In just a few clicks we develop and launch a production-ready CRUD application.
To follow along, take these steps first:
- Sign up for Five’s free trial to build and deploy applications from right inside your browser.
- Download the Northwind application. The file format of this file is .fdf, which stands for Five Definition File. It contains the Northwind database and data (for MySQL).*
Introducing Five: An Online Database Application Builder
For this code-along tutorial, our tool of choice is the Five development environment. Five is a powerful for building and deploying online database applications.
Five has a wealth of application development features, which we will explore today, such as:
- A drag-and-drop database builder,
- Support for Structured Query Language (SQL),
- A visual query builder,
- One-click cloud deployment, and
- A pre-built, modern, and responsive user interface.
Five uses the free and open-source MySQL database to build applications.
Building the Northwind Database Application
Step 1: Import the Northwind Database to Five
If you don’t feel like reading, watch the video above to follow along!
In this step, you will be importing the Northwind application into Five (get free access to Five by signing up). This import contains the Northwind database, as well as all its data.
- After signing up, login to Five.
- Click on Applications.
- Click on the Import icon.
- Select the Northwind application and click on Open.
Here’s a video on how to import apps into Five.
Once successfully imported, you will see a message that says “Import of FDF completed successfully.”
Now let’s start building our application!
Step 2: Inspect the Northwind Database in Five
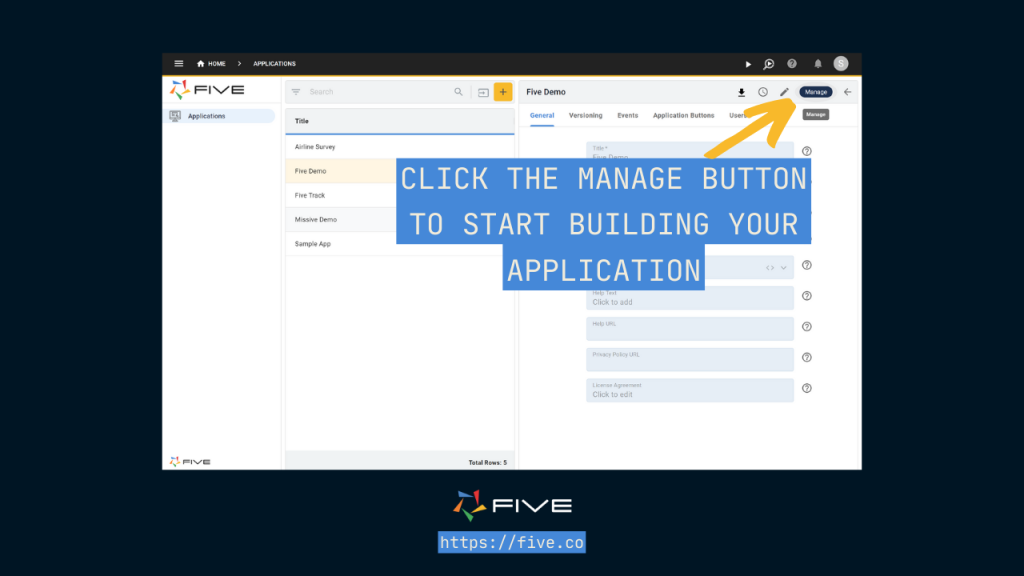
1. Click on Northwind, and then on the blue Manage button in the top right corner.
2. Next, click on Data, and then on Database Modeler.
You can now visually inspect the Northwind database, its tables, fields, and relationships.
Five’s visual database modeler lets you create new tables, add fields, create relationships, or explore Primary and Foreign Keys. Note that Five builds on MySQL and that you’re looking at a MySQL version of the Northwind database. You could even export the Northwind MySQL file from inside Five as a .SQL file.
As the Northwind database is already created, there’s nothing else we need to do with it. Let’s build our first form and launch the application.
Step 3: Building a Customer Form
- Click on Visual and then on the Form Wizard.
- Select Customers in the Main Table drop-down field.
- Click on the small > Arrow right below the tick mark.
- You will now see a list of all the fields that will go into your form. Let’s make a few changes here: first, make CustomerID a required field by ticking the Req box. Let’s also include CustomerName in the list by ticking the List box next to it.
- Last, click on the Tick button to save.
You have just created your first form with Five. Let’s check out what the application looks like.
Step 4: Run the Application
To run applications and preview what you’ve developed, click on the Play icon, located on the top right of Five.
If you cannot see the Play button yet, follow these steps to initialize your first deployment.
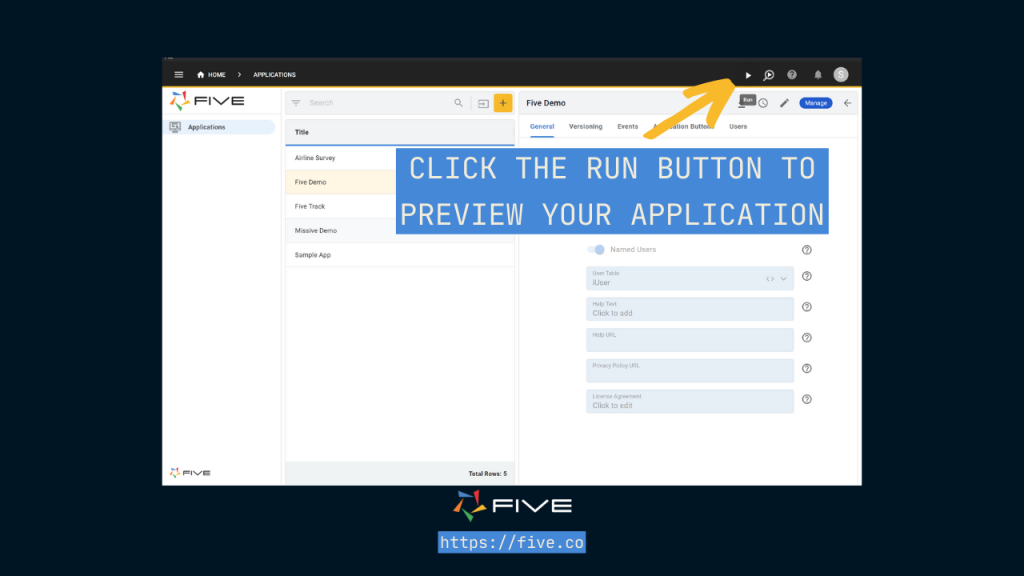
Once you click the run button, the application will open up in a new tab inside your browser. At any time during the development process, you can use the “Deploy” button to preview your application.
As you can see, Five has auto-generated a responsive user interface for your application. The UI is responsive and the application can be accessed from any device: tablet, mobile, or desktop.
Note how the application has a dark theme. This theme and all its colors can be changed in Five’s theme editor. We won’t go into this as part of this tutorial, but if you would like to create a custom theme, go to Setup > Themes back in your development environment.
Take your time to explore the application interface to understand what we’ve built so far. Click “Customers” in the menu on the left and explore the existing list of customers. Click on any of the customers to view their details.
Step 5: Adding the Employees and Shippers Tables to the User Interface
Let’s go back into our development environment, and repeat the steps we just took for the Customer table for both Employees and Shippers.
- Click on Visual and then on Form Wizard.
- Select Employees in the Main Table drop-down field.
- Click on the small > Arrow right below the tick mark.
- You will now see a list of all your form fields. Let’s include LastName in the list by ticking the List box. Untick the List box for EmployeeID.
- Click on the Tick icon to save.
- Do the same for Shippers by selecting it as the Main Table in the Form Wizard.
If you would like to you can run the application again to see what the application now looks like. It will include two more tables from our Northwind database in its front end: employees and shippers.
Step 6: Adding the Orders Table to our User Interface
Let’s continue developing the application by adding the Orders form from the Northwind database to our application. We would like to see all orders that a customer has placed.
- Click on Visual and then on Form Wizard.
- Select Orders in the Main Table drop-down field.
- Deselect Add Menu Item.
- Click on the Tick icon to save.
We have now added Orders as a form to our front end.
But we want to make sure that orders are shown together with the customer that has placed the order. So let’s make some adjustments to our Customer form.
- Go to Visual > Forms.
- Now click on Customers on the left, and then click on Pages.
- Click on the Plus icon on the far right side.
- Select Grid as Page Type and select Orders (Form) as Action.
- Last, write “Orders” in Caption.
- Click on the Tick buttons twice to save.
- Run the application.
Step 7: Understanding the Application
Let’s take a moment to understand what we’ve developed.
We have created four forms for our end users: one form each for customers, employees, shippers, and orders. And we decided to make our order form a grid. Let’s find this grid inside our application.
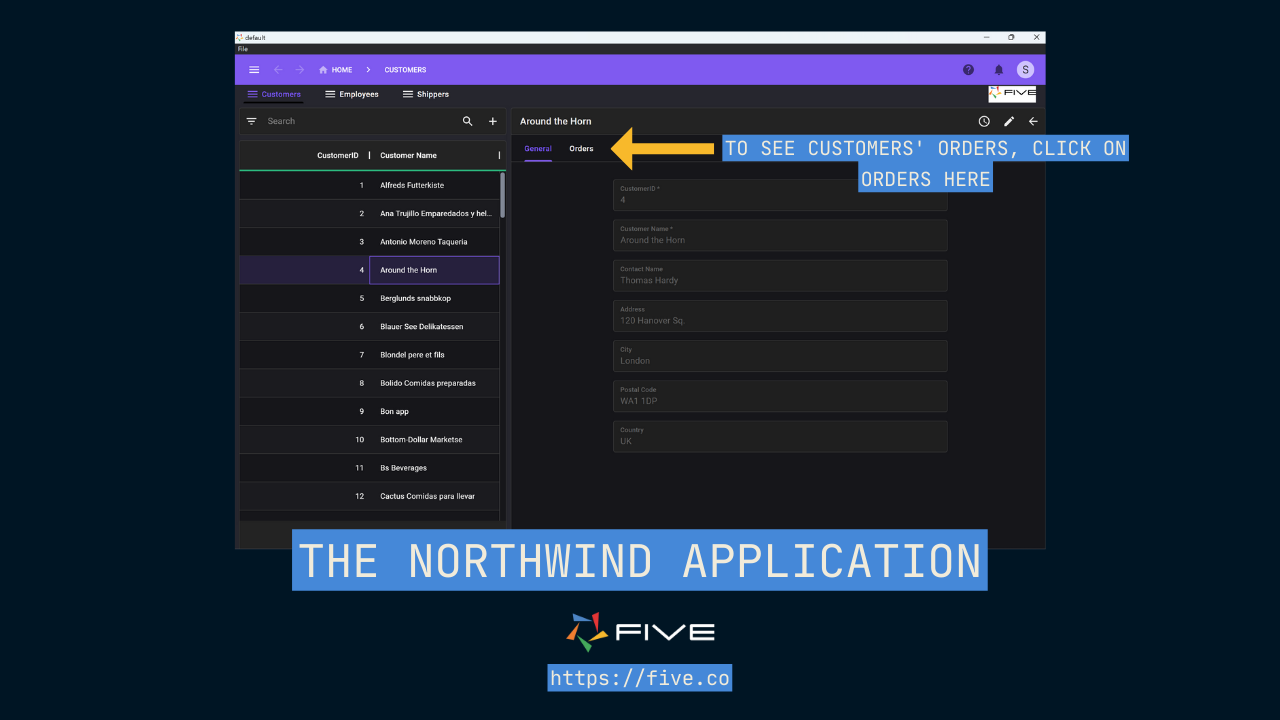
Click on any customer and then click on Orders. We can now see all orders that are associated with a customer. Even better: we can make adjustments to the data as required straight inside our grid page type.
Here’s what your application will look like. Note that this is the same way your application would be presented to end-users inside their web browser.
Extending the Database
Once you feel comfortable working with the existing Northwind database, you can take it a step further by extending its functionality. You can add new tables, modify existing ones, or introduce additional relationships to simulate different business scenarios, all from inside Five.
You can also add charts, dashboards or PDF reports to your application.
Next Steps: Build Your First Web App in Five
Follow our more comprehensive code-along tutorial to build your first web application in Five here: learn how to go from database to responsive web app in less than 30 minutes.
*Thank you to the kind programmer who made the Northwind database for MySQL available on Wikiversity here.