What Is a CRUD App and How Build One in 4 Steps
A Quick & Easy Guide on How to Build a CRUD App
CRUD is a commonly used acronym in software and application development. The acronym describes the four basic operations that can be performed on a database: Create, Read, Update, and Delete. CRUD apps are an essential business tool and are often used by internal staff to pull, analyze or process data stored in a database.
As developers or database administrators, we are often tasked with creating CRUD apps on a database and assigning user roles and CRUD permissions.
In this step-by-step guide, we will build a simple CRUD app in just four steps.
What Is a CRUD App?
CRUD refers to Create, Read, Update, and Delete. Assigning and building CRUD apps is a very common task in programming.
CRUD describes the four basic operations that a user can perform in a database. Users can
- Create or insert new records into a table,
- Read or select existing records from a table,
- Update or modify existing records stored inside a table, or
- Delete or remove existing records from a table.
User Permissions in a CRUD App
CRUD permissions refer to the permissions granted to anyone having access to a database to perform all or part of the four basic operations on data: Create, Read, Update, and Delete. By assigning CRUD permissions, developers control and govern access to data stored in a database.
In SQL, CRUD permissions are often managed by granting or revoking permissions to specific users or roles. These permissions are typically set at the database level or on individual tables within the database.
It’s essential to carefully manage CRUD permissions in a web app to protect data from unauthorized access, modification, or deletion.
By granting the appropriate permissions to trusted users or roles and denying them to others, application developers ensure that only authorized users can interact with the data in the database. This approach helps to maintain data integrity, security, and privacy.
Let’s say you are a restaurant owner and you’d like to make sure your staff can enter the kitchen, but your guests can only stay in the dining room. How would you solve this problem? Easy! You have two roles: staff and guest. Each role has its own permission to enter different parts of the restaurant.
This is what CRUD permissions do for databases: they are used to govern access. By using CRUD operations in SQL, developers can make sure that data stays safe and is only accessed as intended. CRUD permissions are a useful tool in a developer’s access control toolbox.
Goals & Outcomes: Creating a CRUD App in 4 Steps
In this how-to guide, we will go through the 4 steps of creating a CRUD App. These steps are:
- Creating a new application with Five.
- Creating a MySQL database.
This is where we create the tables and fields of our MySQL database and assign data and display types. - Creating forms.
For the sake of simplicity, the only front-end components we are building in this tutorial are forms to give our end-users the ability to read, write, update, or delete (CRUD) data contained in our MySQL database. - Assigning CRUD permissions to user roles.
In the fourth and final step, we are creating user roles and assign CRUD permissions.
Our final result will be a responsive CRUD app for end-users to interact with.
Now let’s dive in!
How to Create A CRUD App in 4 Steps
1. Access Five’s Cloud IDE
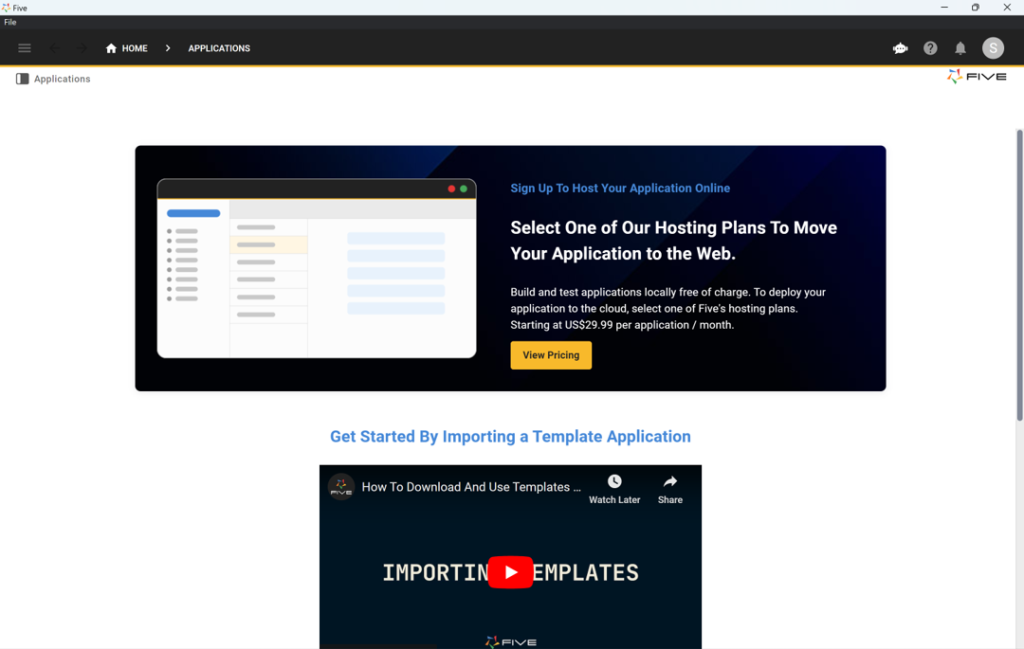
Let’s start by creating a new application with Five. To do so, sign up for Five and access Five’s online IDE. The first screen you will see looks like this.
Here’s how to create a new web application using Five:
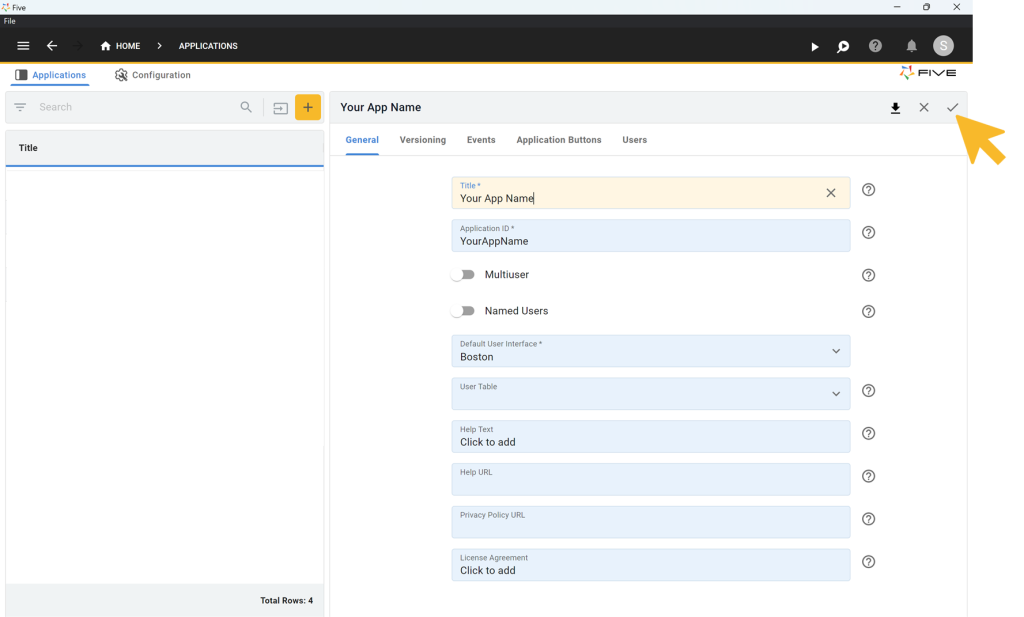
- Start by clicking on Applications in the top left corner.
- Next, click on the yellow Plus button.
- Give your application a descriptive name in the Title field, and save it by clicking the tick mark in the top right.
- Done: You have successfully created your first application in Five. Here’s what this should look like before clicking Save.
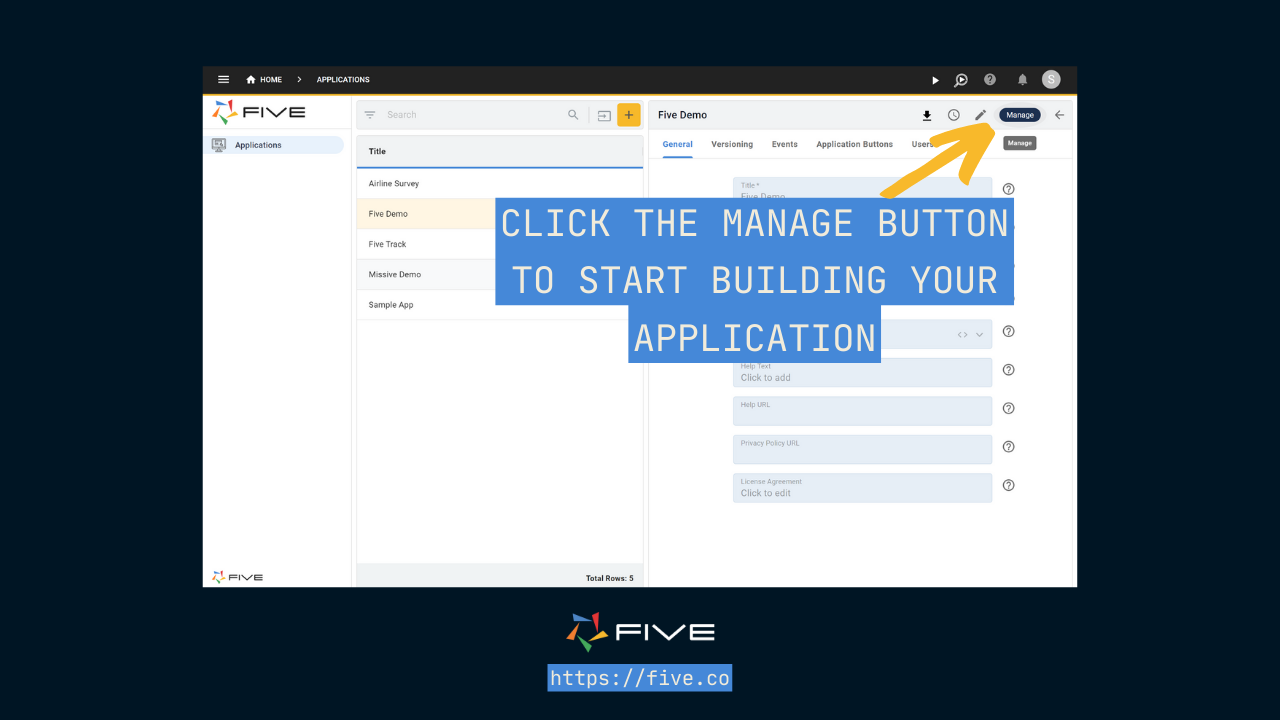
You will now see your new application in the list of all applications that you have created with Five.
Next, click on the blue “Manage” button that has appeared in the top right corner to access all of Five’s development features.
EXPERT TIP: Don’t spend too much time on all the other application settings just yet. There is a lot that you can customize for each application, from making it a multi-user application, to configuring application logs, or customizing application buttons. For now, let’s simply leave the default choices as is. By having created a new application, we have access to all we need to start creating our CRUD app.
2. Create a MySQL Database
Next, we create our MySQL database inside Five.
Five comes with a free MySQL database GUI that lets us create and manage a MySQL database. Whether you’re building on Five’s free MySQL database or your existing relational database: the development process is the same.
Let’s start!
Applications built on Five use an integrated MySQL database. The database can be created and managed straight from inside the Five development environment. No external MySQL GUI, such as dbForge Studio, phpMyAdmin, MySQL Workbench, Navicat for MySQL, DBeaver, or Beekeeper Studio is required to create, alter or update tables.
In this tutorial, we will use Five to create fresh MySQL database tables. To do so, click on Manage, and then on Data, and on Table Wizard.
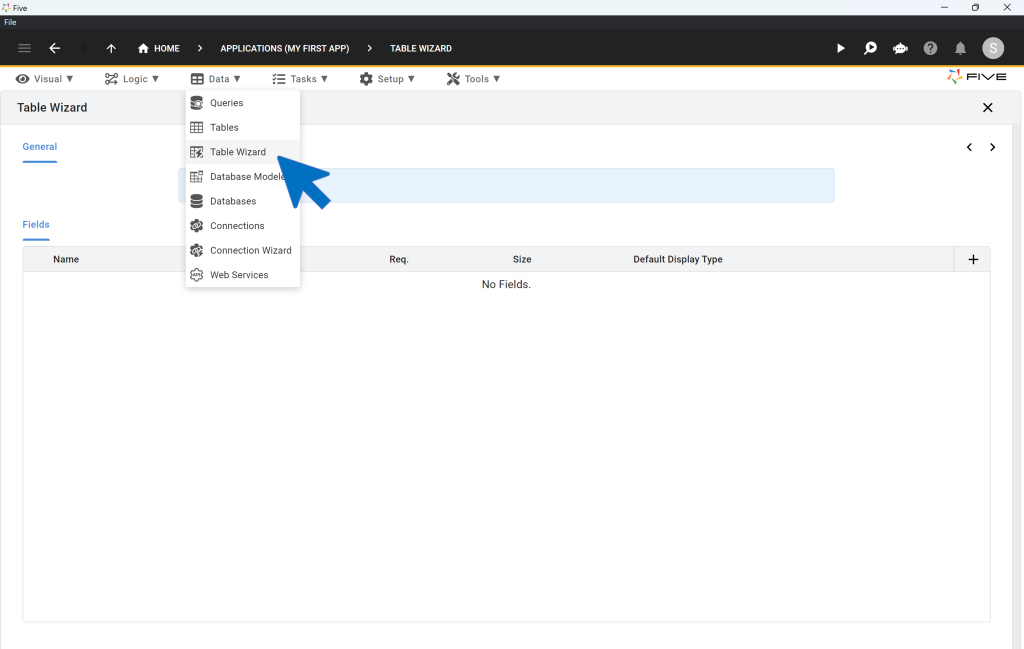
Using the Table Wizard, you can:
- Create a new database tables from scratch,
- Assign data and display types to your database fields, which define how data is stored and displayed to your end users,
- Build relationships between tables using Primary Keys and Foreign Keys,
- Import CSV files straight into your database tables, and
- Add new fields to existing database tables.
Simply add new fields to your table by clicking on the Plus icon. Define their data and display types, as well as their size, and you’re done creating a database table.
For a quick tutorial on how to create your first database table, follow our Quick Start Guide that walks you through setting up database tables, as well as building relationships between them.
Or watch this YouTube video that explains Five’s Table Wizard:
EXPERT TIP: Five automatically creates Primary Keys, and Foreign Key fields when you establish a relationship with another table, for you. This means that when you create a new table from scratch and inspect its fields, you will find that Five has automatically added the Primary Key to your table. The field is always named “TableNameKey” and is stored as a GUID. There is no need for you to create a separate field to serve as a primary key.
To view keys, click on Data and then Database Modeler. The database modeler visualizes your database schema and shows you all of your tables and their relationships.
3. Create a GUI with Forms
Once your database tables are set up, you can start creating your CRUD GUI by adding forms.
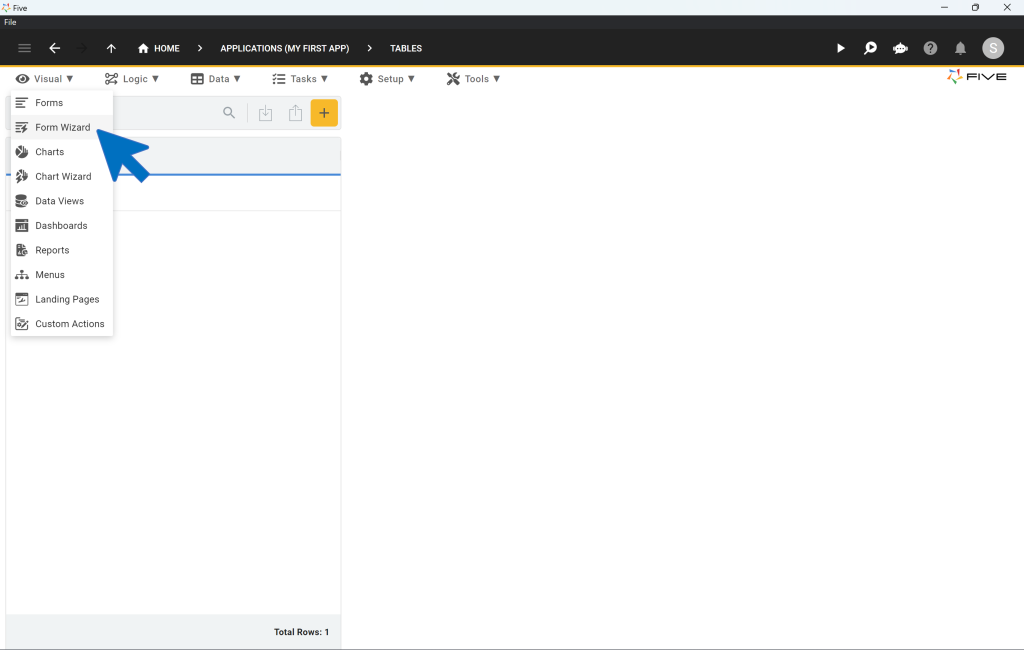
Simply click on Visual, and then Form Wizard in the Menu on the top.
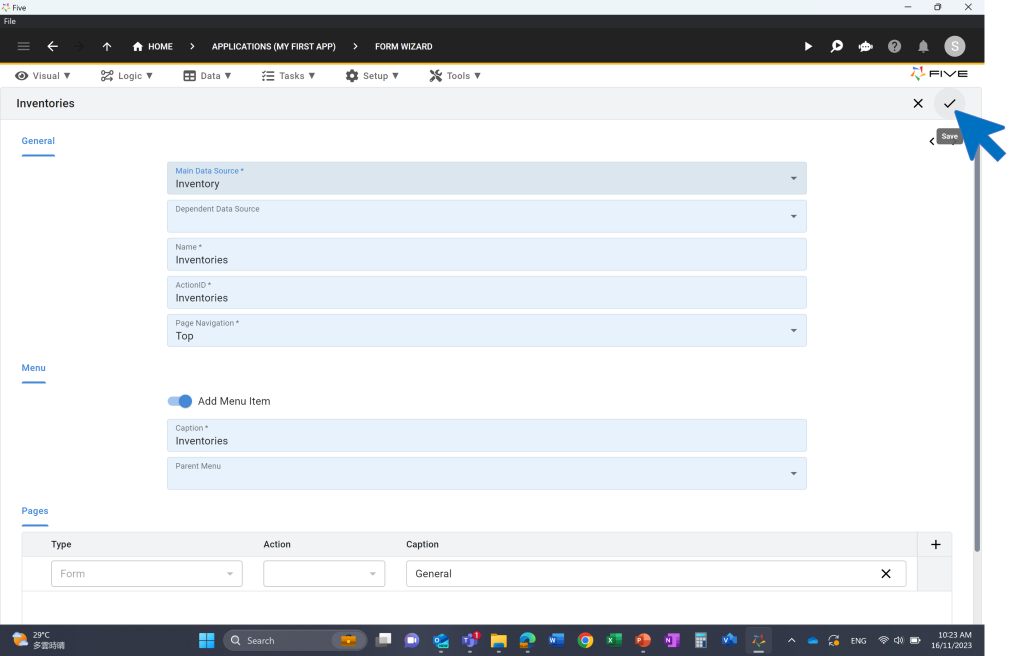
Inside the Form Wizard, select the database table that your new form will be pointing to.
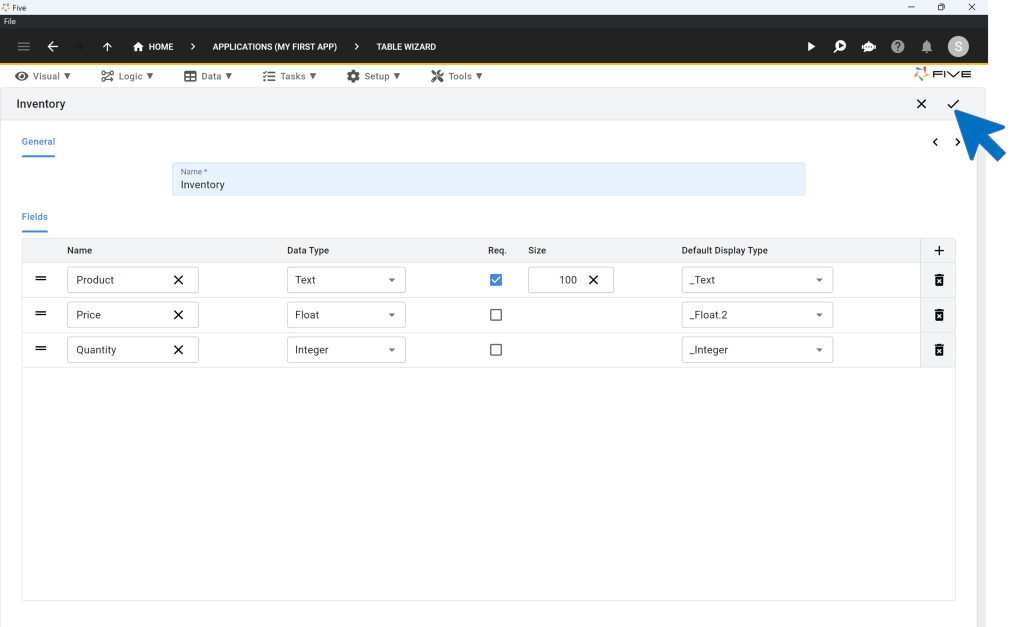
For example: say your database contains a table called “Inventory”. The form wizard will let you select this table, and will automatically create all the fields that your form should contain for end-users to interact with your database table.
Going from database table to form usually takes just a few seconds. Five makes it incredibly easy to build a CRUD application through its tight integration of the MySQL database into the overall development process. Simply follow this video to create your first form:
There are also plenty of customization options that Five gives you for forms. We will not go into all of these now, so here is just a quick list:
- You can adjust the size and order of your form fields.
- Through the use of “Show If”, “Read Only If” or “Required If” and JavaScript conditions, you can create forms with conditional logic.
- You can create custom display types, or apply regular expressions (RegEx) to validate the data that end-users store inside of forms.
- You can assign events to end users’ actions on forms. For example, you can run a JavaScript function that is tied to an “on enter” or “on exit” event in relation to a form field.
In a nutshell, there is little that you cannot do with a form built inside of Five. But if you still have questions, then our user community is a good place to learn more about Five’s features.
EXPERT TIP: Forms can get pretty complex. It’s best to start with a bare-bones form and delve deeper into the customization options later. The form might not look pretty at the start, but it does what it is supposed to do: it lets end users interact with your database through a graphical user interface. Later on, you can customize forms based on your requirements.
4. Creating CRUD Permissions
Once we’ve built our app it’s now time to assign CRUD permissions as outlined in this video:
- Multi-User Conversion:
- Access the application settings within Five.
- Enable the “Multi-User” toggle, which automatically adds essential features like a login page, user management capabilities, and a default admin account setup.
- Admin Account Setup:
- Upon running the multi-user app for the first time, log in using the default “admin” username and password.
- Immediately update the password to secure the admin account.
- User Role Creation:
- Navigate to the “Roles” section under application settings.
- Create new roles (e.g., “Managers”) and define their permissions, focusing on what CRUD operations they can perform on specific tables or sections of the app.
- Assigning Menus to Roles:
- Organize the app’s navigation by creating new menus or adjusting existing ones.
- Assign menus to specific roles, ensuring users only see navigation options relevant to their permissions.
- Adding and Managing Users:
- Through the “Users” menu, add new users by providing details like username, email, and assigning them a role.
- Set initial passwords for these users, with an option for them to update upon first login.
In the video, we use our order management template. For instance, “Managers” have read and update access to order details, but not the ability to alter product information.
Five automatically creates a clean and intuitive admin panel user interface on top of your MySQL database.
Running along the top and the left-hand side, Five gives you a menu that lets end-users navigate through your application. On the top, you have icons for in-app help or a user avatar that is particularly handy for multi-user applications. And in the center, there is a main area for your users to interact with your application, its forms, charts, dashboards, or any other element that you decide to develop for them.
This user interface is customizable through themes, buttons, or custom front-end components. It also handles more complex data structures very well, by letting you add pages, drill downs, or parent-child menus.
Conclusion
Five is capable of building even complex applications. Follow this guided YouTube tutorial to delve deeper into Five’s features.
Whatever you wish to build with Five: Happy coding!