Database Design: Table Relationships
Database Design – Part 2: Table Relationships
Hi and welcome to Five’s Database Design series. This series of blog posts teaches you how to create a MySQL database from scratch in Five. From adding table fields to creating many-to-many relationships and importing data – we cover everything you need to know to build the perfect database.
This blog post explains how to create relationships between database tables in Five. Five lets you develop a MySQL database, one of the world’s most popular relational database management systems (RDBMS). MySQL stores data in related tables.
Understanding how to create these relationships is a critical aspect of database design. Inside Five we do not need to write complicated SQL commands to create relationships, but can do so entirely in point and click using the Table Wizard.
About Five: More Than Just a Database
Five is a rapid application development environment for building database-driven web applications. Every application developed in Five has its own, fully customizable MySQL database.
In Five, you can create your database like in MySQL Workbench, with one important difference. You don’t need to write SQL commands to do so.
Five gives you the power of a database GUI in an easy-to-use and intuitive web application. You can create tables, assign data types, define table relationships, and import or query data.
Beyond its database features, Five lets you develop an entire web application on your database. Five makes it easy to build a modern web app with forms, charts, dashboards, and PDF reports that are all connected to your database.
Unlike traditional SQL tools, which only serve as a graphical user interface for a database (but are usually not very user-friendly), Five allows you to build and launch a web interface connected to a database. This makes Five ideal for rapidly creating internal databases to store data about products, inventory, business partners, to-do lists, members, suppliers, or other data.
To view Five’s web interface for databases, visit our customer database sample application here.
Five’s Database Design Tools: The Table Wizard
Five’s Table Wizard is the quickest and easiest way to create a MySQL database. It is a point-and-click interface for creating MySQL database tables and defining relationships.
When creating a new database, we often start by mapping out our tables, fields, and relationships in pen and paper. Which table should store what data? What is each field’s data type? Are we dealing with strings, floats, integers or booleans? What relationships do I need to create? What about junction tables?
Equipped with a database model or entity-relationship diagram, we can quickly convert our visual database representation into an actual database using Five.
Let’s learn how to use the Table Wizard in this blog post.
Using Five’s Table Wizard to Create Relationships
To create a relationship between two tables using Five’s Table Wizard, follow these steps:
Prerequisites:
Have at least one application with an existing database table ready in Five.
1. In Five, select your application and click Manage.
2. Now go to Data > Table Wizard.
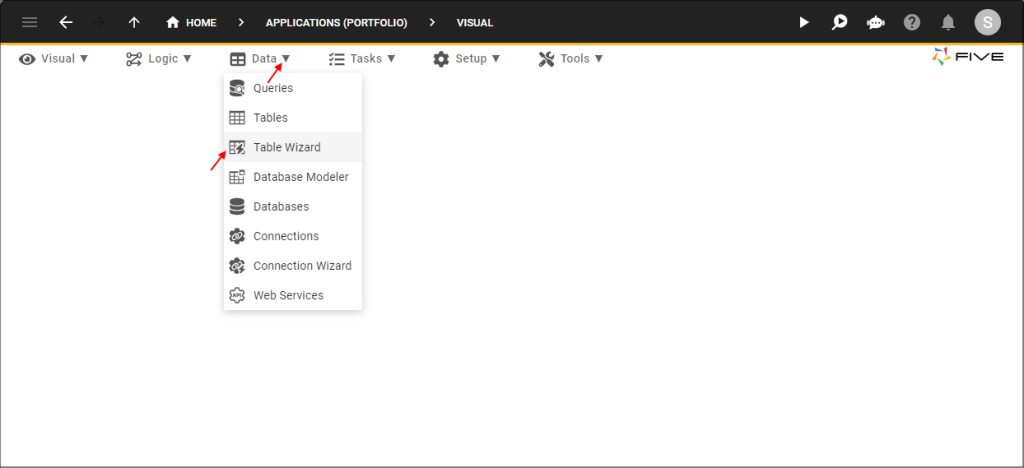
3. Give your database table a name by filling in the Name* field. Usually, table names should always be singular, using PascalCasing, such as CustomerName.
4. Next, click the Plus button on the right side of the screen to add fields to your database, as shown here:
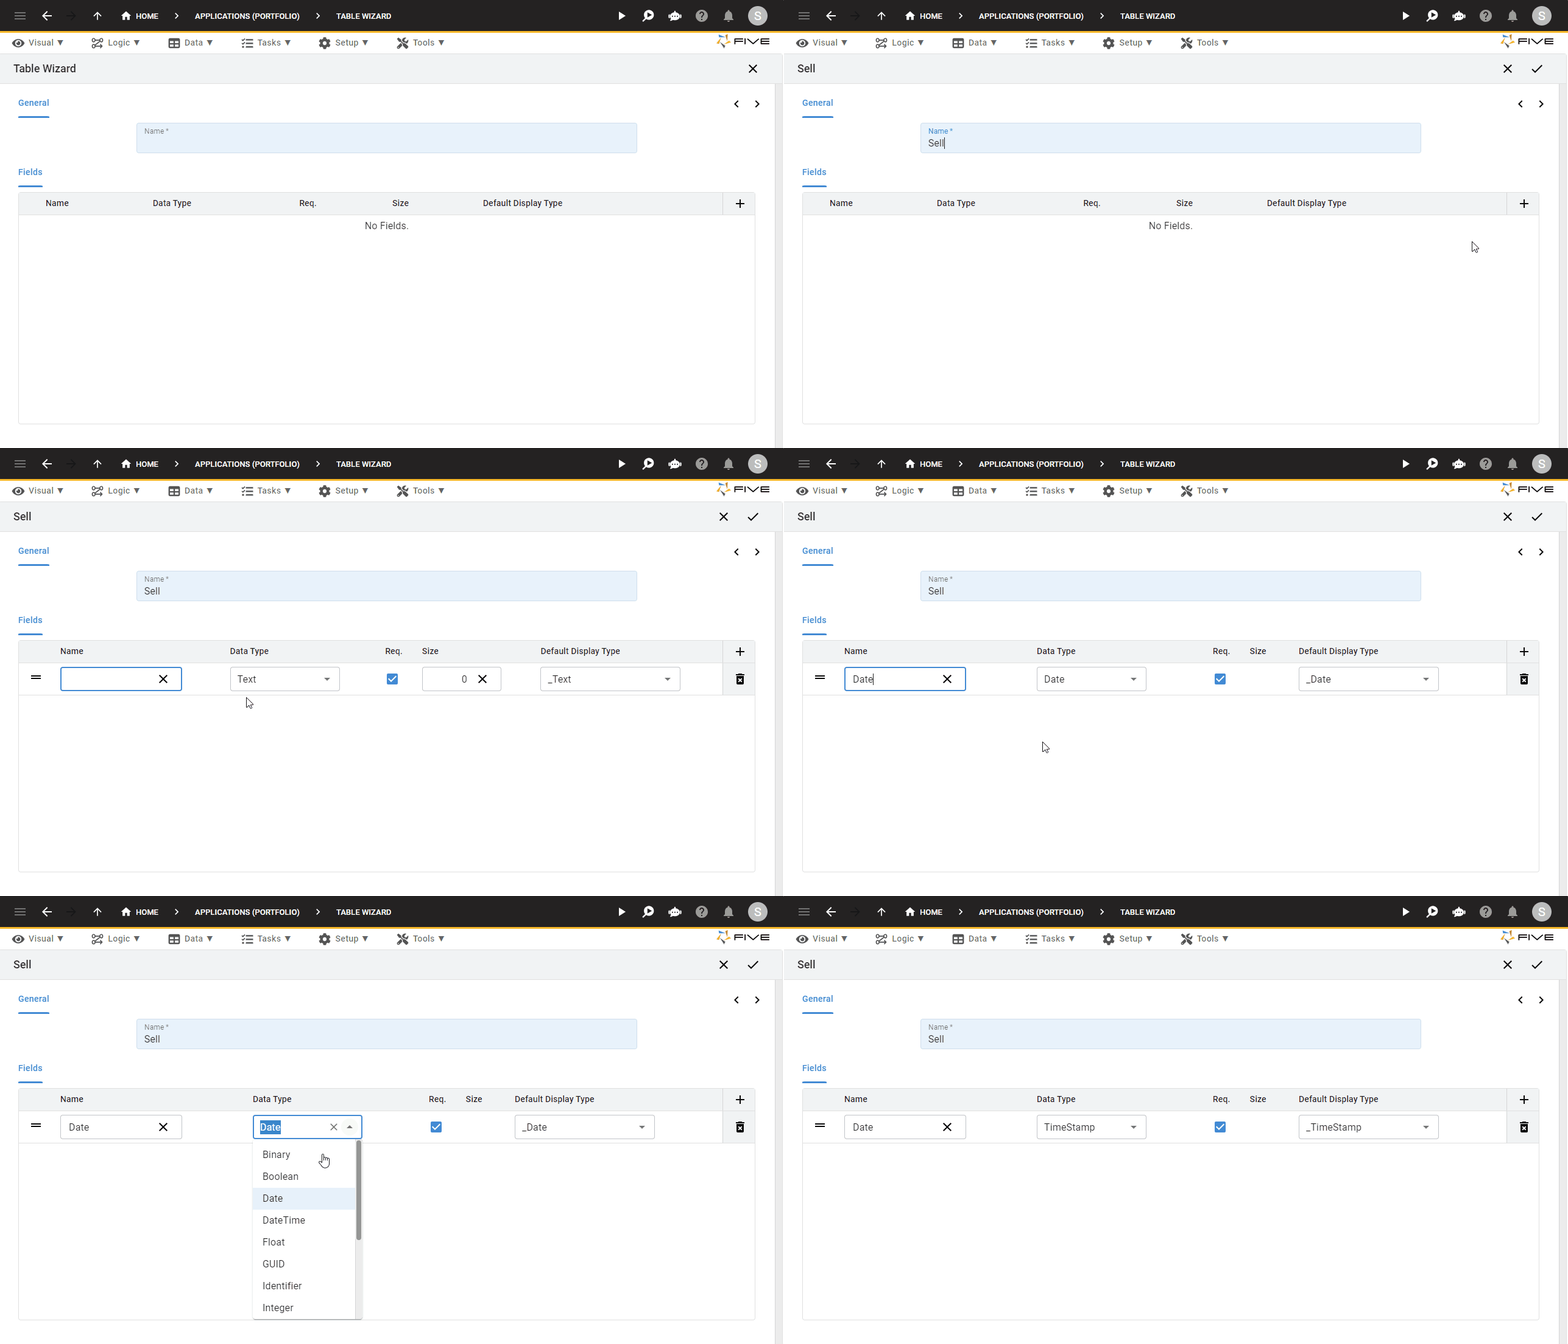
5. Keep clicking the Plus button to add more fields to your table. As before, do not add a primary key to your table. This is done automatically by the Table Wizard.
6. Once you have added all your fields to your table, click the small next > Arrow, shown here:
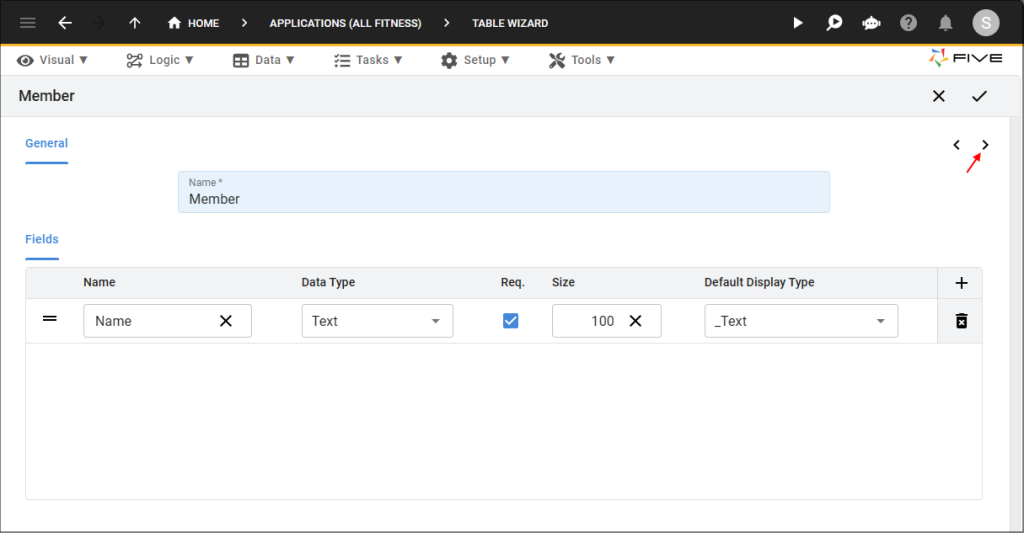
7. Click the Plus button in the Relationships section.

8. From the dropdown field, select the related table. Five will create a one-to-many relationship between the table you are creating and the table you are selecting.

9. Last, click the Tick ✔️ Button to save.
Done! We have just created our first related table in Five’s integrated MySQL database.
Explainer: Table Relationships
When you select a table in the Relationships section, Five creates a one-to-many relationship. For example, let’s assume we have two tables: Gym and Member. We know that one gym can have many members, so we want a one-to-many relationship between the Gym and the Member table.
To do so, we first create our Gym table, as we did in part 1 of database design, i.e. we create the table without any relationships. Second, we create the Member table as described above. For the Member table, we select the Gym table as a related table.
This will add the Gym table’s primary key as a foreign key to the Member table and create the one-to-many relationship that we need!
Viewing Your Database Tables and Relationships
To view your database tables and relationships, follow these steps:
1. Click Data > Database Modeler.
Here is what the Database Modeler shows for our customer database sample application.
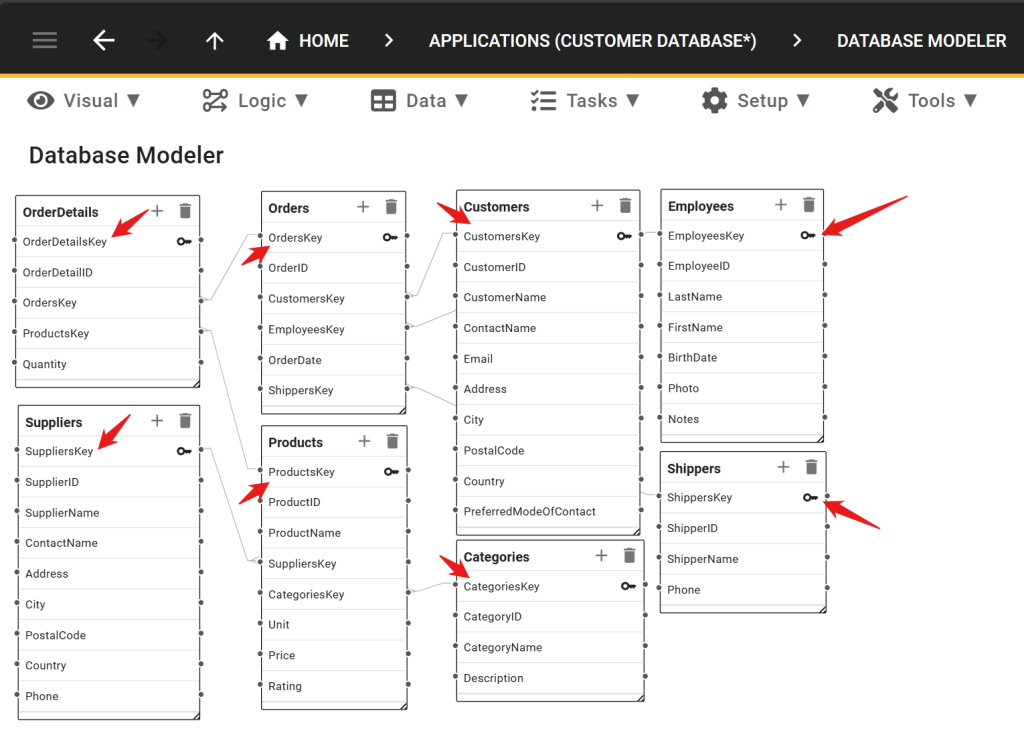
Note how the tables are connected by thin lines that indicate the type of relationship. In Five, zoom in on one of these lines. Each line’s ends are either a single line or multiple lines (“crow’s feet”), indicating how the two tables are related.
You can now also see that some tables contain foreign keys. In the Database Modeler image above, look at the relationship between the Categories and Products tables. One category (“electronics”) can have many products (“phones”, “TVs”, “laptops”). This is why the Products table contains the CategoriesKey.
Table Relationships: Practical Tips
Almost every database consists of several related tables. Very few applications can do with just a single, flat table. Often, however, we are not dealing with a simple one-to-many relationship, but with many-to-many relationships.
In the example of gyms and members above, we could imagine that someone is a member of multiple gyms at once: one gym for spinning, another for strength workouts. Our database design above cannot accommodate this scenario, as we only created a one-to-many relationship (one gym can have many members. But one member cannot have many gyms).
Let’s learn how to change this in our next blog post on many-to-many relationships.
Finding Help
Have more questions? Join our user community to connect with others and get answers.
Continue Reading About Database Design
Discover all articles of our Database Design series here.
