How to Build a Frontend for Google Sheets (Fast & Easy)
How to Build a Google Sheets Frontend: Step-by-Step Guide
Are you looking to turn your Google Sheet into a dynamic web frontend? This beginner-friendly tutorial will guide you through the process of converting a Google Sheet into a frontend using Five. No coding experience required!
Step 1: Clean Up Your Spreadsheet
Before we can build a Google Sheets Frontend, your data must be organized correctly. Proper data formatting is essential for a smooth transition.
Organize Your Google Sheets Data
- Descriptive Headers Make sure the first row of your Google Sheet contains clear and descriptive names for each column. For example:
| Product | Price | Quantity |
|---|---|---|
| Product 1 | 4.99 | 100 |
| Product 2 | 5.99 | 4 |
| Product 3 | 100.99 | 58 |
- Avoid Redundancy Do not repeat the same type of information in multiple columns. For instance, instead of having separate columns for “Products (non-perishable)” and “Products (perishable)”, use a single “Product” column and another column to classify them as “Perishable” or “Non-Perishable”.
| Product | Price | Quantity | Type |
|---|---|---|---|
| Product 1 | 4.99 | 100 | Non-Perishable |
| Product 2 | 5.99 | 4 | Perishable |
| Product 3 | 100.99 | 58 | Non-Perishable |
- Single Data Entries per Cell Each cell should contain only one piece of data. Avoid combining data points like “5.99 (discounted to 4.99)” in a single cell. Instead, use separate columns for price and discount information.
| Product | Price | Discounted Price |
|---|---|---|
| Product 1 | 5.99 | 4.99 |
| Product 2 | 7.99 | 6.99 |
- Separate Multiple Values If you have multiple values of the same type, such as multiple email addresses for a customer, create separate columns for each, like “Primary Email” and “Secondary Email”.
| Customer | Primary Email | Secondary Email |
|---|---|---|
| John Doe | john@example.com | john.doe@example.com |
| Jane Smith | jane@example.com | jane.smith@example.com |
Clean Your Data
Here are some useful Google Sheets functions to ensure your data is clean:
- TRIM Function: Removes extra spaces from text. Useful for correcting formatting issues like merged or improperly spaced words.
=TRIM(A1)- CLEAN Function: Removes all non-printable characters from text. Useful for cleaning up pasted data with special characters.
=CLEAN(A1)- PROPER Function: Converts the first character of each word to uppercase and the rest to lowercase.
=PROPER(A1)By following these steps, your Google Sheet will be well-prepared for conversion into a frontend.
Ready to move forward?
Step 2: Setting Up Your Database and Importing Data
Creating a robust backend with a MySQL database is crucial for converting Google Sheets into a frontend. MySQL is a reliable and popular open-source database, and Five offers an easy-to-use visual interface for managing it.
Create a New Application in Five
First, ensure you have free access to Five . Follow these steps to create a new application:
- Launch Five.
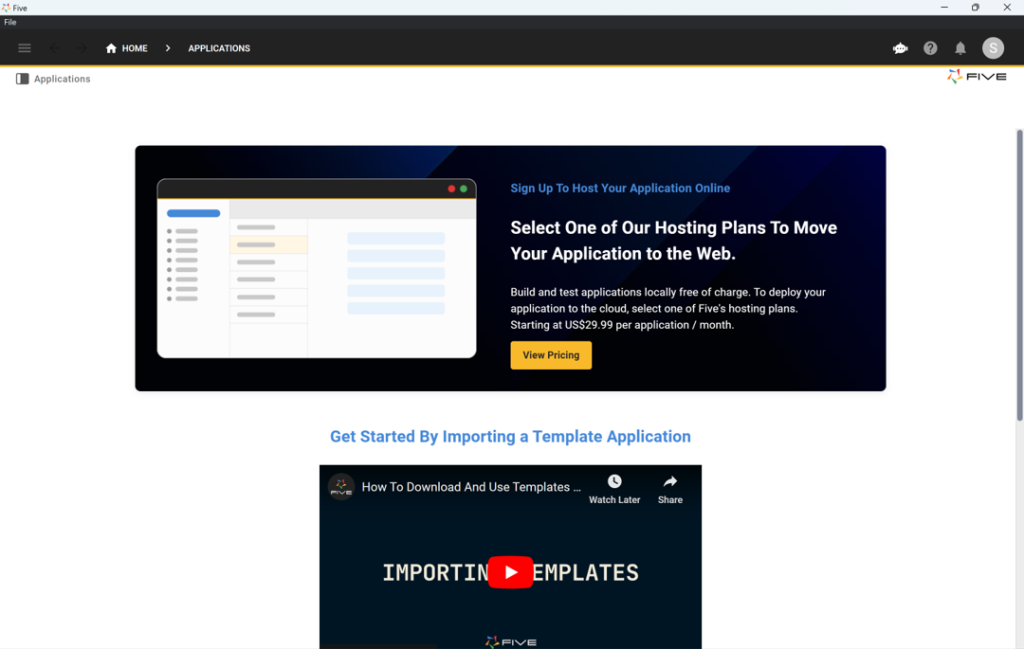
- Navigate to “Applications” near the top left corner of the screen, just below the hamburger menu icon.
- Click the yellow Plus icon. A “New Applications Record” window will appear.
- Enter a title for your application, such as “My First App”.
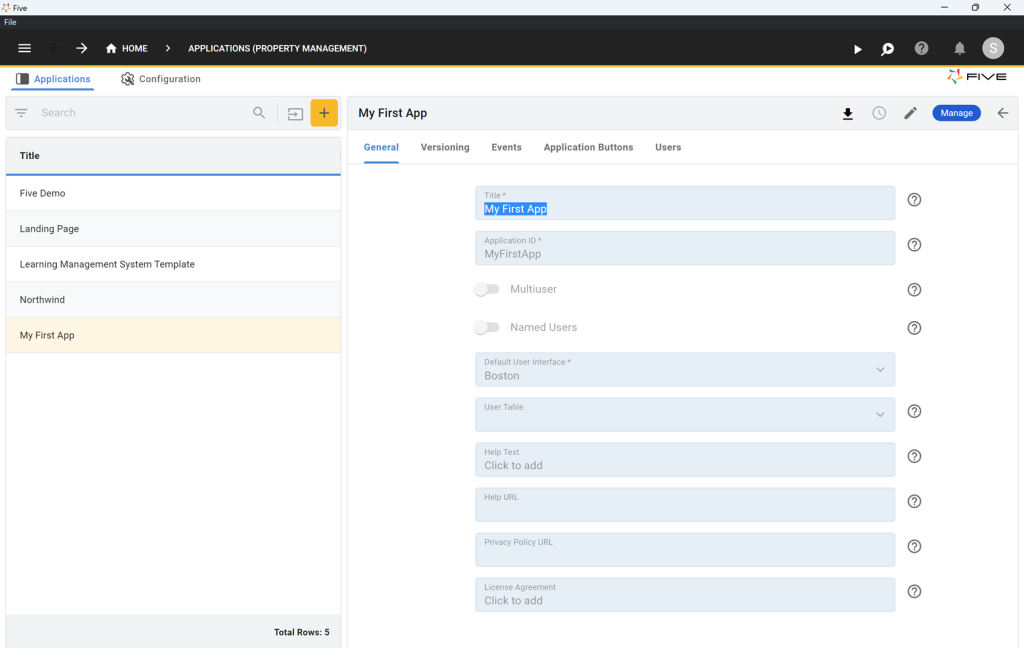
- Save your new application by clicking the Tick Mark in the top right corner.
Your screen should now show your new application listed on the left side.
Create Your Database and Import Data
With your application set up, it’s time to build your database and import your data from Google Sheets.
Creating Your Database Table
- Click the blue Manage button at the top right of the screen near the Five logo.
- Navigate to “Data” and then select “Table Wizard”.
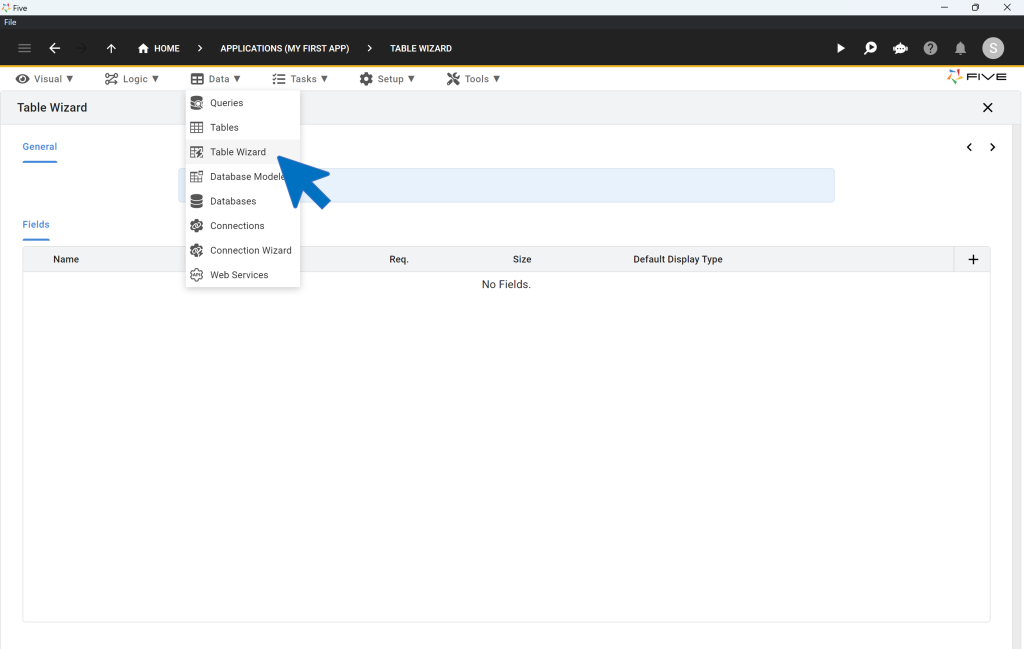
- Name your table “Inventory”.
- Click the Plus icon on the right side of the screen three times to add three fields:
- Field 1: Name it “Product”, select “text” as the data type, and set the size to 100.
- Field 2: Name it “Price”, select “float” as the data type, and choose “float.2” for the display type.
- Field 3: Name it “Quantity”, select “integer” for both the data and display type.
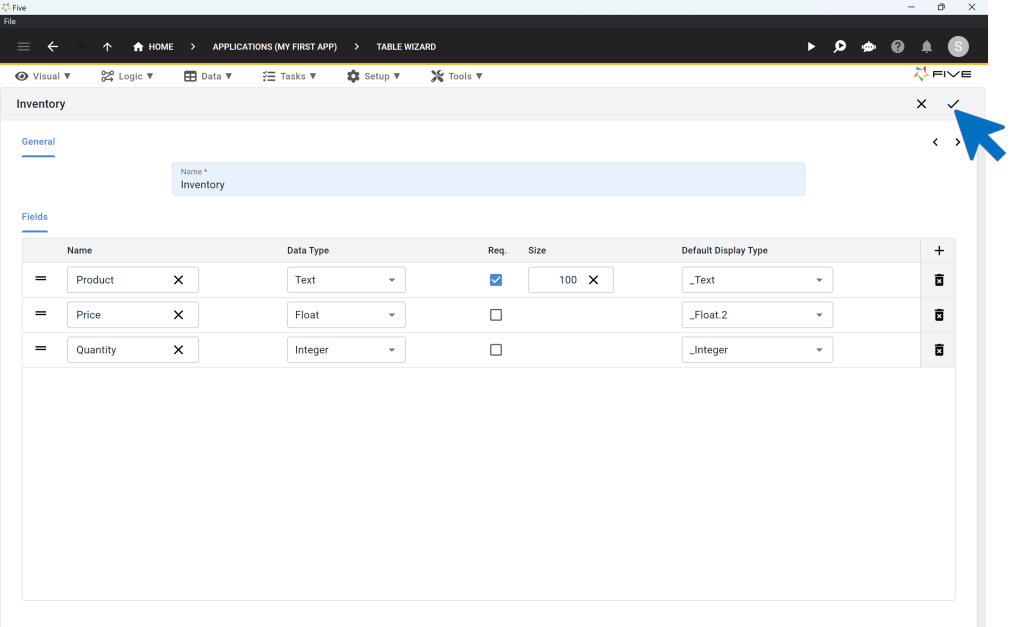
- Save your table by clicking the Tick mark.
Importing Data from Google Sheets
- Ensure your data is stored in a CSV file. If you don’t have one, you can download an example Inventory CSV file.
- Go to Data > Tables and click the Import CSV into Table icon (located to the left of the yellow plus icon with a small arrow pointing down into a box).
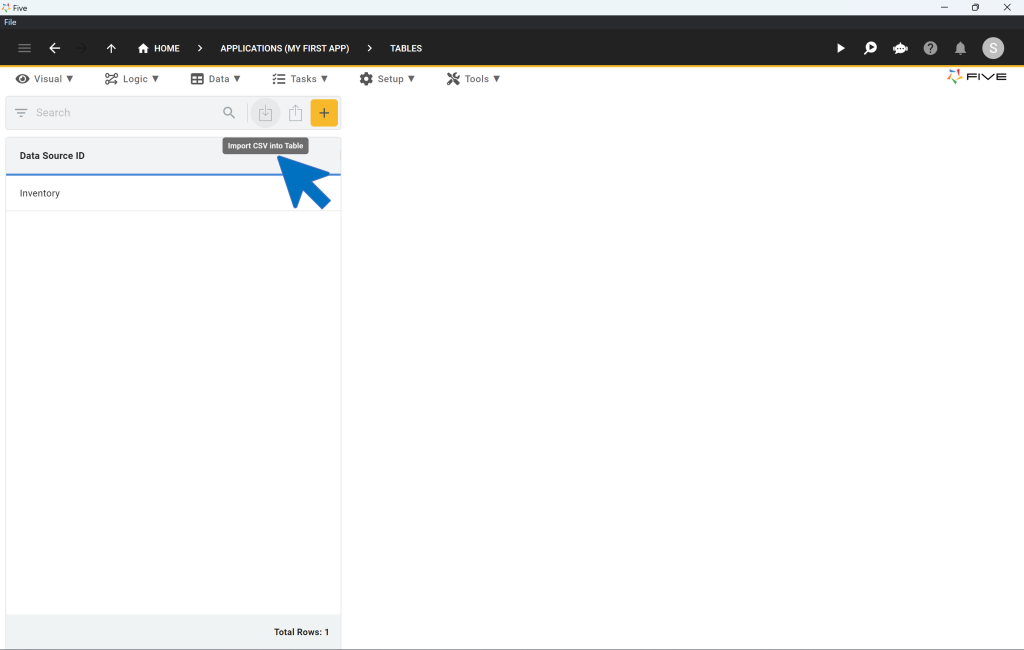
- Select your Inventory table from the dropdown box.
- Click on Choose File and locate your Inventory.csv file. Upload it.
- Five will automatically map the fields from your CSV file to the corresponding database fields, assuming the field names match.
- For InventoryKey, select Generated to let Five create a unique primary key for each record.
- Click the Tick mark to complete the upload.
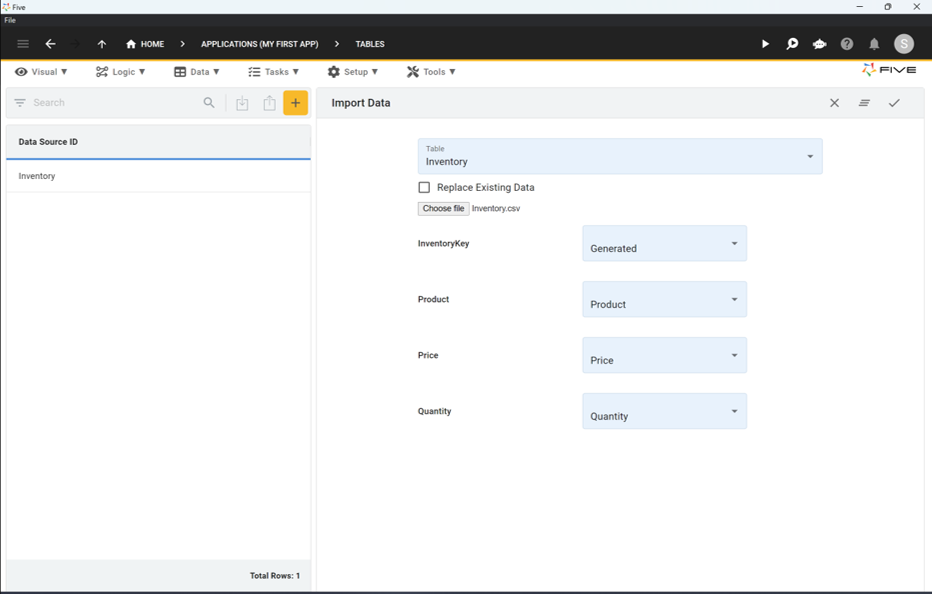
Congratulations! You’ve successfully created a MySQL database table and populated it with data from your Google Sheet.
In the next step, we will add a form to your application and launch it for a preview.
Step 3: Adding a Form and Previewing Your Frontend
We’ve already set up our database with a table for products, prices, and quantities. Now, it’s time to build a frontend so users can easily interact with this data.
Adding a Form
Five simplifies the process of building forms for end-users. Follow these steps to create your form:
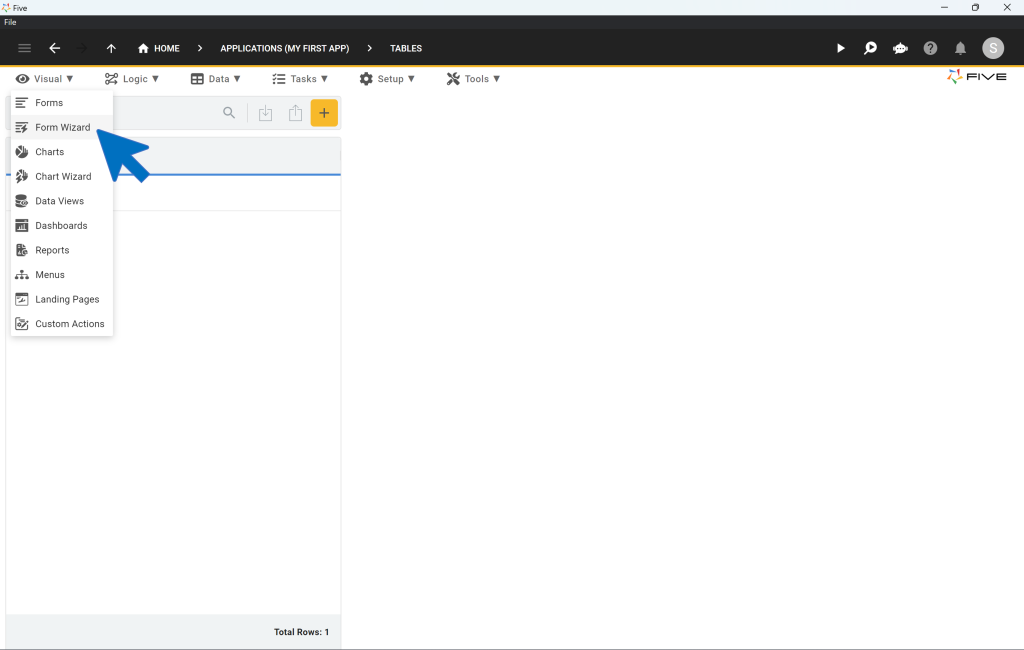
- Click on “Visual” in the top menu and then select “Form Wizard”.
- In the Form Wizard, select “Inventory” as your main table.
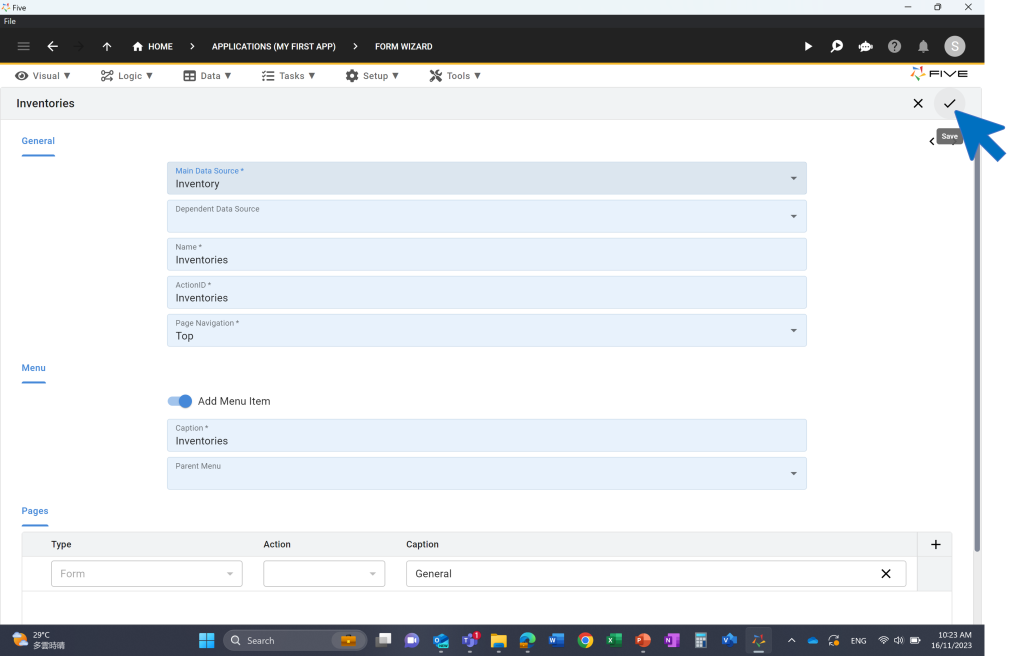
- Save your form by clicking the Tick mark.
Preview Your Frontend
With the form created, it’s time to preview your google sheets frontend:
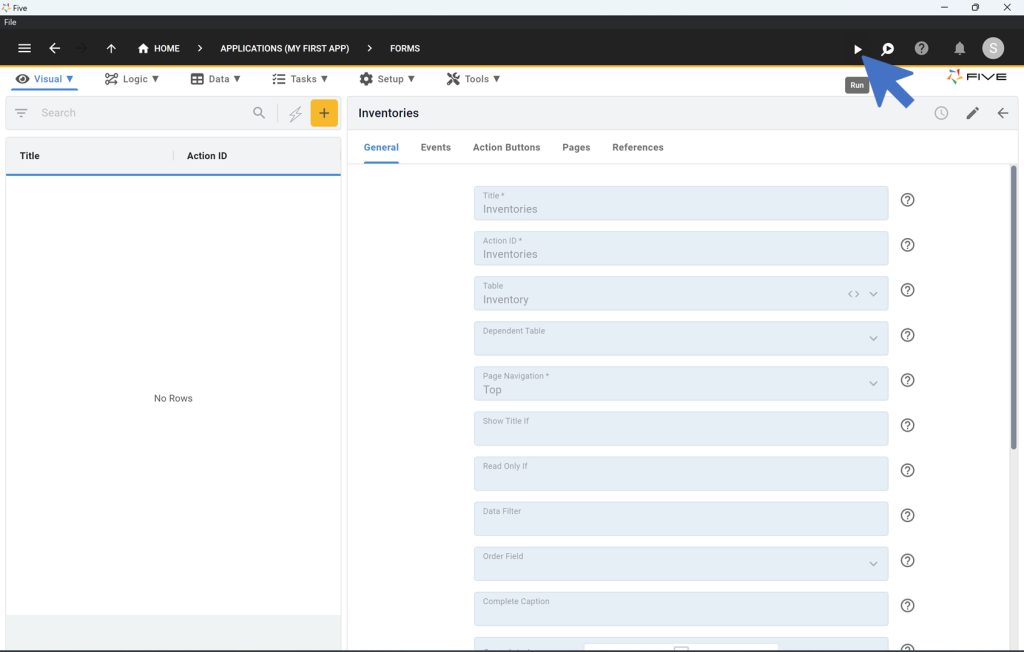
- Click the “Run” button at the top right corner. This will open your application in a new window.
What Your Frontend Application Includes
After launching, you will see a fully auto-generated front-end, including:
- Menu: A navigation menu on the left side.
- Search Bar: Located at the top for quick data searches.
- Filter: Next to the search bar for refining your data view.
- Data Management: The ability to add, edit, or delete records directly through the GUI.
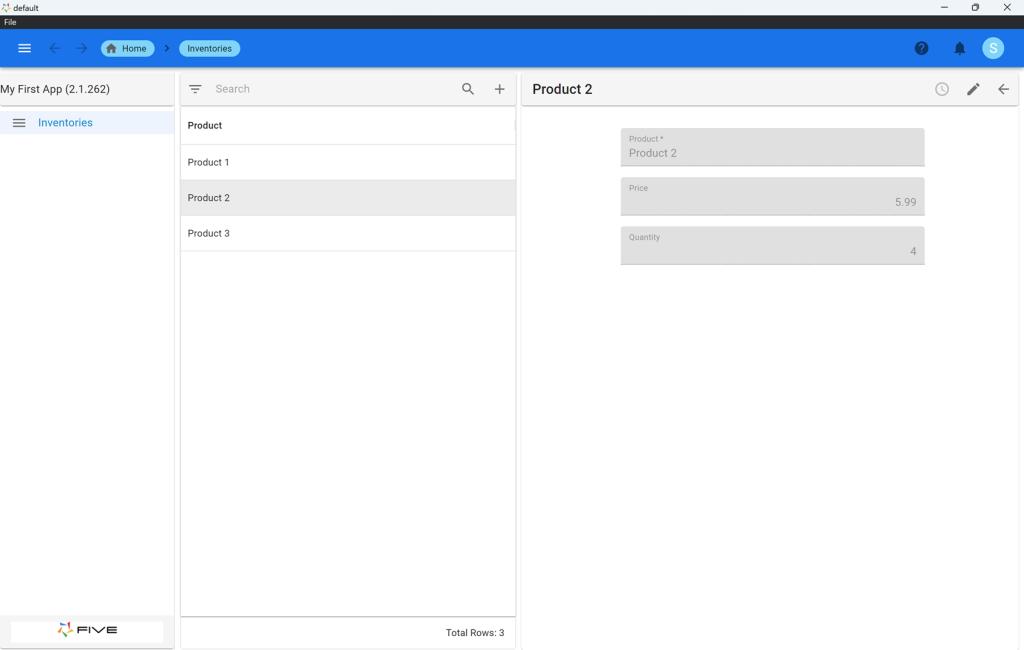
Congratulations! You’ve just created the first prototype of your web frontend, turning your Google Sheet into a searchable online database.
Next Steps: Build a Frontend for Google Sheets
Now that your application is up and running, let’s explore further enhancements and customizations:
- Add Calculations: Learn how to add calculations to your forms, such as computing the total field in your form.
- Customize the Design: Add a theme to your application to make it look professional and unique.
- Implement User Authentication: Add a login screen and terms & conditions consent to manage user access and permissions.
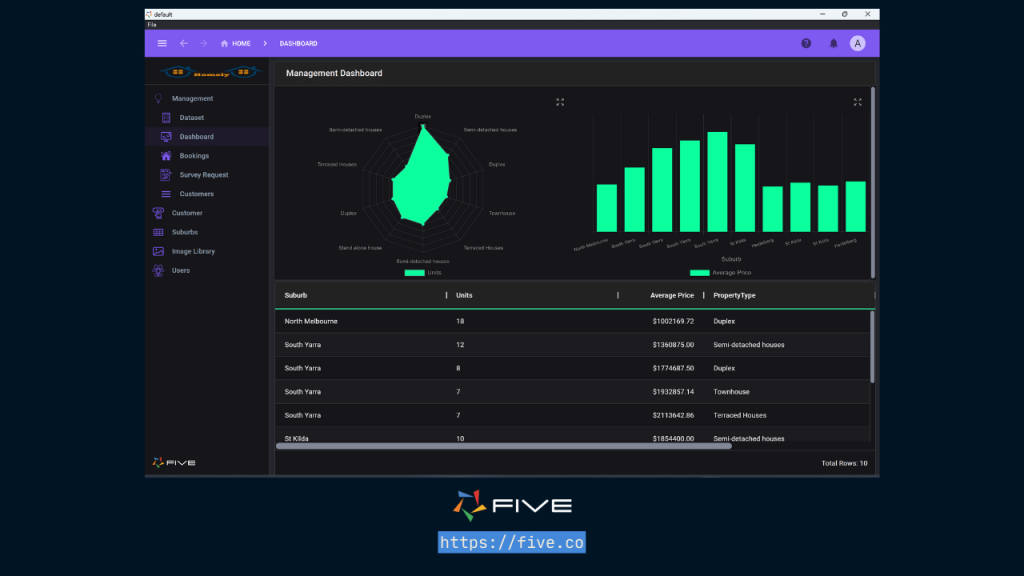
- Create Charts and Dashboards: Incorporate analytics and business intelligence features for data visualization.
Resources for Further Development
If you need help or inspiration while developing your application, here are some useful resources:
- Five’s User Community: Visit Five’s User Community to ask questions or get ideas from other users.
- Five’s Documentation: Access Five’s comprehensive documentation for detailed guides and information.


