How to Build an Excel GUI [Quick & Easy Tutorial]
Learn How to Build an Excel GUI In 4 Steps
Are you sitting on lots of data trapped in Excel spreadsheets? This beginner-friendly tutorial will guide you through the process of using your data to build an Excel GUI.
No coding experience? No problem! This guide is designed to be accessible to everyone, regardless of technical background.
We’ll be using Five’s free trial to build our prototype web frontend, making the process easier. Before we begin, ensure you’ve signed up for Five.
Don’t Feel Like Reading?
Watch the YouTube Video and Learn How to Build an Excel GUI.
How to Build an Excel GUI Faster
This blog post is part 1 of a 5-part series on converting your Excel spreadsheet to a GUI. To view the other parts, follow the links here:
- Part 2: How to Build an Excel GUI – Calculating a Field
- Part 3: How to Build an Excel GUI – Adding a Theme
- Part 4: How to Build an Excel GUI – Adding Logins to Your App
- Part 5: How to Build an Excel GUI – Creating Charts and Dashboards
Step 1 – Structure Your Spreadsheet
Before diving into building your Excel GUI, it’s crucial to ensure your Excel spreadsheet is well-organized and data is stored in a proper format.
Here are the steps to clean up your spreadsheet:
1. Use Descriptive Column Headers
Ensure the first row of your spreadsheet contains clear and descriptive names for each column. For instance, if your spreadsheet holds information on Products, Prices, and Quantities, the headers should read:
| Product | Price | Quantity |
|---|---|---|
| Product 1 | 4.99 | 100 |
| Product 2 | 5.99 | 4 |
| Product 3 | 100.99 | 58 |
2. Avoid Redundancy in Columns
Do not repeat the same information in different columns. Instead of having separate columns for “Products (non-perishable)” and “Products (perishable)”, combine them into one “Product” column and add another column to classify them as “Perishable” or “Non-Perishable”.
3. Maintain Single Data Entries per Cell
Each cell should contain only one piece of data. Avoid combining data points like “5.99 (discounted to 4.99)” in a single cell as it complicates calculations. Separate the discount information into its own column.
4. Separate Multiple Values into Different Columns
If you have multiple values of the same type, such as multiple email addresses for a customer, create separate columns for each. For example, use “Primary Email”, “Secondary Email”, or differentiate between “Work Email” and “Personal Email”.
By following these guidelines, you’ll create a clean and well-structured Excel spreadsheet, laying a solid foundation for building your Excel GUI. This organization ensures that your data is easy to manage, analyze, and convert into a functional web application.
Expert Tips: Essential Excel Commands for Cleaning Up Your Spreadsheet
Transitioning from Excel to a GUI requires ensuring your data is clean and well-organized. Here are three essential Excel functions for achieving clean data:
1. TRIM Function
The TRIM function in Excel removes all leading, trailing, and excess spaces between words, except for single spaces. This is particularly useful for correcting misspelled names. For example, if customers have entered names like “JohnDoe” or “Jane Doe “, the TRIM function will convert these entries to “John Doe” and “Jane Doe”.
2. CLEAN Function
The CLEAN function removes all non-printable characters from text. This is helpful if your database contains names with special characters that weren’t pasted correctly into Excel, or if there are unwanted line breaks within cells.
3. PROPER Function
The PROPER function capitalizes the first letter of each word while converting the rest to lowercase. For instance, it will transform “JOHn DoE” into “John Doe”.
Checklist: Is Your Excel Spreadsheet Ready?
Before moving on to the next step, ensure your Excel spreadsheet meets these criteria:
- Descriptive Header Row: Does the first row contain clear and descriptive column names?
- Unique Information: Does each column contain unique information relevant to the column header?
- Single Data Entries: Does each cell in a column contain only one piece of data of the same type (e.g., text, numbers)?
- Split Data Points: Are multiple data points of the same category split across different columns?
- Clean Data: Have you utilized Excel’s built-in functions to clean your data?
By ensuring these criteria are met, your spreadsheet will be well-prepared for the next phase of converting your Excel data into a GUI.
Step 2 – Setting Up Your Database
After completing Step 1, building an Excel GUI becomes significantly easier. Now, let’s proceed with Step 2: setting up your database.
Using a database as the backend for your application is crucial when creating an Excel GUI. We recommend MySQL, the world’s most popular open-source database.
We’ll use Five, which offers a user-friendly visual database designer, to create our database. With Five’s point-and-click interface, setting up a database table is straightforward. Make sure to sign up for a free Five trial to follow along.
1. Creating a New Application in Five
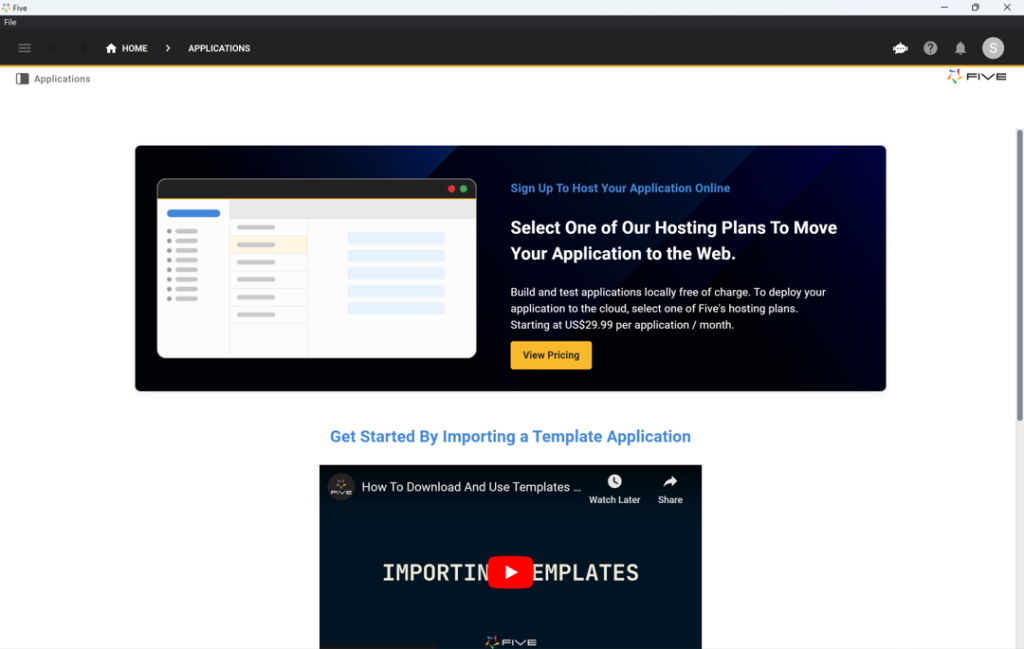
Once you’ve signed up to Five. You’ll see a welcome screen similar to this:
2. Navigate to Applications
- Click on “Applications” near the top left corner of the screen, just below the hamburger menu icon.
- Click on the yellow Plus icon. A “New Applications Record” window will appear.
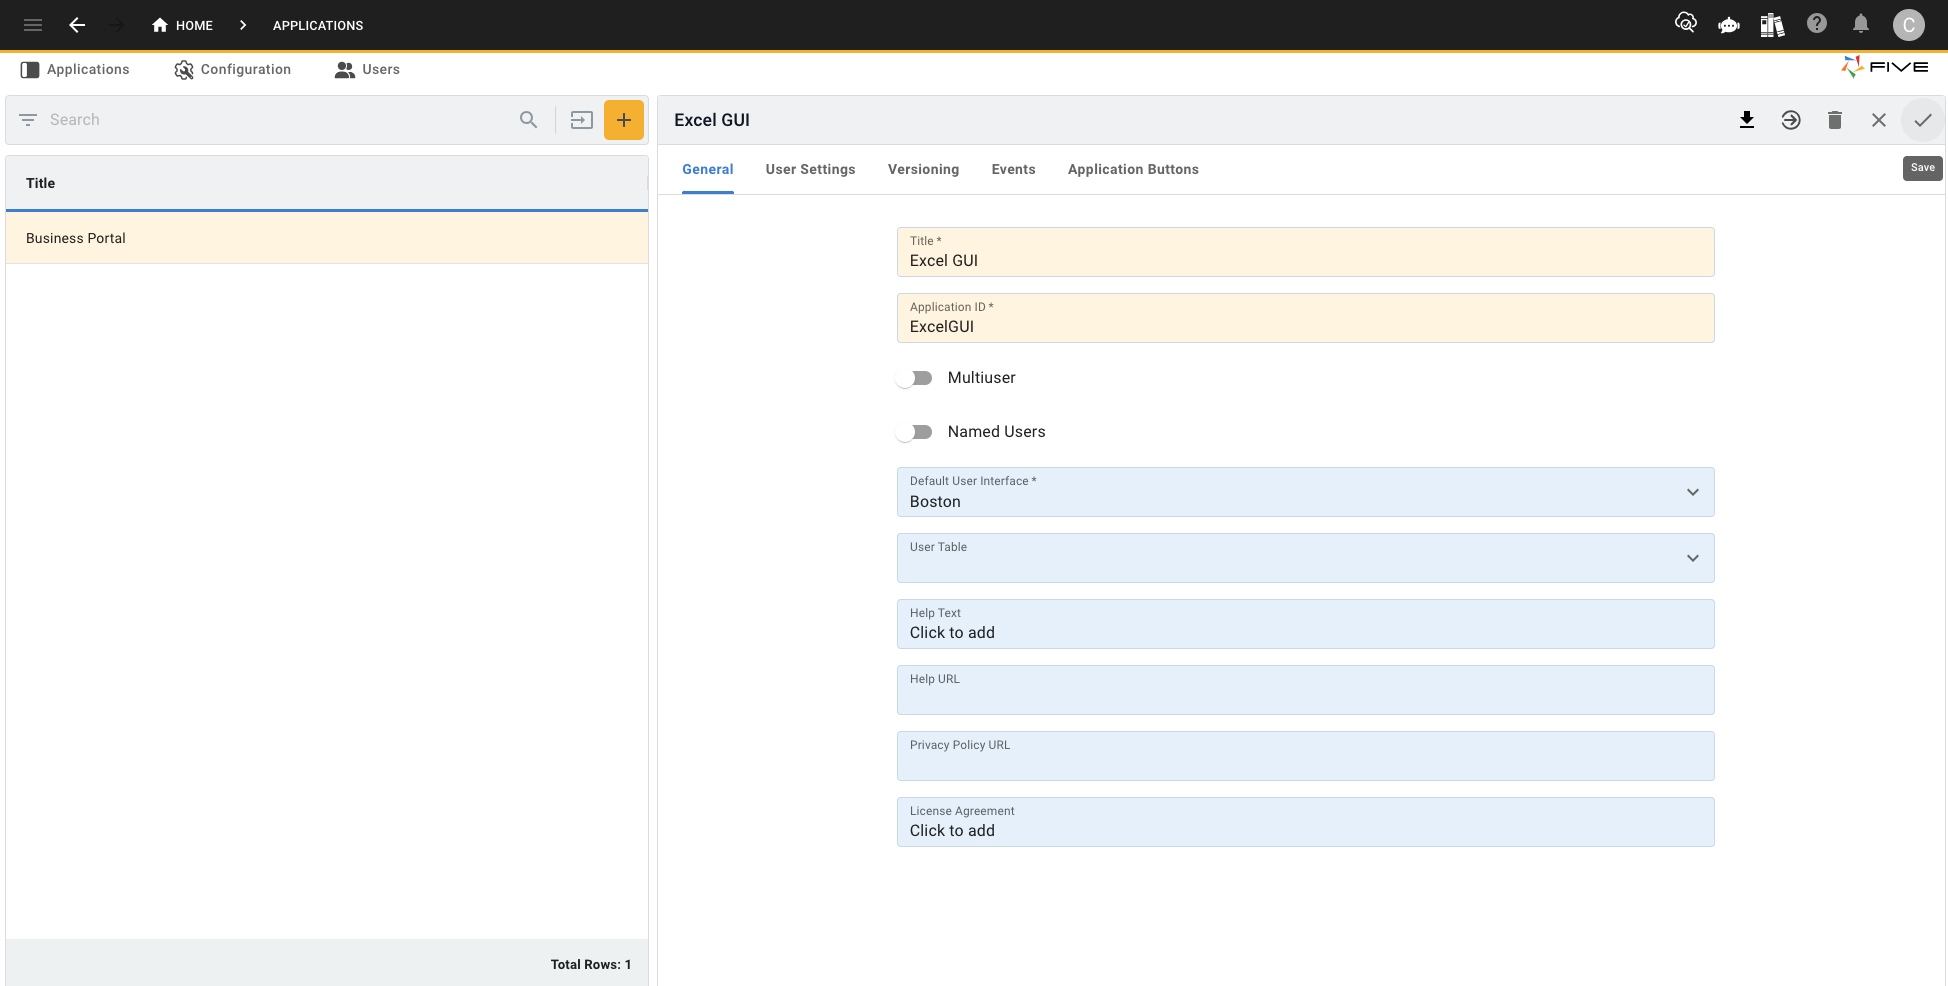
3. Create Your Application
- Give your application a title, such as “Excel GUI”.
- Save your new application by clicking the Tick Mark in the top right corner.
Here’s what your screen should look like after creating your application. If “Excel GUI” is your first application, you won’t see any other applications listed on the left.
Step 3 – Import Excel Data
In this step, you’ll create your database and import your data seamlessly. Follow these instructions to ensure a smooth process:
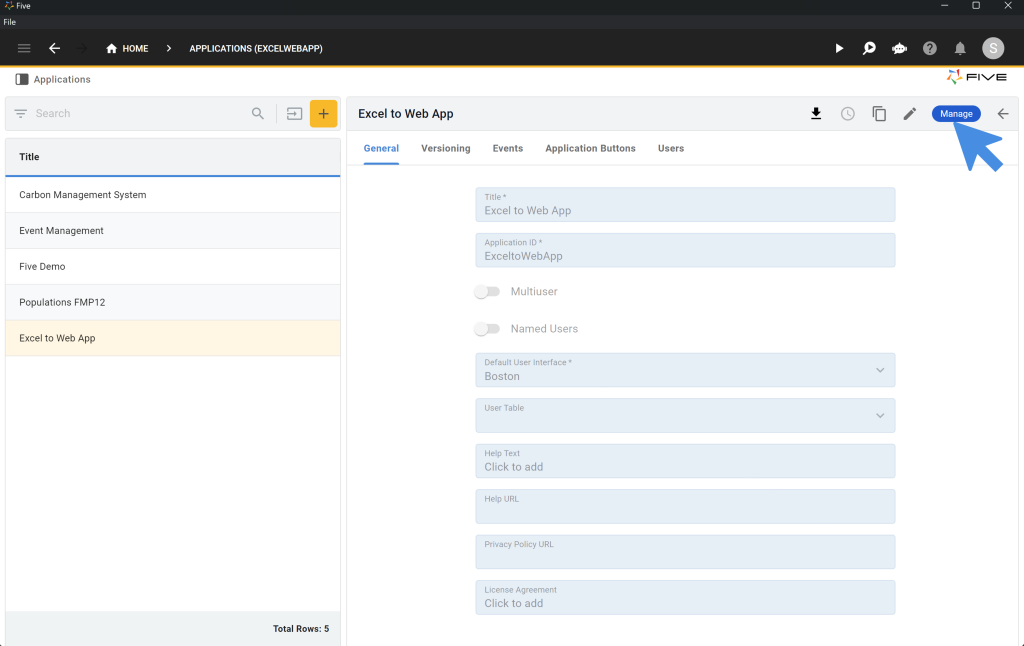
1. Start by Managing Your Data
- Click the blue Manage button located at the top right of the screen near the Five logo.
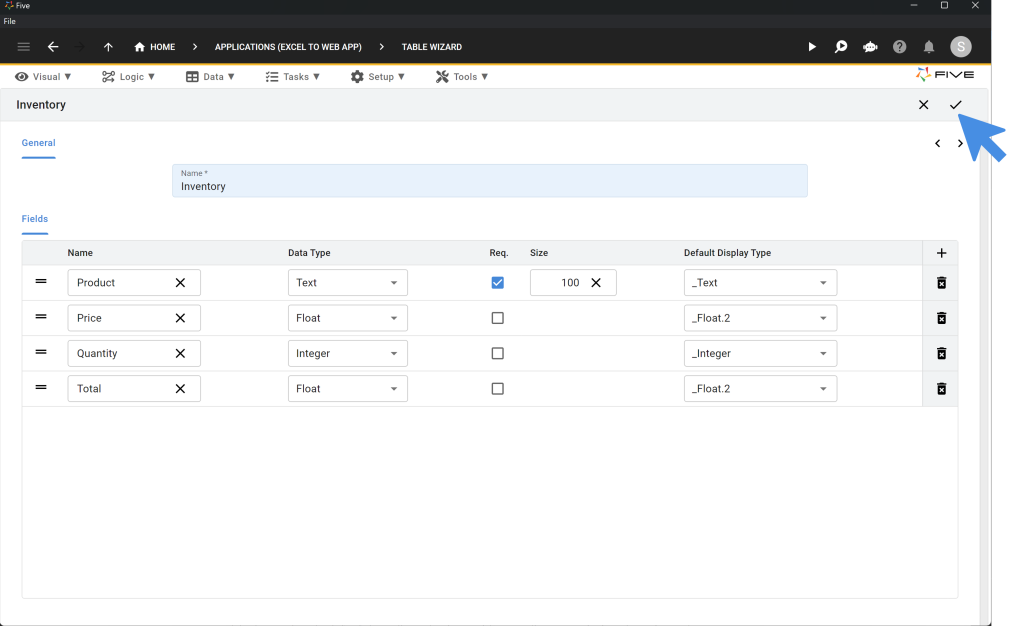
2. Create a Database Table
- Navigate to Data and then click on Table Wizard.
- Begin by creating your first database table and name it Inventory.

3. Add Database Fields
- Click the Plus icon on the right side of the screen to add database fields. Click it four times to create four fields:
- Field 1: Name it Product, select text as the data type, and set the size to 100.
- Field 2: Name it Price, select float as the data type, and float.2 as the display type.
- Field 3: Name it Quantity, select integer for both data and display type.
- Field 4: Name it Total; this will be used for calculations later in the application development process.
- Save your table by clicking the Tick mark. Ensure your table structure matches this setup before saving.
4. Import Data from Excel
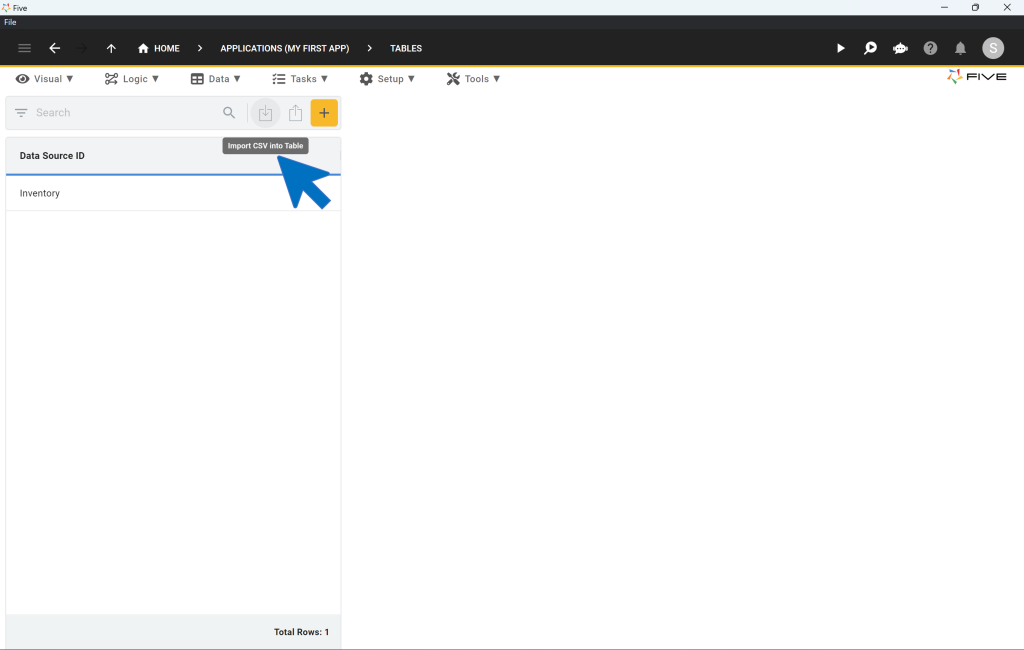
- Go to Data > Tables.
- Click the Import CSV into Table icon located to the left of the yellow plus icon (it has a small arrow pointing down into a box).
5. Prepare Your CSV File
- Ensure your data is stored in a CSV file. If using the provided data, download the Inventory CSV file here.
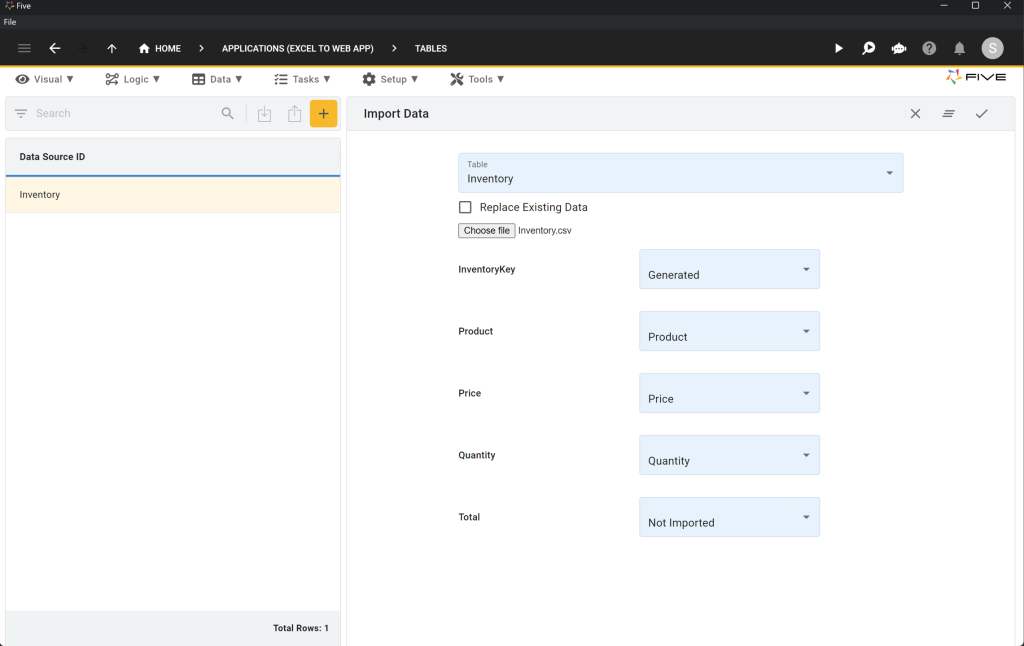
6. Import Data into Your Database
- Select the database table (Inventory) from the dropdown box.
- Click on Choose File and locate the Inventory.csv file. Upload it.
- Five will automatically map the fields of your CSV file to the corresponding database fields, assuming your database fields match the top row of your CSV file.
- For InventoryKey, select Generated to let Five generate a unique primary key for each record.
- For Total, select Not Imported from the dropdown box.
- Click the Tick mark to upload your data.
Congratulations! You’ve successfully created a MySQL database table and populated it with data. This setup will serve as a solid foundation for building your Excel GUI.
Step 4 – Adding a Form
With your application backend set up, it’s time to add a user-friendly frontend to transform your database into a fully functional GUI. Follow these steps to continue converting your Excel spreadsheet into a GUI.
1. Adding a Form
Five simplifies the process of creating forms for your end-users. Here’s how to do it:
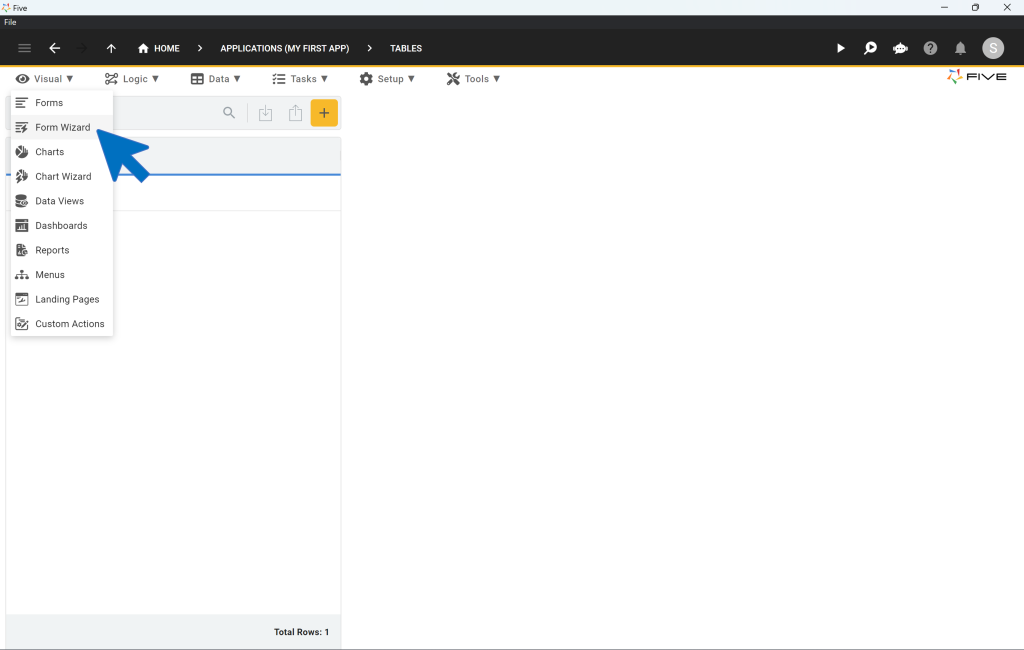
- Click on Visual and then select Form Wizard.
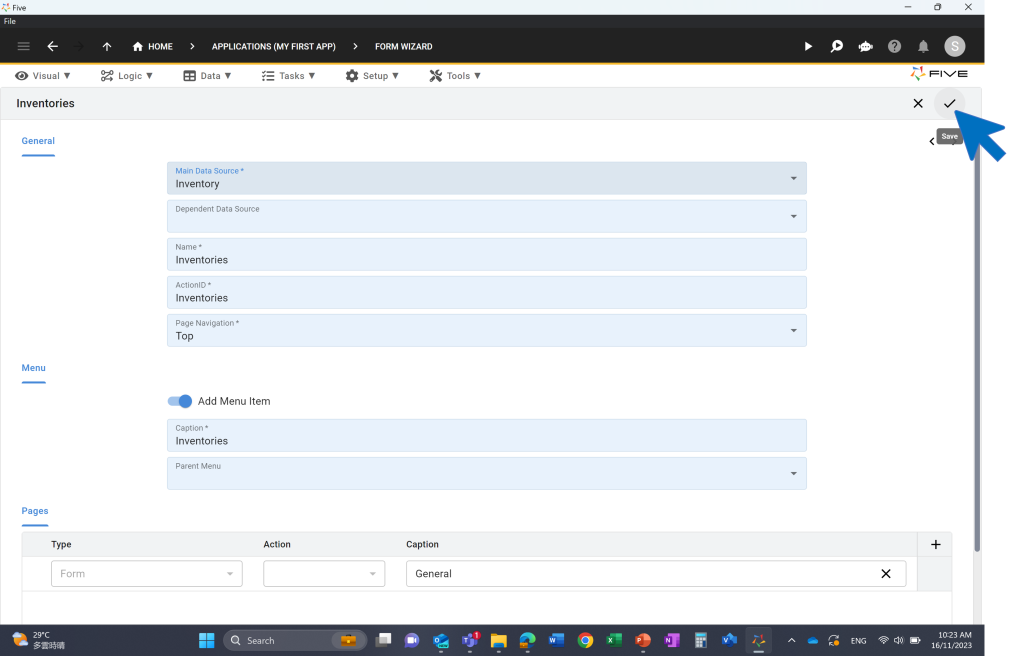
- In the Form Wizard, select Inventory as your Main Table.
- Save your form by clicking the Tick mark.
2. Preview Your Application
Now that the form is set up, it’s time to preview your application:
- Run Your Application
- Click on the Run ▶️ button located at the top right corner. If the Run button isn’t visible, you need to activate it first. To launch your web form, click on the “Deploy to Development” button in the top right corner. This opens up your app in a new browser tab.
Here’s what your Excel GUI looks like:
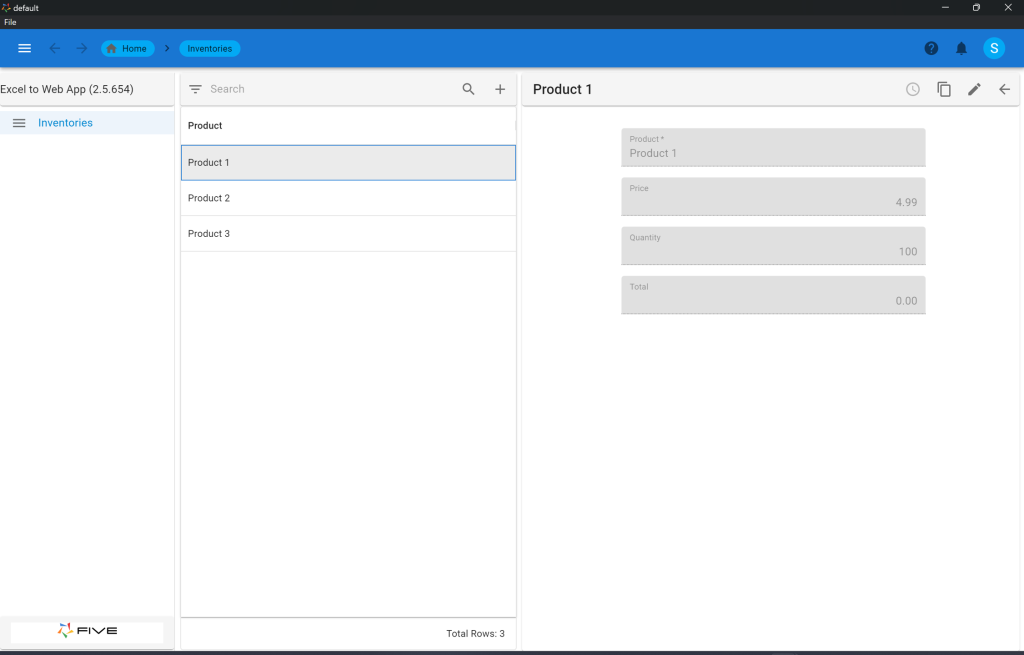
Here’s what your application will include:
- Fully Auto-Generated Front-End: Your form, created using Five’s Form Wizard.
- Menu: A menu on the left side for easy navigation.
- Search Bar: A search bar at the top to quickly find data.
- Filter: A filter option next to the search bar for refining your data view.
- Data Management: The ability to add, edit, or delete records from your database through the graphical user interface.
Congratulations! You’ve just created the first prototype of an Excel GUI. This setup provides a solid foundation for further development.
To continue building your GUI, follow the next steps in this tutorial.
Excel GUI: Next Steps
Congratulations! You’ve successfully built and deployed your Excel GUI using Five. Transitioning from managing data in Excel to using a modern web app allows you to store, retrieve, and process data more efficiently. And it only took three steps to get here!
Five’s prebuilt user interface has automatically created an Inventories menu item for you. You can also see your Products listed on the left side of the screen. By selecting a product, you can view its details and make any necessary changes. Additionally, Five includes pre-built search and filtering features to enhance data management.
Further Customize Your Excel GUI?
The possibilities in Five are extensive! Here’s a preview of what your Excel GUI could look like:

Add Calculations
In Part 2 of this guide, you’ll learn how to add calculations to your application. For example, you can calculate the Total field in your form.
Customize Your App Design
Enhance the look and feel of your web app by adding a theme. This will give your application a professional and unique appearance.
Implement User Authentication
Add a login screen and terms & conditions consent screen to your application. Assign different roles and permissions to users for controlled access to data.
Analytics and Business Intelligence
Incorporate charts and dashboards to allow users to perform analytics and provide business intelligence insights.
Explore More Possibilities
We’ve just scratched the surface of what you can achieve with Five. For further inspiration, explore our Use Cases or continue with our tutorial by adding a calculation to your application.
In case you get stuck during the development process, we’re here to help! Continue developing your application by accessing these resources:
- Five’s User Community: Visit https://five.org to ask questions or get inspiration from other users.
- Five’s Documentation: Visit help.five.org to access Five’s comprehensive documentation.