How to Create a Secure Portal In 4 Steps
Create a Secure Portal In 4 Steps: Quick & Easy Guide
It seems almost every day we hear about security and data breaches affecting some of the world’s largest companies. Consequently, more businesses are investing heavily in securing their operations, whether it be their web portals, websites, or databases.
But where do you start when it comes to making your company’s online presence secure? And how do you go about creating a secure portal?
What Makes a Portal Secure?
There are a few key criteria for ensuring your portal is secure:
- Login and Password Protection: Your portal must be protected with strong login and password mechanisms.
- Data Encryption: Ensure that data is encrypted both in transit and at rest to protect it from unauthorized access.
- Regular Backups: Backup your portal at least once daily so you can restore it if something goes wrong.
Additional Steps to Enhance Security
In addition to these basic measures, consider implementing the following:
- Two-Factor Authentication (2FA): Adds an extra layer of security by requiring a second form of verification beyond just a password.
- Security Audits and Penetration Testing: Regularly test your system for vulnerabilities and address any weaknesses found.
- User Access Controls: Limit access to sensitive information based on user roles and responsibilities.
- Monitoring and Logging: Implement robust monitoring and logging to detect and respond to suspicious activities in real-time.
How Can You Create a Secure Portal
There are several ways to create a secure portal. One option is to code it entirely from scratch, a process that can take around 18 weeks even if you have the expertise. Another option is to hire an expert developer, though this can be quite expensive and there’s no guarantee you’ll get exactly what you need.
A third and more efficient option is to use a free web application builder designed specifically for creating secure portals, such as Five. Five offers several advantages: it significantly speeds up the development process, requires no extensive coding knowledge, is far more affordable than hiring a developer, and allows you to customize your secure web portal to meet your specific needs.
Five ensures the security of your portal with twice-daily data backups and follows industry-standard AES-256 data encryption practices to protect your data both in transit and at rest. With Five, you don’t need to worry about security—it’s already taken care of. This allows you to focus on enhancing the functionality and overall quality of your portal.
To follow this guide on how to create a secure portal get free access to Five.
Step by Step Guide on Creating a Secure Portal
Step 1: Creating a New Secure Portal
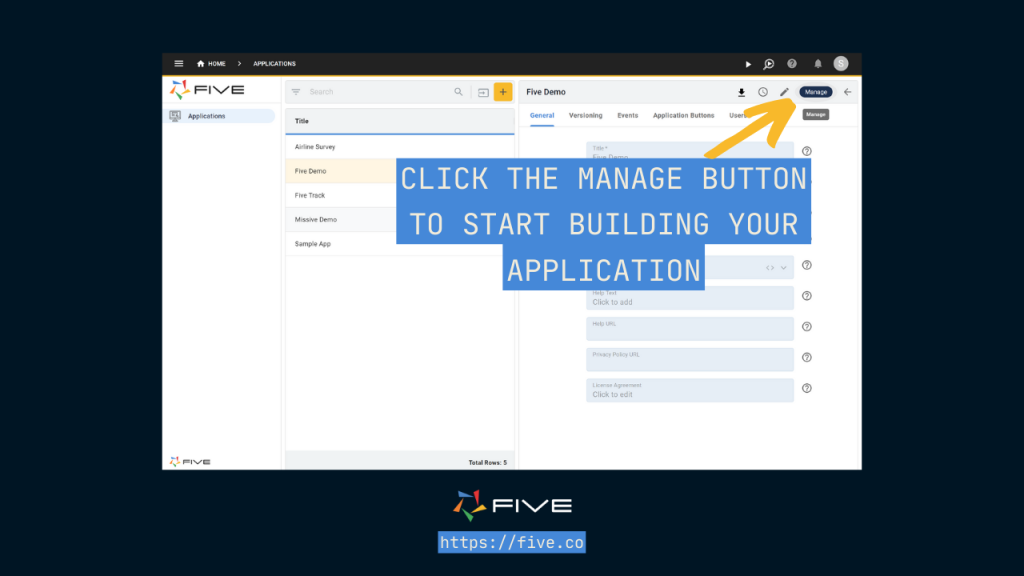
- Click on Applications and create a new application named “Secure Portal.”
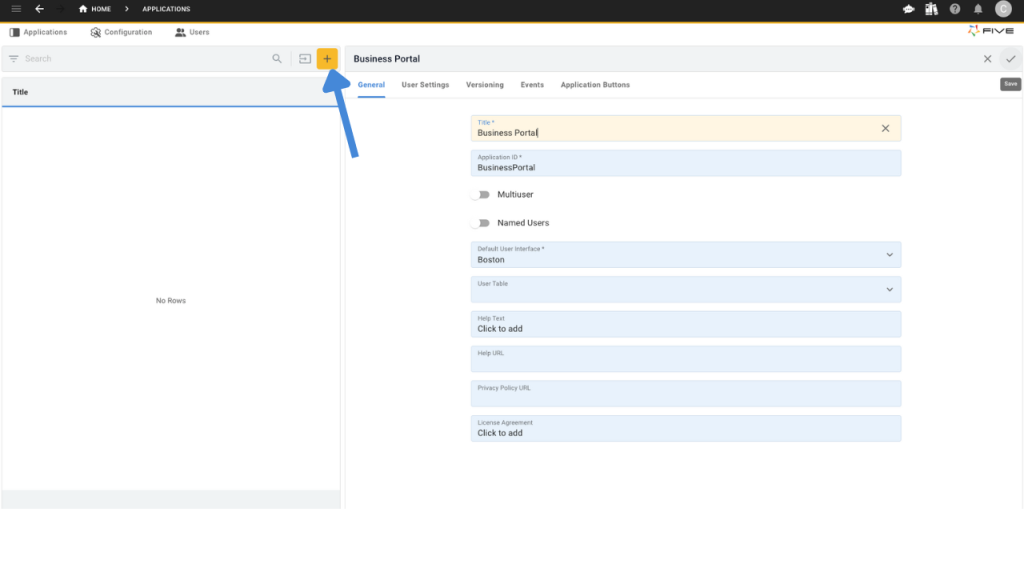
- Deploy your application using the Deploy to Development button.
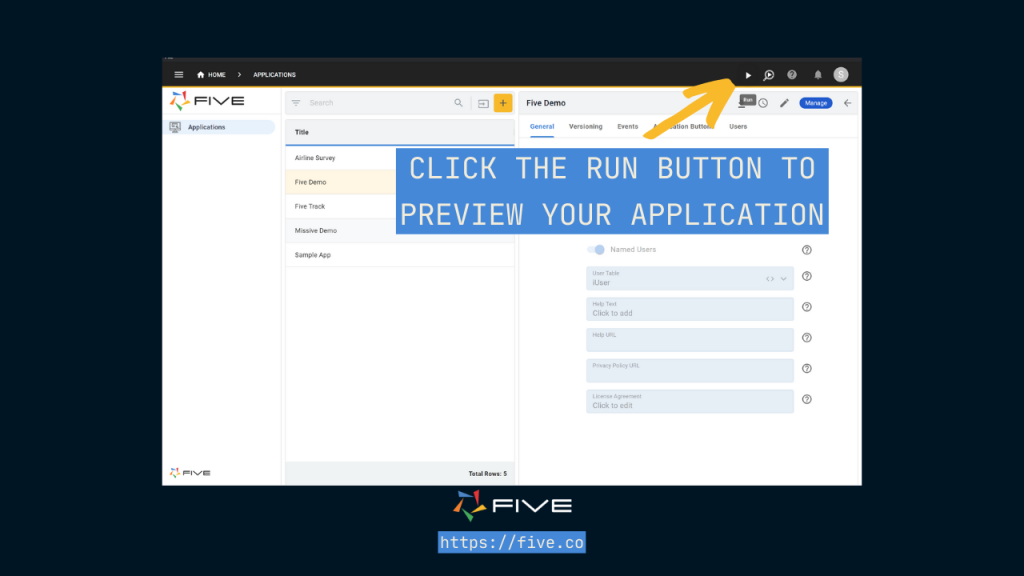
- Click Run to preview your application.
Step 2: Setting Up Database Tables
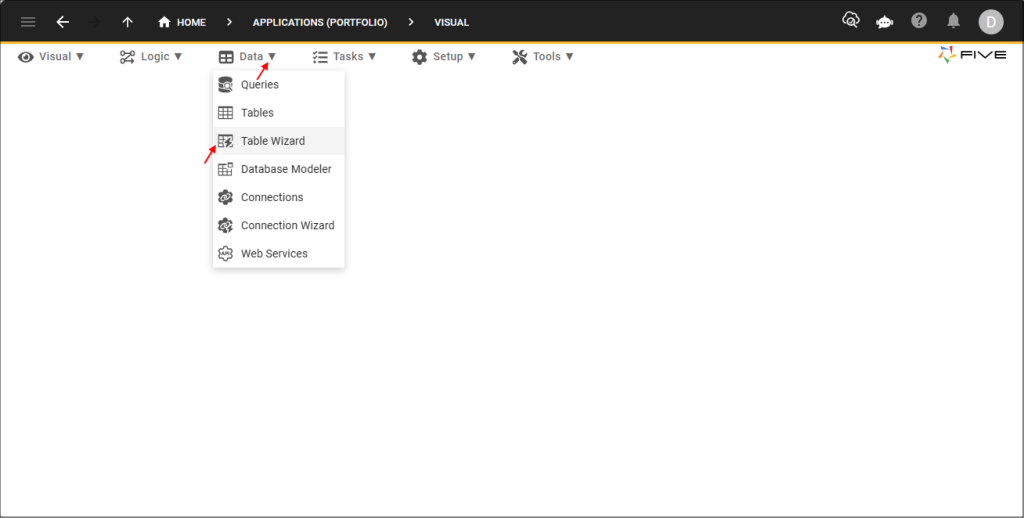
Navigate to the Table Wizard
- Go to Data > Table Wizard.
- Create tables for core entities like Products, Orders, and ProductOrders (for many-to-many relationships).
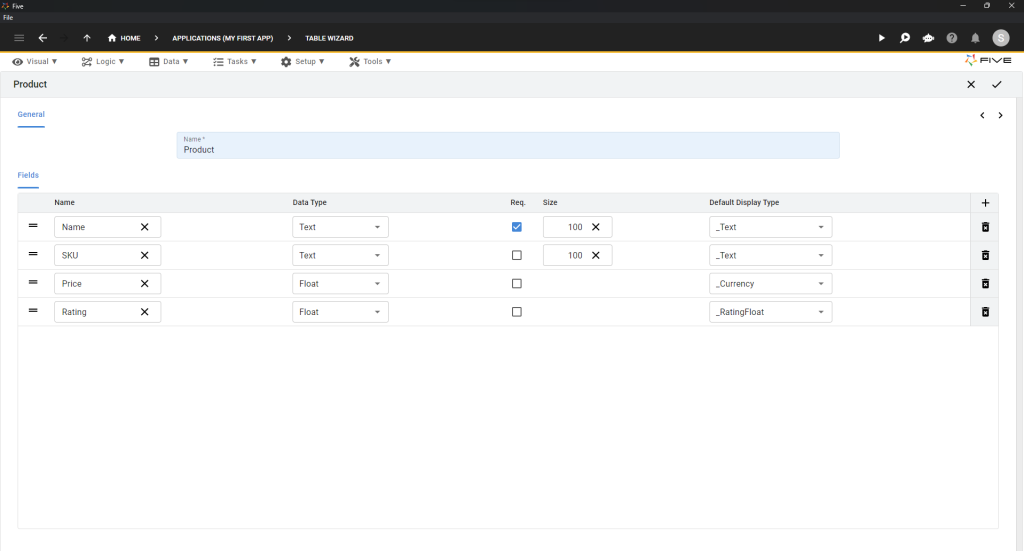
The Products Table
- In the Name field, enter “Product”.
- Add fields by clicking the Plus ➕ icon.
Example Product Table Structure:
| Name | Data Type | Req. | Size | Default Display Type |
| Name | Text | ✔️ | 100 | _Text |
| SKU | Text | 100 | _Text | |
| Price | Float | _Currency | ||
| Rating | Float | _RatingFloat |
- Once your table matches the structure shown, click the Tick ✔️ icon to save.
- Confirm in the Table Upgrade dialog by clicking Save.
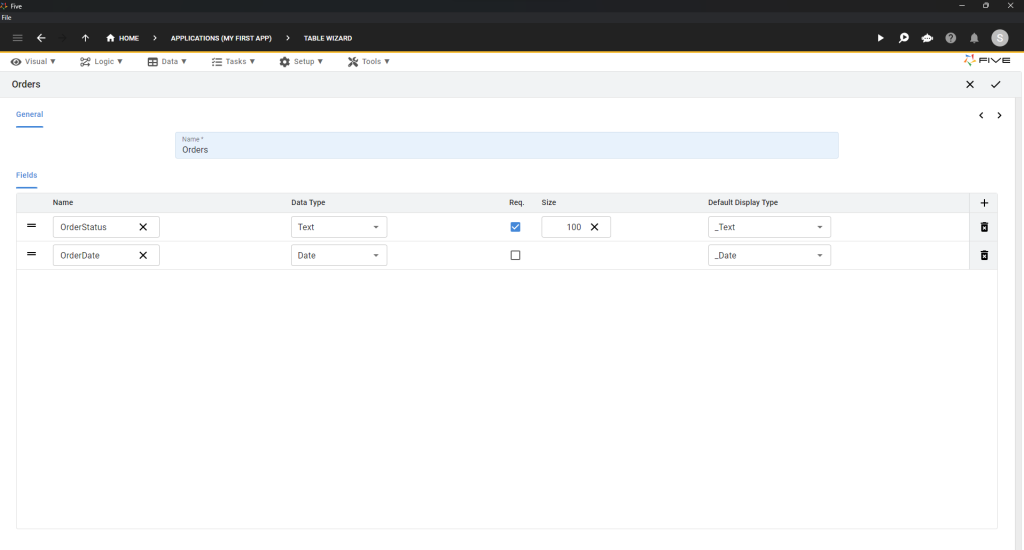
The Orders Table
- Repeat the above steps for your “Orders” table.
| Name | Data Type | Req. | Size | Default Display Type |
| OrderStatus | Text | ✔️ | 100 | _Text |
| OrderDate | Date | 100 | _Date |
2. Click the Tick ✔️ icon to save.
The ProductOrders Table
The ProductOrders table is a junction table for establishing a many-to-many relationship between Products and Orders.
- Open the Table Wizard.
- In the Name field, enter “ProductOrders”.
- Click the Right Arrow > icon.
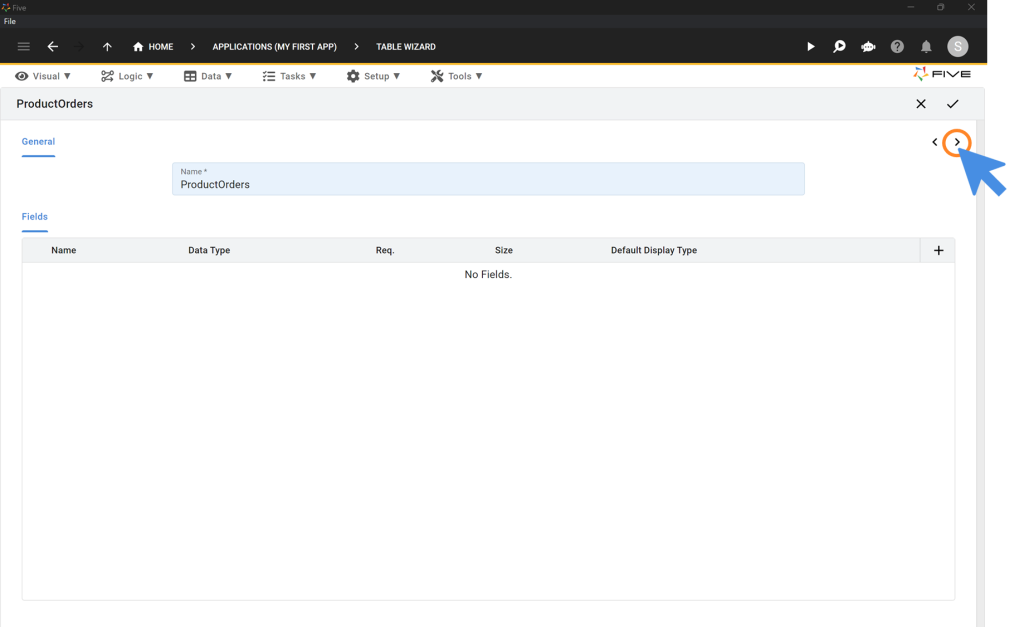
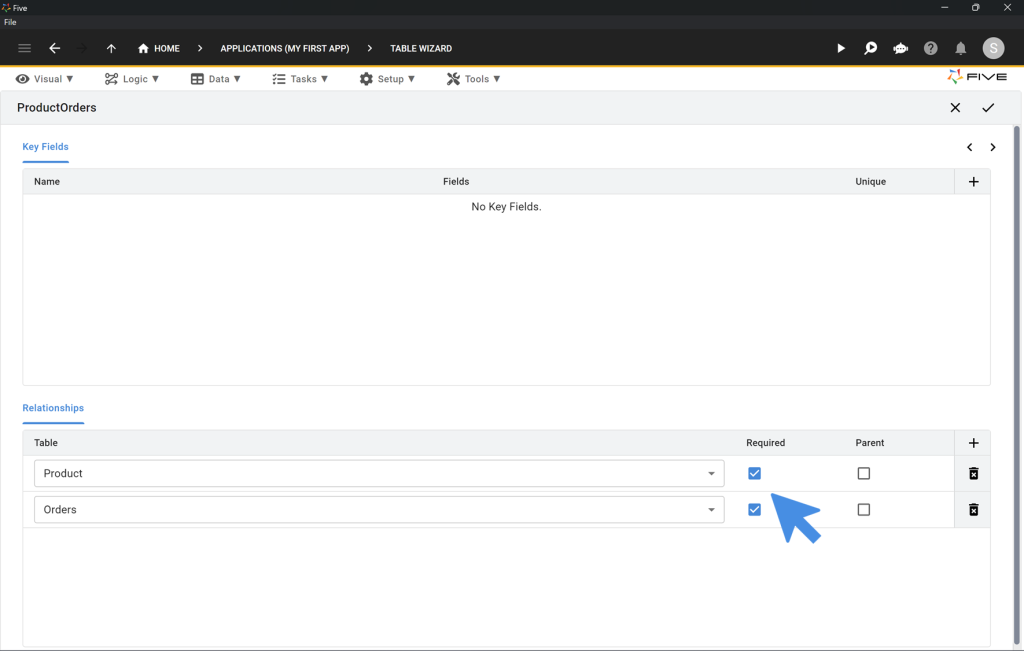
- In the Relationships area, click the Plus ➕ icon.
- Add relationships to the Product and Orders tables, marking both as Required.
- Once the relationships are defined, click the Tick ✔️ icon to save.
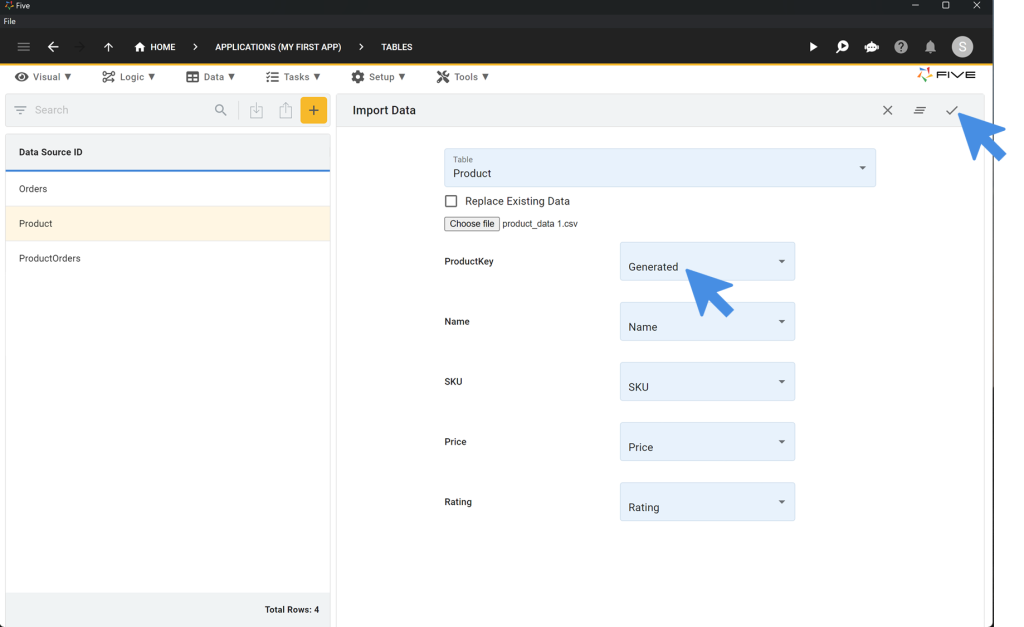
Step 3: Importing Data For Your Secure Portal
- Import initial data using CSV files into your database tables (e.g., Products).
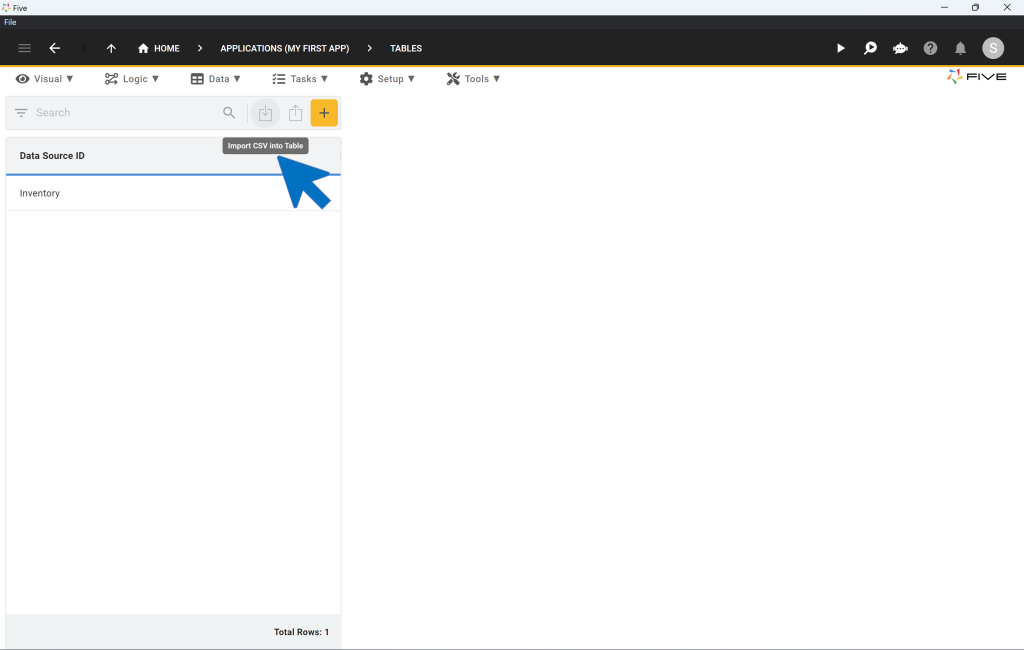
- From the dropdown menu, choose the Product table.
- Click on the Choose File button and select the CSV file available for download from the top of this guide.
- Select “Generated” for ProductKey. The platform will automatically map the remaining fields from your database to the corresponding columns in the CSV file.
- Click the ✔️ icon to confirm the data import. A confirmation pop-up will indicate, “CSV import completed successfully.”
Use Form Wizard to Create Forms
Use Visual > Form Wizard to create forms for data entry and management (e.g., Products and Orders).
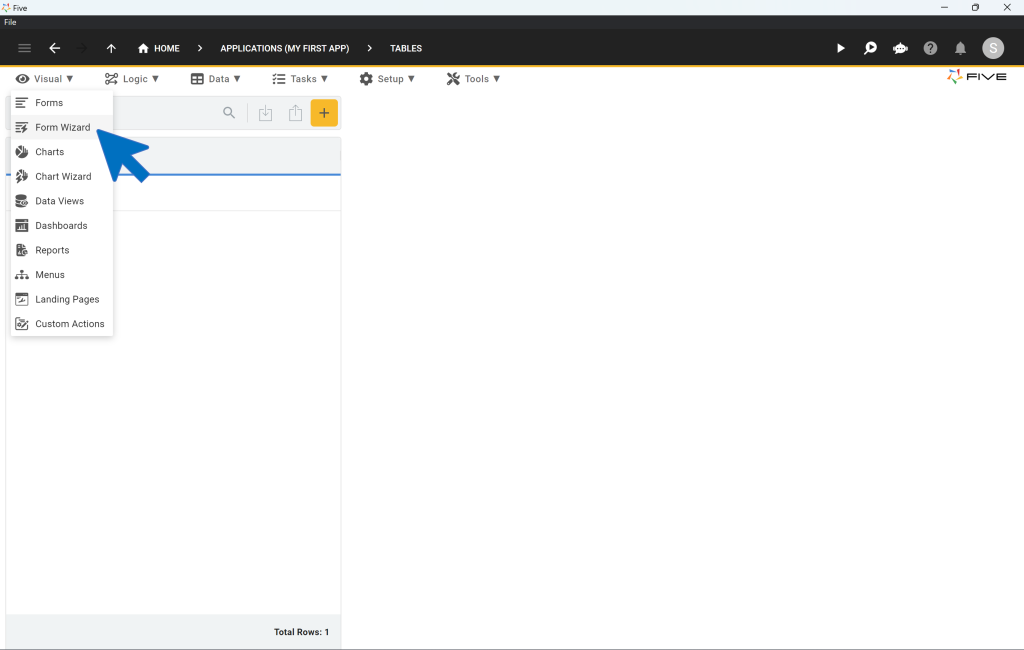
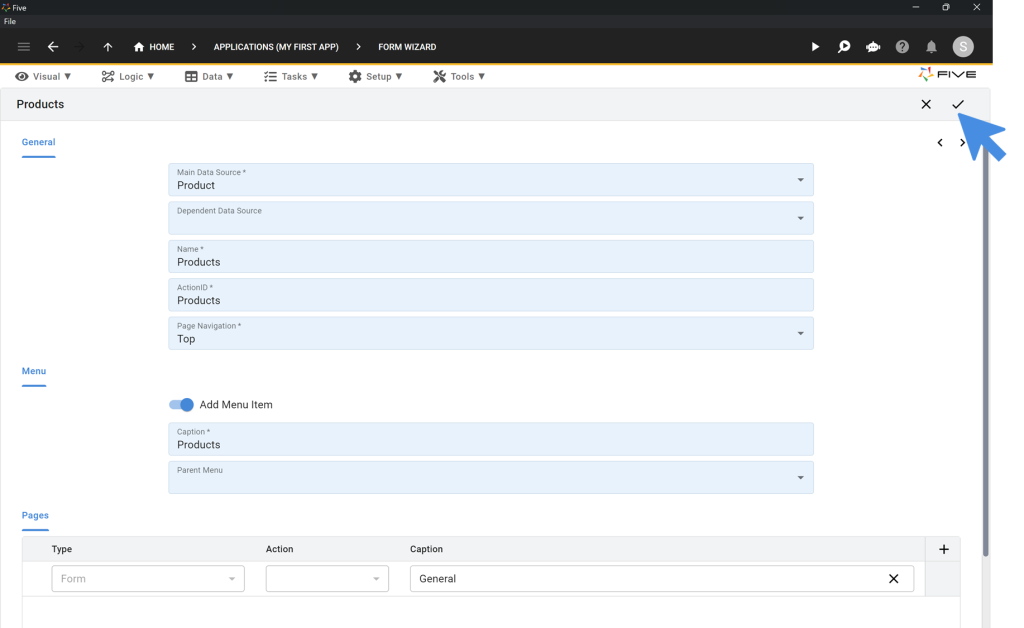
Create the Product Form:
- In the Main Data Source field, select Product.
- Click the Tick ✔️ icon to save.
Create the Orders Form:
- Repeat the same steps, selecting Orders in the Main Data Source field.
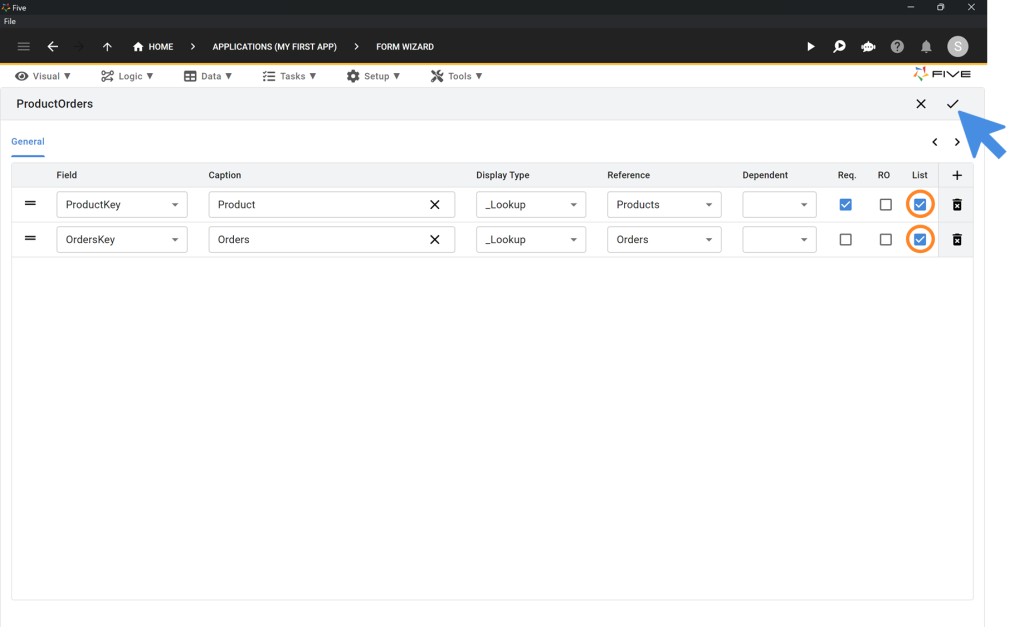
Create the ProductOrders Form:
- In the Main Data Source field, select ProductOrders.
- Toggle the Add Menu Item to off.
- Click the Right Arrow > icon.
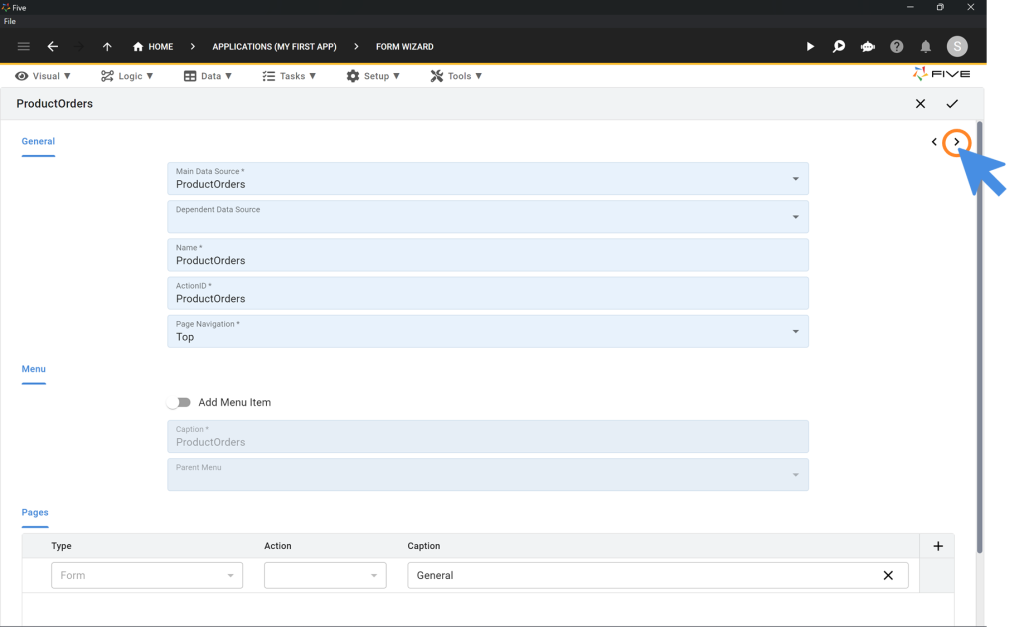
- Tick the List box for both fields: ProductKey and OrdersKey.
- Click the Tick ✔️ icon to save.
Adding a Page to a Form
- Click on Visual > Forms.
- Select the Orders form from the list on the left.
- Click on Pages on the right.
- Click the Plus ➕ icon.
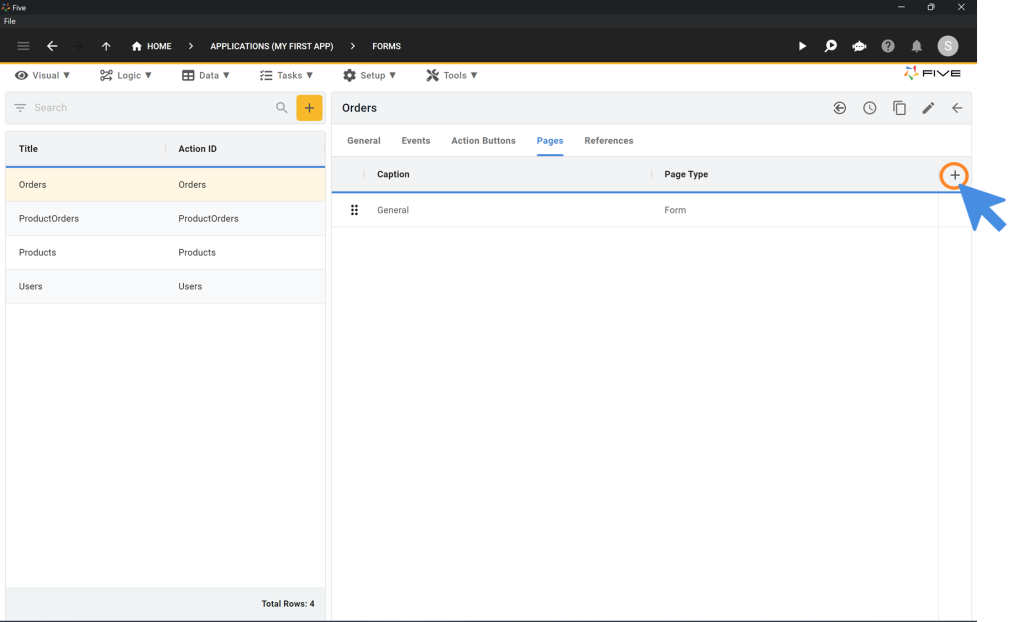
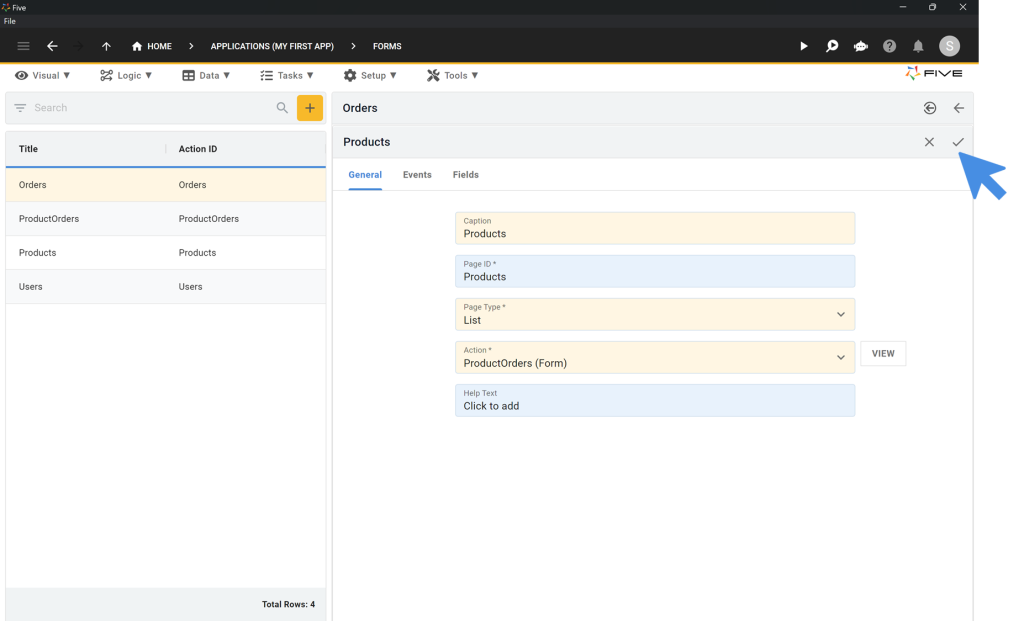
- Change the Page Type to List.
- Enter “Products” in the Caption field and select ProductOrders (Form) as Action.
- Click the Tick ✔️ icon to save.
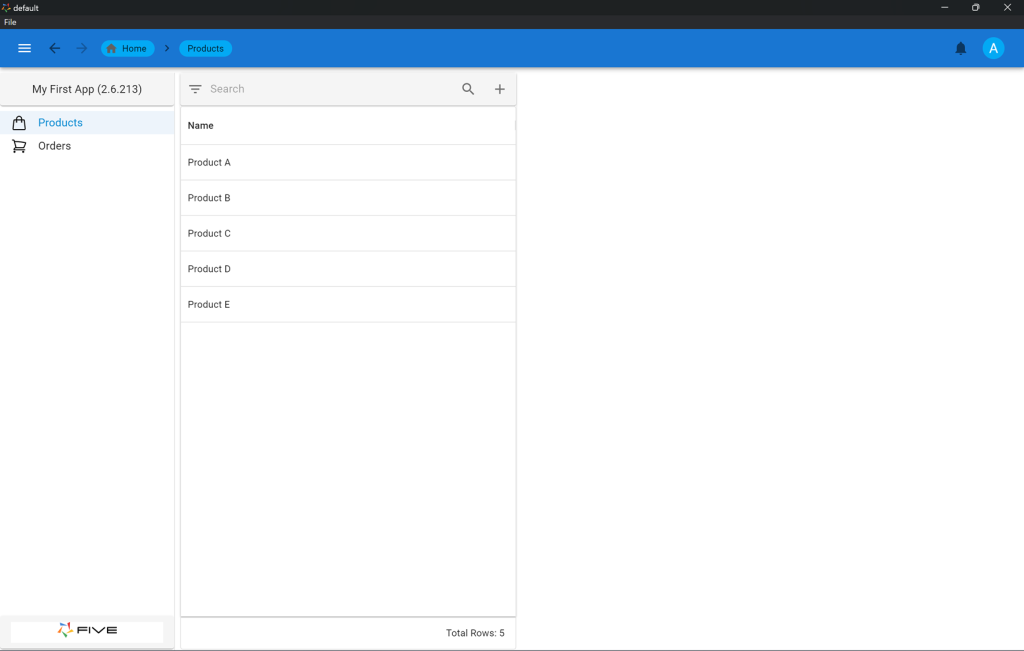
Step 4: Preview Your Web Portal
- Click on the Run ▶️ icon in the top right corner to preview your application.
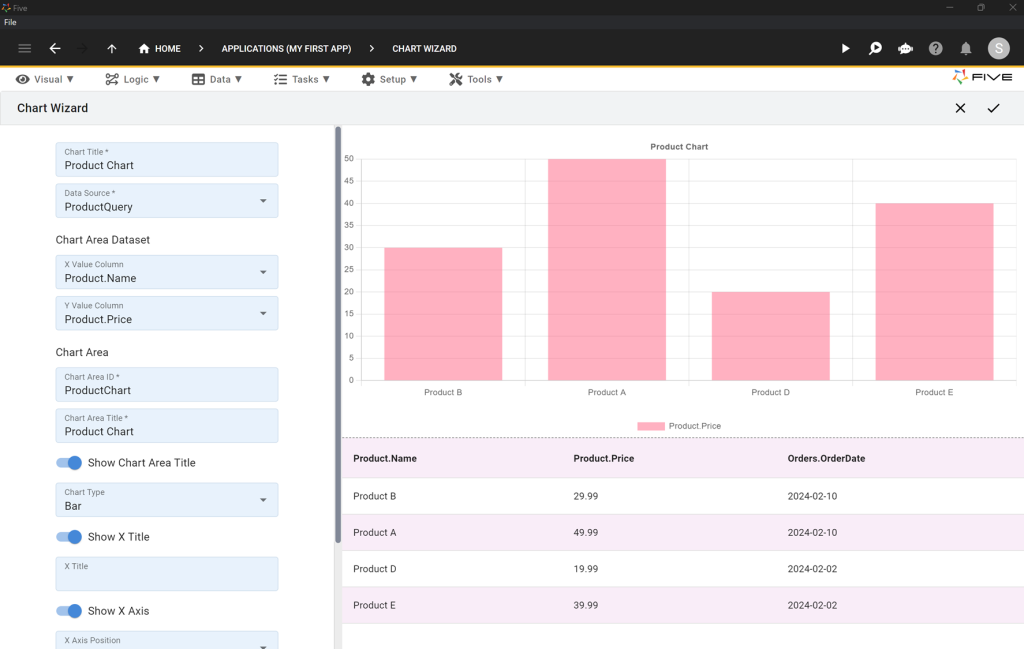
Generating Charts For Your Web Portal
- Utilize Visual > Chart Wizard to create visual representations (e.g., sales trends).
- Fill in all required fields, choosing your X Value Column and Y Value Column.
- Save by clicking the Tick ✔️ icon in the top right corner.
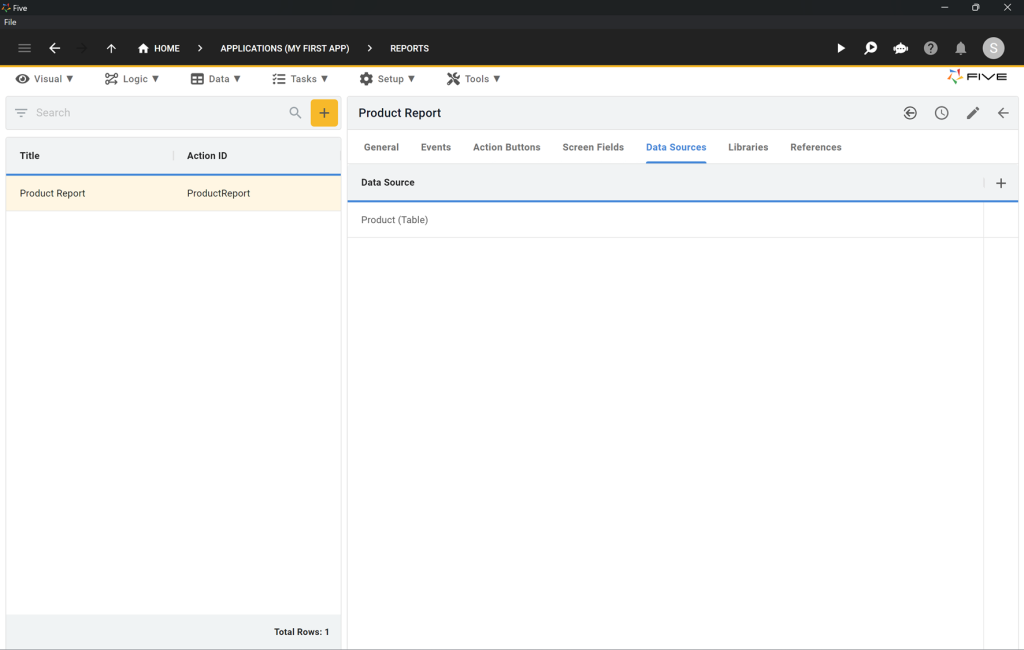
Creating PDF Reports
- Click on Visual > Reports.
- Click on the yellow Plus icon.
- Enter “Product Report” in the Title field.
- Click on Data Sources.

- Click the Plus ➕ icon to add a data source.
- Select Product (Table) as the Data Source.
- Click the Tick ✔️ icon to save.
- Return to General.
- Click on the Template field to open Five’s report template editor.
- Click on the </> icon.
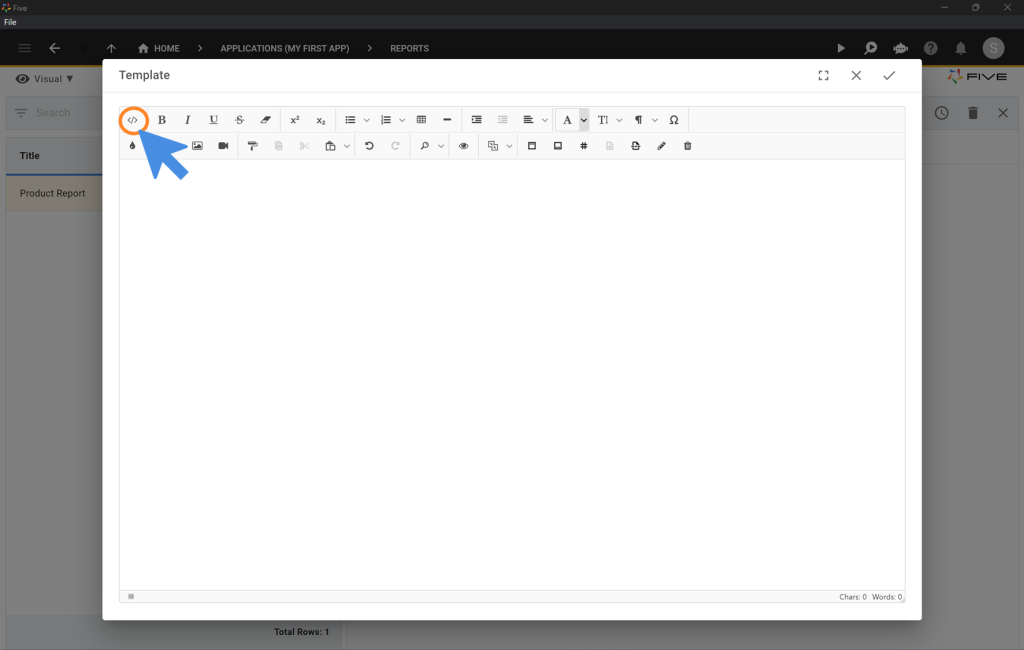
- Delete all code in the editor and replace it with the HTML provided.
<style>
    .demo tr {
      background-color: lightgrey
    }

</style>

<div><img src="data:image/png;base64,iVBORw0KGgoAAAANSUhEUgAAAKMAAAAtCAYAAADC1tsoAAAABmJLR0QA/wD/AP+gvaeTAAAHlklEQVR42u2cbWxTVRjHLxvv8hJQM1HRgdB2dLyE3rYMQizQtRs4hA8V1iIqiQu+EBK/EAHZ5YOsiwtRfIkjSIIGWW9AhX2g3YAFPhiNiy8gbEMmuHUImYKArN0YOz6nux13d/d2ve29t3M7/+SfLO2559777JfnnOeck1LUABCiqLQWs7kgaKUrKCIiMeWX/vak2hAGLSZXk4W+0GyhEfgnEnUiUTm89d/keutrwZudu89PVqrf80bjyKCFXt9sMV3kIIz6NIk6kahySxvKAETEOZRbWs/aSy7aKYSGJdpnk9X8SrOZbhFAyNlUSaJOJA5jSf1GHox8N8B3W5a9ey5Dbp8AXak4iNjmgyTqRKLCWVACxqg7Hd66agDTZWNqhscFI01bpGAMWsyfkKgTiSqvpC6zHxj5boFh3AsAT++naBkG4F2RyIxeEnUiUTEMSgPIwjKAxL6Ps6Xd27A+Z3fzGNF5o4XeLQYjfL6NRJ1Iet7ora+TCSPfN+2lDeVOb8Ncfp8tNL1IYqh+k0ScKMa8saEyCRj5rnWU1BXZmPPj8PqiWEWNl3tIxIkktbTswtMAkUkpL9tVp4sUMmb6o77DtGkViTiRbKGt2RnJXB+0mpb0zYzzl5LIEskD8R1DDtqhW51UHy5XOlTP1/kw/mGdbyLRJZKREbOmoGJ9I2JmTEi2Lxiqy3tlR6t1psKPi3eK1oK3aODHBPd+ClzEs5RywKNS+C/FMVoS4/s08ErBu6hlGSAymaMBxO9RsU6Rbbsmq8nBh/F3qzVD4UDjF0QaWZjVCwTfi8kGDoFPgCekAMSR4APc870u0aZMwxjKgLFY/xkYIUa/QZEsa7MNBwhbe4DMyRmjcLDLBzCMc8C3eN+f5bKpVpoEPsW7/32wS6TdDwMORsTo3uJA7ERvz3hUqYgEzfR+DsYOFQLOh/EfcK2KzpIJ43jwcUGbP8G0BiBOA18Q3PsqeLZI21pemxvgRhUdF4h2APEeB+MpJaMC5xlXcDC2qgzjMY2HwHiGabyfv1fQ7l/w8yo+lxl8TXDPWFmZDyOT2oKFMWQChK0RELF3GDYp2X+tyTQCquobAGPjEIQxWkDgf3IXr20nVxQpLbyOe1fwXFX9zFcHBoyIMY4DAM89AFHfhbY9M1Xp+zRb6S9UOuX9f4AxqpfA7YJryrnsqYQ2c/NCfv/7wCP6yxcphxGfroEhme0BMTJEG75T415450XqlHeH3zhXIRjPcEWGWh6bJIxYeNH/puA6f5KVdjp4j6DPLhlg8WH8ADxdRUtVzoadvUDszoxqDB3UZZtttPBgLao2TQwFjIfCAWNXyG98dRBW01Iygq8Irv0FnMiI9BD4qKCvMLhQzkwqpdU0FCyrIkOyEMbter1ambhpAb0y+ndbddYCgLARjDh3tvuN7iECI8UtoAuXVFrA85Ps4y/wYrnT+pTBiLbPzALwbvUBkdGfVXVaAGuOiHWlA3RbAL4OHogPgAxkrxkiMEaz2jFBH3fAzyWYXS+BdYnUmCmBEQqWyQDdpT4gRmzYqSaMbYHsqeFA9mkRCPnGkBYkCONJlec7oxSGMTrf+1DQD66034hxzTKReee34ETXhrWaM2Y+ANFFpQN0x8VBxJlx5rwVB92TsJUGsb0qezXMD//uB8So28OBWfmDsJqWWwljMNIE7V7GNZ+gHQtOZmdL+2oaMuL7kiAW6y9H2+X5PHuch9YtVuSelaaxANfeOCHku7nt5NwnhhCMWPiUVJugz6+4Kj66VoniAHZgwwjHwV6MASL2e9G2ziPrpjh97tY8n5txwRwv4Wzon2UEqM7GCd89cG24yugN+7PsqMY2fIhlxqgWglsF/eLlti8Fn+HsuEGhe2oHI2KyFkBWDMeEkTEs5F/j9Hk2ApDIyRbW5B/xyPoJFISoYQBWEfhuDPju94Yvc/QQWPSOV3h+VRejCLgNzlfwfnwYr1Jq7u/DMs6OyLEwRt8mDqL+KmIEqR6Agsx4MgKkz30zr8LtiuetbtfoHgHIjkkAiJdyyturZrlunzA8rFAgByOMWPinZk6LgBgEz1P4XtpX05EChtFNh73nAsiEDD6zCDBeB38s9oTLK9boAMQQByRyVrg/L6gsGiv1RlCgLAXYgj3w+Y2tUD2zOEuGAnOmqQTEYIWR4qr3g7z+fwar8UNdB6iBcoQMbZoheQoZINzaA2M3kL8uZz29jiHh+V0okM0AdHcAvmq8jtgRmG3qk23VEV77c3FepDGMGRyQUashXLjg3ZSNVN/tSKU0nqvmvSp7V1JPaQPQnKz7Rz6QDp+7DT7b3D0fpdLwumCoavaziDWOpIiI1FQu654HEN7rlSG7fViNNUkiophy+grLRGDEw/aVXJ9nEYkQkXYzdShcAL5LokBC1sRrkqA0EikijbKjewm4SwJIhJeCcg+tfZxEikgrIPdLwcj52sqjG8aTSBGpLjvrmgjAtUjD6PGRKBFpWcy8IAFjp+NwoYFEiEjr4fprIYwOn+dTEhkizYULFbxnzV8Il3uggohIMTlY92s9lXSFp4REhChlwuuKcMTsTCRDsq7JJCJEKVUeu04f3acmIupP/wHYJhviTK/+pwAAAABJRU5ErkJggg==" style=""></div>
<div><br></div>
<h1>Report</h1>
<table style="letter-spacing: 0.00938em; width: 100%; font-size: 1rem;" class="demo">
    <tbody>
        <tr style="border-bottom: 2px solid black;" class="fiveReportHeaderRepeat-Level1">
            <td style="width: 28.1305%; background-color: rgb(153, 153, 153); color: rgb(255, 255, 255); text-align: left;">Name</td>

            <td style="width: 50.97%; background-color: rgb(153, 153, 153); color: rgb(255, 255, 255); text-align: left;">SKU</td>

            <td style="width: 18.254%; text-align: left; background-color: rgb(153, 153, 153); color: rgb(255, 255, 255);">Price</td>
        </tr>

        <tr class="fiveReportHelper" contenteditable="false">
            <td class="fiveReportHelper">{{#each @root.[Product].[Records] as | Product |}}</td>
            <td><br></td>
            <td><br></td>
        </tr>
        <tr class="" contenteditable="false">

            <td style="text-align: left;">{{Product.[Name]}}</td>

            <td style="text-align: left;">{{Product.[SKU]}}</td>

            <td style="text-align: left;">{{Product.[Price]}}</td>
        </tr>
        <tr class="fiveReportHelper" contenteditable="false">
            <td class="fiveReportHelper">{{/each}}</td>
            <td><br></td>
            <td><br></td>
        </tr>

    </tbody>
</table>
<div><br></div>

<div style="text-align: center;  display: flex; justify-content: center; align-items: center;">
    <div style="width: 150mm; height: 125mm; border: 1px dashed black; display: flex; justify-content: center; align-items: center;">   {{{_Chart 'ProductChart'}}}</div>
</div>
<div><br></div>
<div><br></div>
<div><br></div>
<div><br></div>

<table class="fiveReportFooter-everyPage" style="width: 100%; height: 10mm;">
    <tbody>
        <tr>
            <td style="text-align: right;"><span style="font-size: 12px;"><em>Page <five.pageNumber.current.arabic> of <five.pageNumber.total.arabic></em></span></td>

        </tr>
    </tbody>


</table>
By following these steps, you’ll have a fully functional database with an intuitive interface and robust reporting capabilities, all set to enhance your user experience.
Final Touches To Your Secure Portal
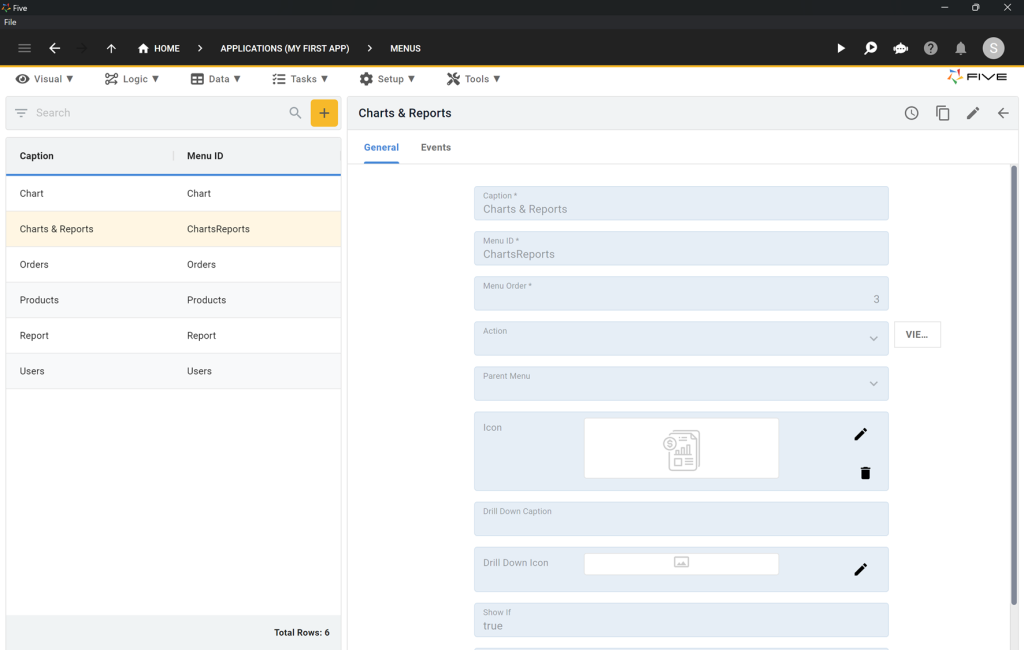
Creating Menus
Navigate to Menus:
- Go to Visual > Menus.
- Click on the yellow Plus icon.
Create a Parent Menu:
- Type “Charts & Reports” into the Caption field.
- Enter “3” into Menu Order.
- Click the Tick ✔️ icon to save your menu.
Add Menu Items:
- Click the yellow Plus icon again to create new menu items for your chart and report.
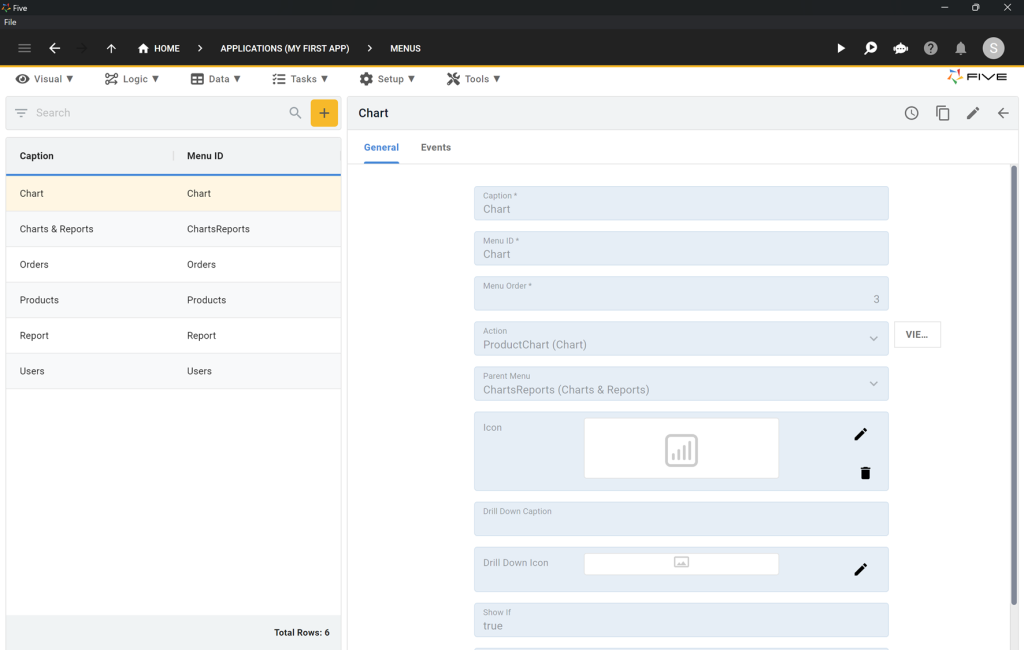
Chart Menu Settings:
- Caption: Chart
- Action: (select the appropriate action for your chart)
- Parent Menu: Charts & Reports
- Click the Tick ✔️ icon to save your menu.
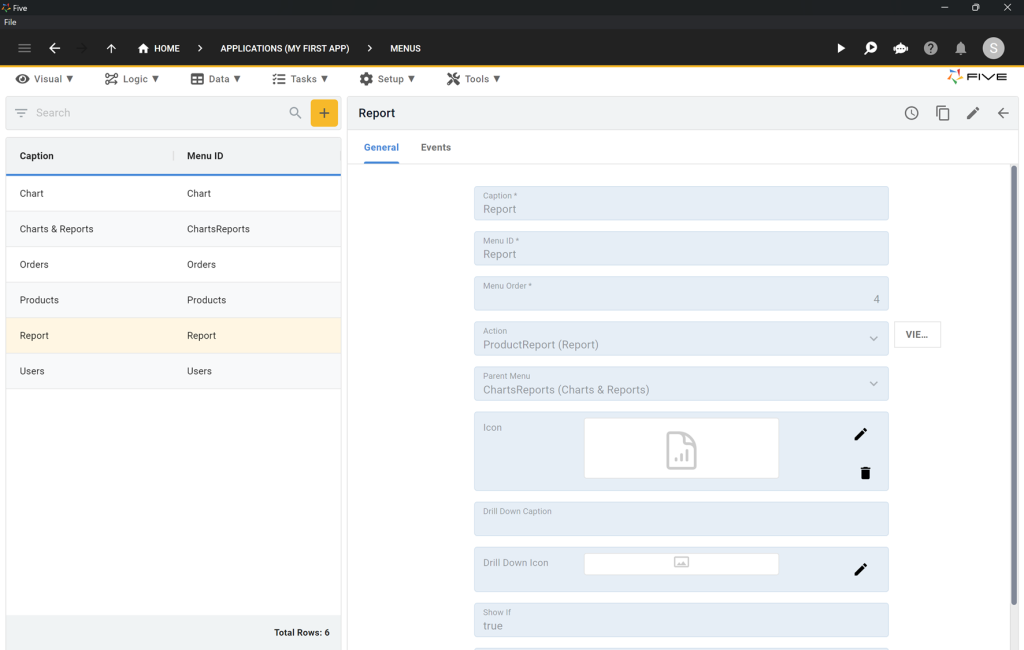
Report Menu Settings:
- Caption: Report
- Action: (select the appropriate action for your report)
- Parent Menu: Charts & Reports
- Click the Tick ✔️ icon to save your menu.
Testing Your Application
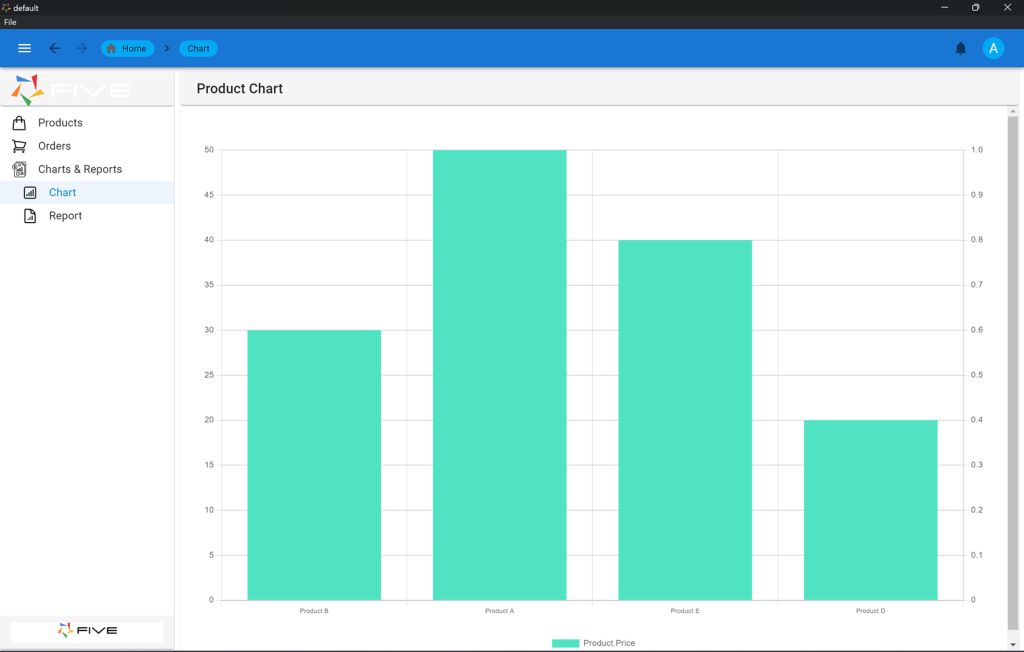
Run Your App:
- Ensure that your forms, charts, and reports are functioning correctly.
- Verify that clicking on Chart in the menu on the left displays your chart.
- Test your report to confirm that you can view a PDF document in your business portal.
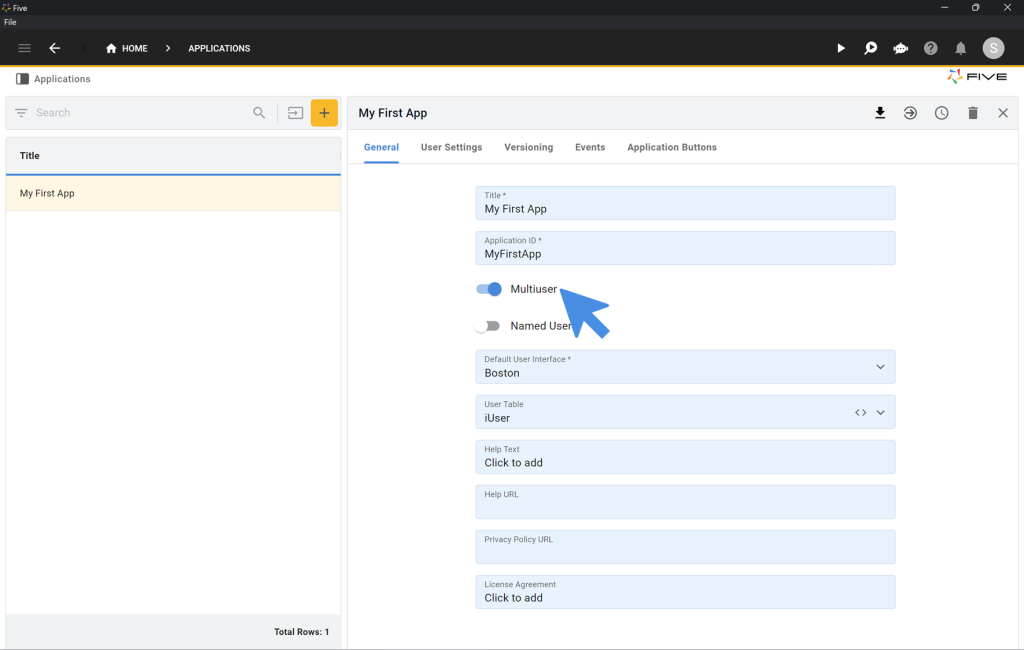
Adding User Management and Logins
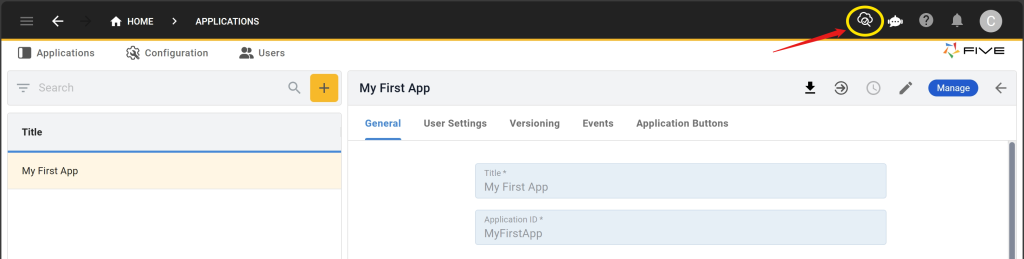
Enable Multiuser Functionality:
- Click on Applications (My First App) in the top navigation bar.
- Toggle the Multiuser switch to “On” to add a login screen and user management to your application.
- Click the Tick ✔️ icon to save.
By following these steps, you can finalize and deploy your web portal, ensuring it includes user-friendly navigation, comprehensive data visualization, and secure user management.
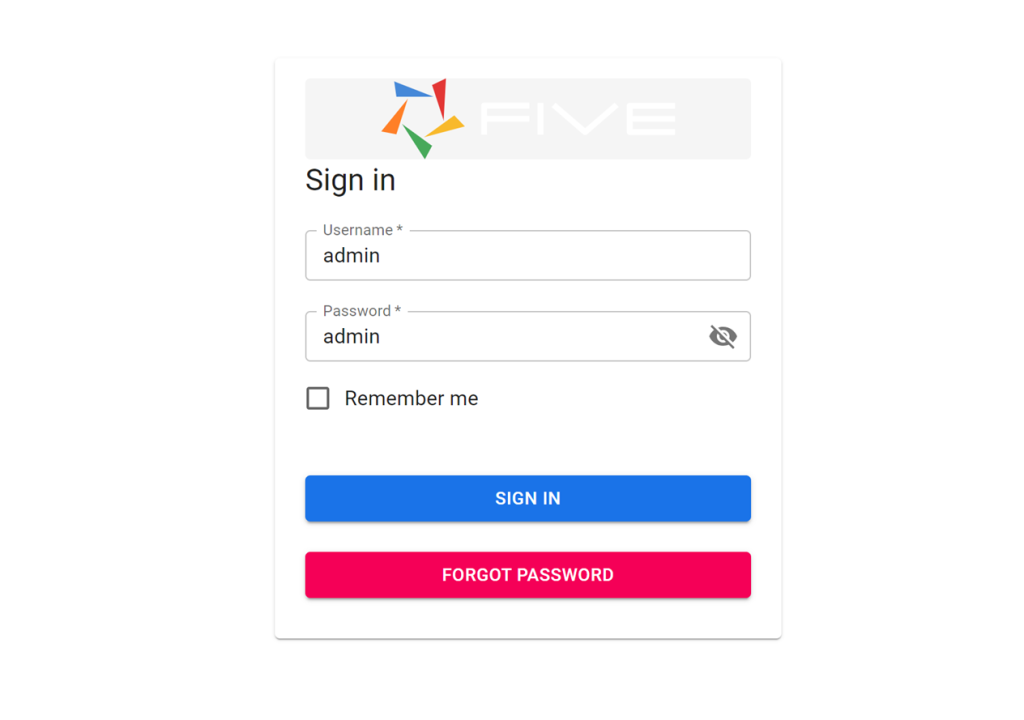
Run your web portal again. You will be greeted by a login screen.
Use user name admin and password admin to log in to your application!
Conclusion: How to Create a Secure Portal
Follow this full tutorial to continuing building you first web app: Code-Along: Build & Deploy a Full-Stack Web App
Finding Help in Five
In case you get stuck during the development process, we’re here to help! Continue developing your application by accessing these resources:
- Five’s User Community: Visit https://five.org to ask questions or get inspiration from other users.
- Five’s Documentation: Visit help.five.org to access Five’s comprehensive documentation.