User Management: Logins & Authentication [Excel to Web App – Part 4]
Adding a Login Screen to Your App [Excel to Web App – Part 4]
Welcome to part 4 of our five-part Excel to Web App guide.
In this step, we want to add logins to our application. After all, having a good-looking application that can perform calculations is great. But what’s the point of having an application when the data it stores isn’t protected from unauthorized access?
By adding a login to our application, we can ensure that only registered users can view and edit our data.
Convert Your Spreadsheet Into a Beautiful Web App: Follow Our 5-Part Guide
This blog post is part 4 of a 5-part series on converting Excel spreadsheets to web apps. To view the other parts, follow the links here:
- Step 1: Excel to Web App – Creating a Database and Forms
- Step 2: Excel to Web App – Calculating a Field
- Step 3: Excel to Web App – Adding a Theme
- Step 5: Excel to Web App – Creating Charts and Dashboards
This beginner’s guide on converting an Excel spreadsheet to a web app does not require a background in coding. Only make sure to have access to Five. Sign up for a free trial here!
Video: Adding a Login Screen to Your Application
To add user management, including a login screen and authentication to your application, watch our Developer Pranoy turn a single-user application into a multi-user application.
Adding Logins To An Application
To add logins to your application, we start by opening Five and selecting an application.
Now, instead of clicking on the blue ‘Manage’ button, click on the Edit icon indicated by the ✏️ symbol.
Next up, click on the toggle button that says Multiuser to add a login and user management to your application.
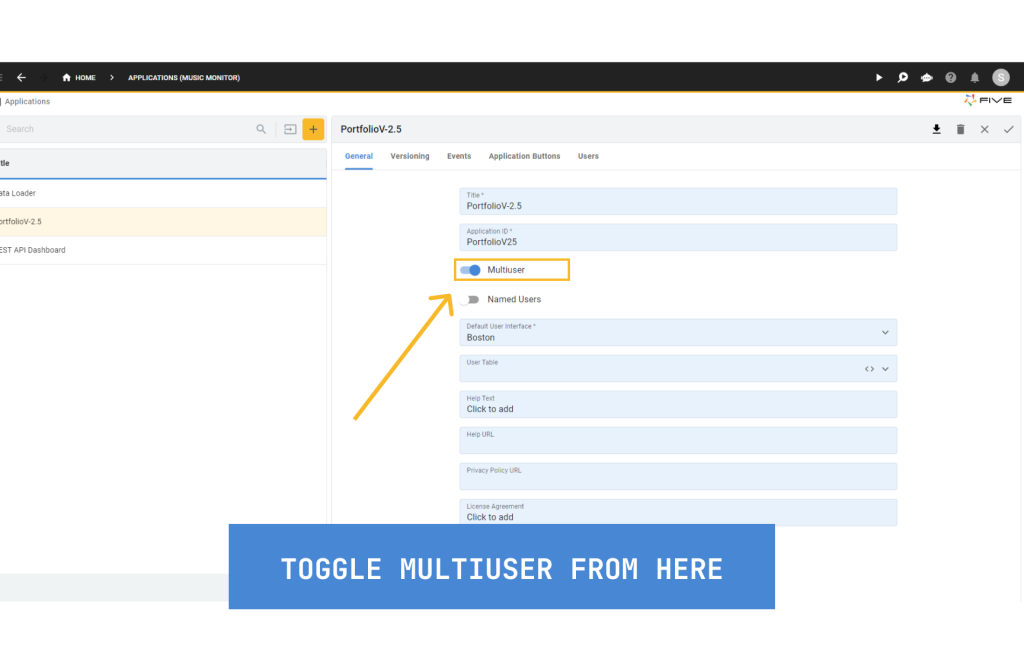
Clicking this button adds authentication to your app. Your application will now have a login screen and a forgot password option. The multiuser toggle also automatically adds a new user table to your database. The user table allows you to manage your users and keep track of user accounts.
Let’s run the application to see what has changed.
To run and preview your application, click on the Run button in the top right corner. You will now be greeted with a login page.
NOTE: When logging into your application for the first time, the username and password are admin and admin.

After logging in for the first time, Five will now prompt you to update your password to something more secure. After updating, you can access your application. Five has now automatically added a new User menu item to your application. Inside the User menu, you can assign new accounts or administer existing accounts.
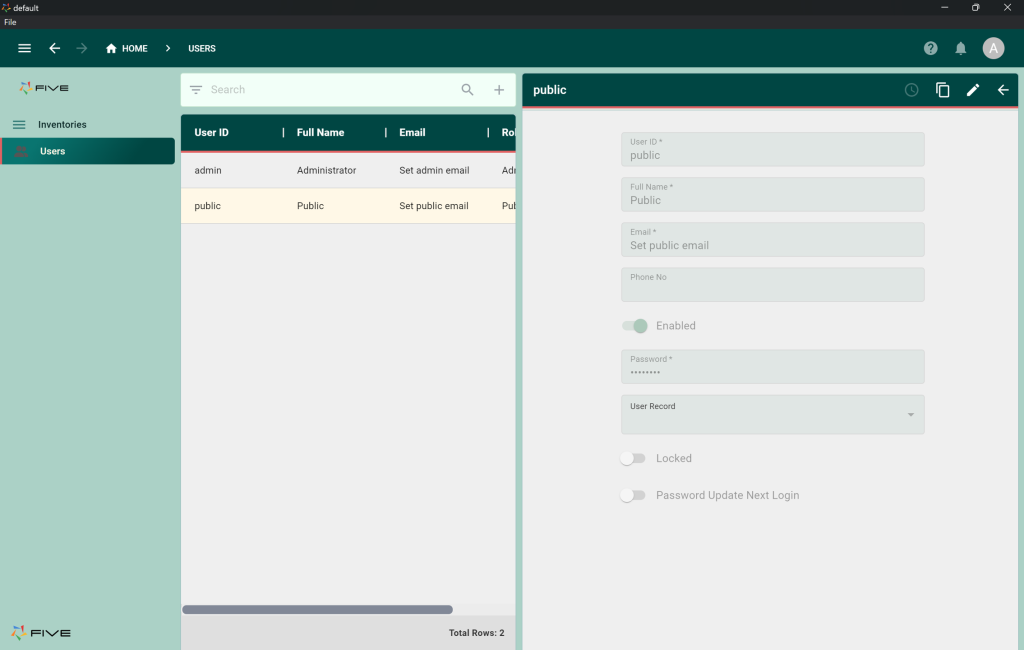
Congratulations! You have successfully converted your application into a multiuser app with just a click of a button!
User Roles And Permissions
Now that we have a working multiuser app, let’s also talk about how you can manage user roles and permissions inside Five.
Usually, different users have different access rights: Tom from sales maybe able to see sales figures. But Jack from HR cannot. Governing access to our application can be achieved through user roles.
To set up different user roles, follow these steps.
First, go back into the Five development environment and click on the blue Manage button to enter the development environment for your application.
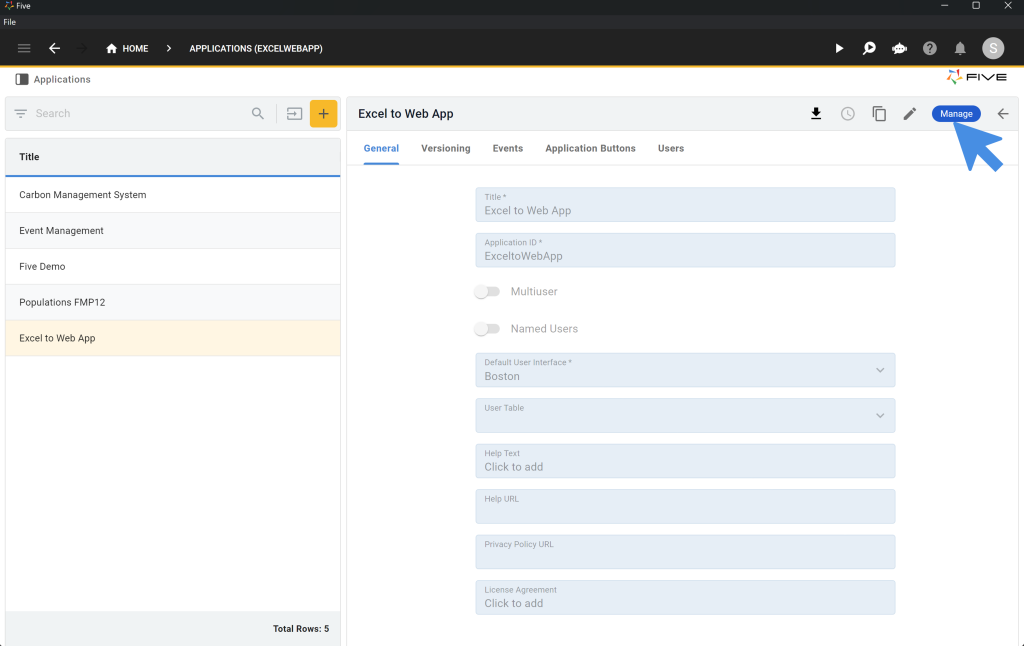
Now, click on Setup and then on User Roles. From this menu, you will be able to create user roles for your application.
We won’t go into all the details of creating roles, but let’s understand the big picture of what roles are there for.
You can create roles and assign them specific permissions, such as CRUD permissions (Create, Read, Update, and Delete) or User Interface (UI) permissions.
CRUD permissions govern access to data – who can do what with what data?
UI permissions govern access to user interface features – who can see what inside the application?
For example, one user role, a “Viewer” might only be able to read new records, but not update or delete records. Another user role, an “Editor” might be able to update records.
Five’s user role management is designed to be intuitive. It allows you to easily define what each role can access and modify within your application. Simply assign the different permissions to a role and give it a name.
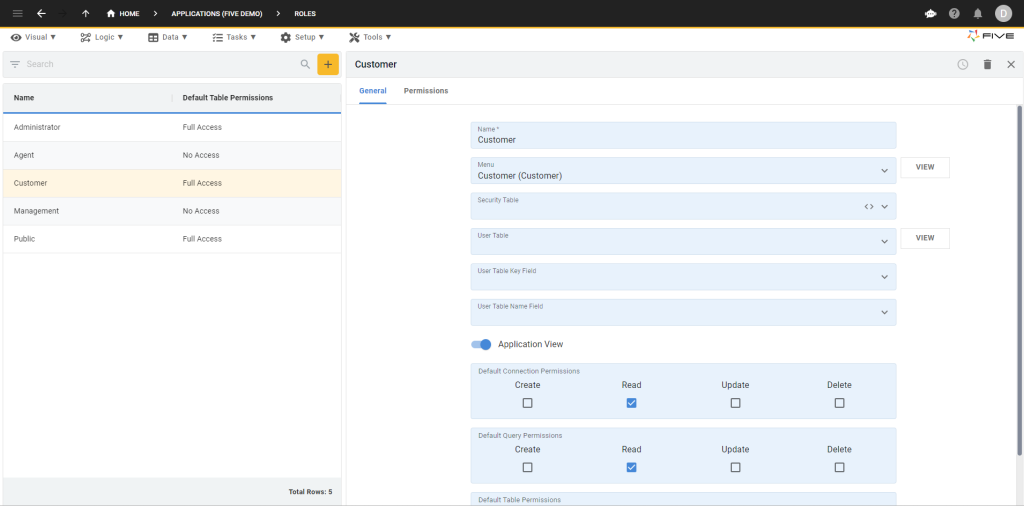
Five’s user roles can be made extremely granular as well. By clicking on the Permissions tab, you can assign each role CRUD permissions to individual data sources.
Overall, user roles are an extremely powerful tool to assign access to your application. They are also a big differentiator from a typical Excel application which cannot support such granular access rights and permissions.
Summary: User Logins & Roles
In this blog post, we learned how to transition from a single-user to a multiuser application using Five. By adding authentication to our app, we have introduced a login system and user management capabilities, which are fundamental for any collaborative or public-facing application.
Additionally, the management of user roles and permissions within Five is a powerful tool, allowing for the customization of access and permissions. This is particularly important for applications with varied user needs, where different levels of access rights are required.
In the next step, we will learn how to create charts and dashboards in Five.
Finding Help in Five
In case you get stuck during the development process, we’re here to help! Continue developing your application by accessing these resources:
- Five’s User Community: Visit https://five.org to ask questions or get inspiration from other users.
- Five’s Documentation: Visit help.five.org to access Five’s comprehensive documentation.
Five’s In-App Help
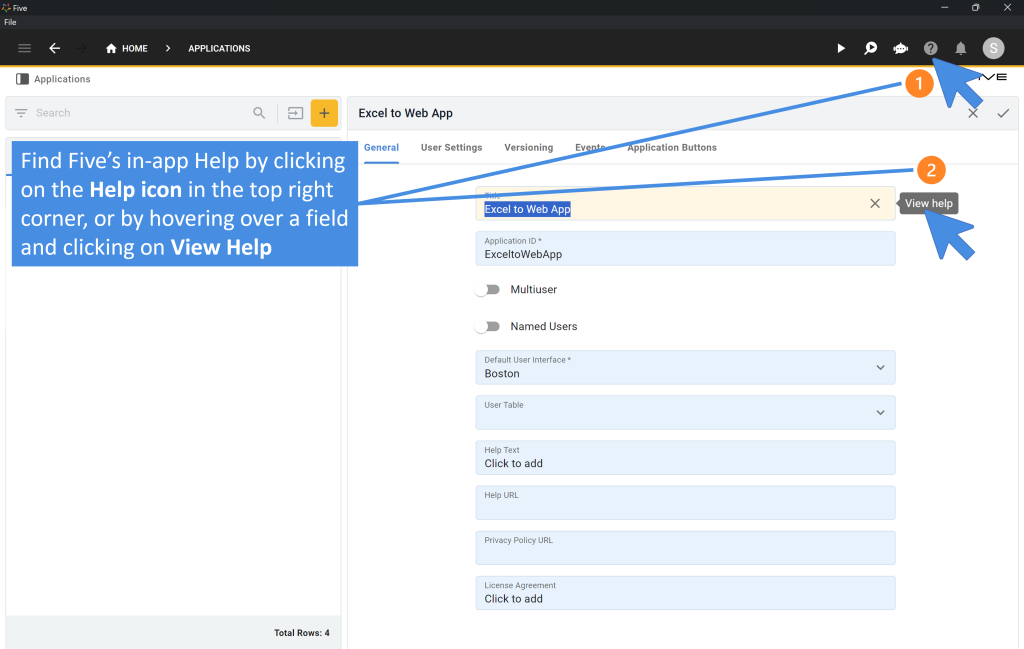
Last, find useful tips for your application development by clicking on Five’s in-app help available in the top right corner or on almost any field.
Get Your App Online For US$29.99 Per Month
To deploy your application, sign up for one of our paid plans, starting from US$29.99 per month and application. Your plan includes unlimited end-users and provides you with a custom URL to access the application online.
Host Your App Online
Select one of our hosting packages.
Starting from US$29.99 per app and month.
Unlimited end-users.
