How to Build a Business Portal in 6 Steps
Build a Business Portal Today (Faster & Easier)
An effective business portal can help client interactions, provide on-demand access to important information, and enhance your overall customer experience.
Follow these 5 steps to rapidly develop a custom business portal for your clients, vendors, or partners:
Step 1: Collect Relevant Information and Documents
The first step is determining what information and documents your clients need regular access to. Ask yourself:
- What are the top 5 pieces of information clients frequently request?
- What documents do clients need to access on a recurring basis?
- What manual client interactions could be automated through a self-service portal?
Consult with your account managers to identify the most time-consuming client requests and interactions. This will help you prioritize the key features and content to include in your portal.
Step 2: Choose an Effective User Interface
For B2B business portals, an admin panel layout is often the most suitable user interface. It provides a clean, professional design that allows clients to easily navigate the portal and access information. There’s no need to reinvent the wheel – leverage tried-and-tested UI patterns for business applications.
Step 3: Develop the Core Portal Functionality
With your requirements defined, it’s time to start building. Modern rapid application development platforms like Five make it easy to quickly translate your requirements into working software. Key features to consider include:
- Secure user authentication and access controls
- Document management and file sharing
- Billing and payment information
- Project/order status tracking
- Support resources and FAQs
- Data visualizations and reporting
Start with the highest priority features and iterate from there.
Step 4: Customize the Portal Design
Apply your company’s branding to create a cohesive experience:
- Use your brand colors and logos throughout the portal
- Set up a custom domain for the portal URL
- Create branded signup and login pages
- Customize email templates for portal notifications
A well-designed, branded portal reinforces your professionalism and attention to detail.
Step 5: Test and Refine
Before fully launching, test the portal thoroughly:
- Conduct internal testing with employees across departments
- Gather feedback and identify any usability issues or missing features
- Make refinements based on testing results
Table of Contents
Full Tutorial For Building a Business Portal
Do you need help getting started with building your business portal? Five’s rapid application development platform makes it easy to create custom portals without extensive coding. Sign up for a free trial to follow the tutorial below and start building your portal today.
Most custom business software consists of these elements:
- A database for storing data,
- Forms for data entry,
- Calculations for processing data,
- PDF reports, charts, and dashboards for visualizing data,
- User logins and authentication for controlling access to data, and
- Notifications (email or in-app) for notifying users of data changes.
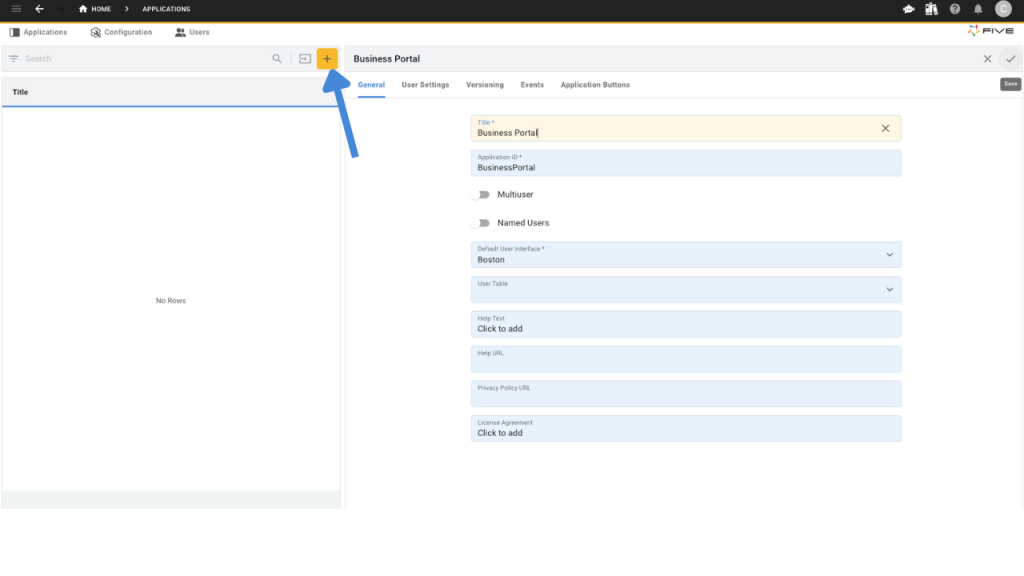
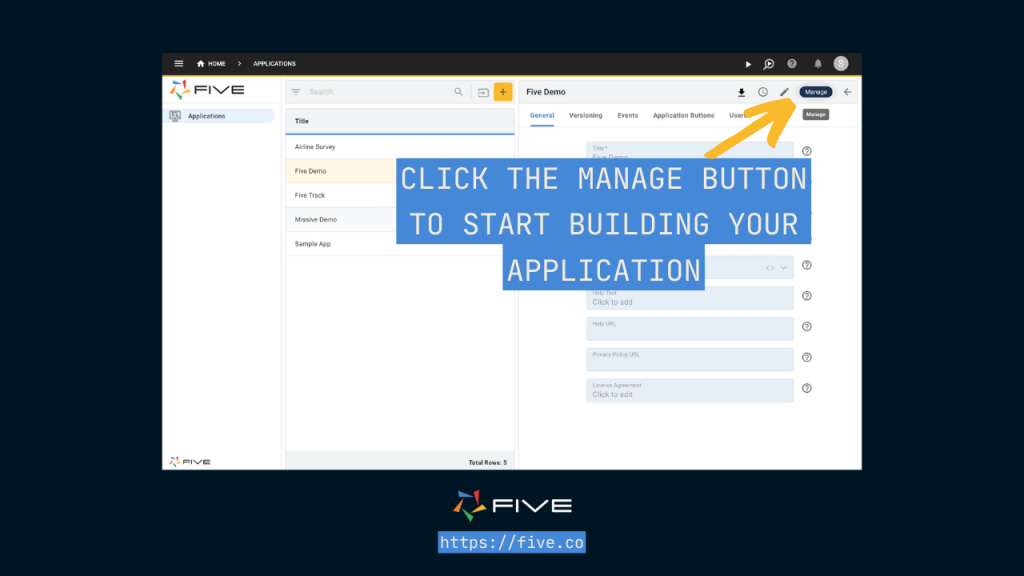
Step 1: Creating a New Application
- Click on Applications and create a new application named “Business Portal.”
- Deploy your application using the Deploy to Development button.
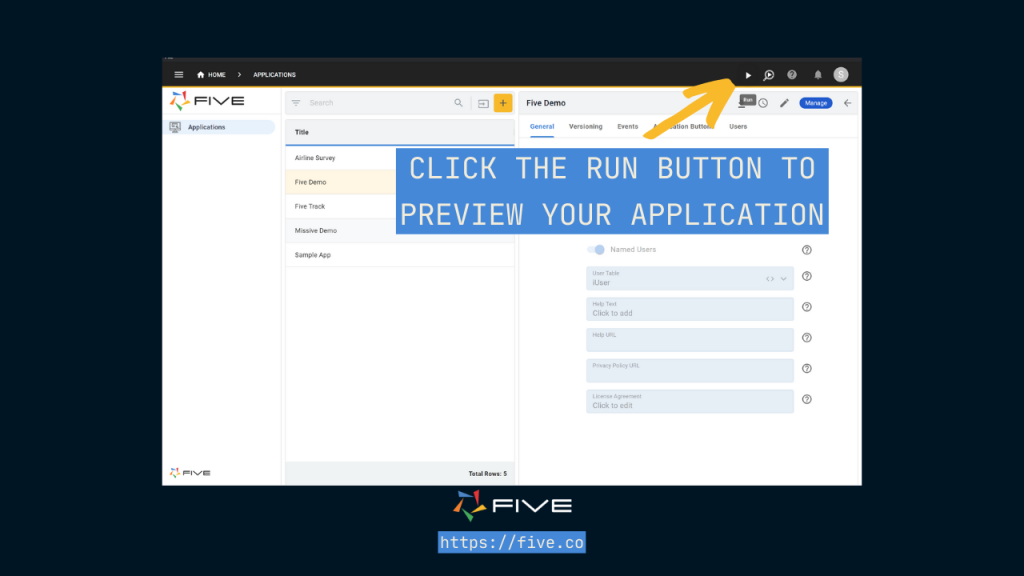
- Click Run to preview your application.
Step 2: Setting Up Database Tables
- Navigate to Data > Table Wizard.
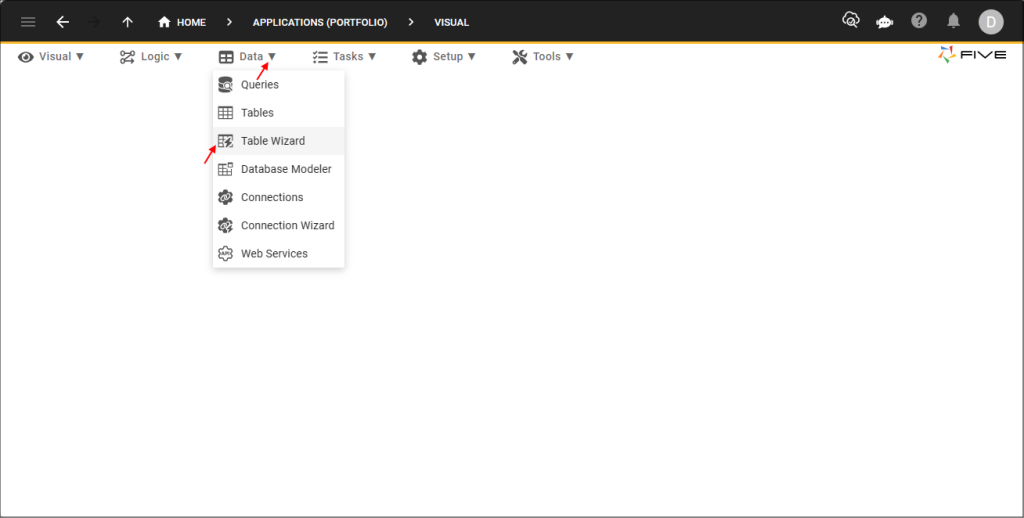
- Create tables for core entities like Products, Orders, and ProductOrders (for many-to-many relationship).
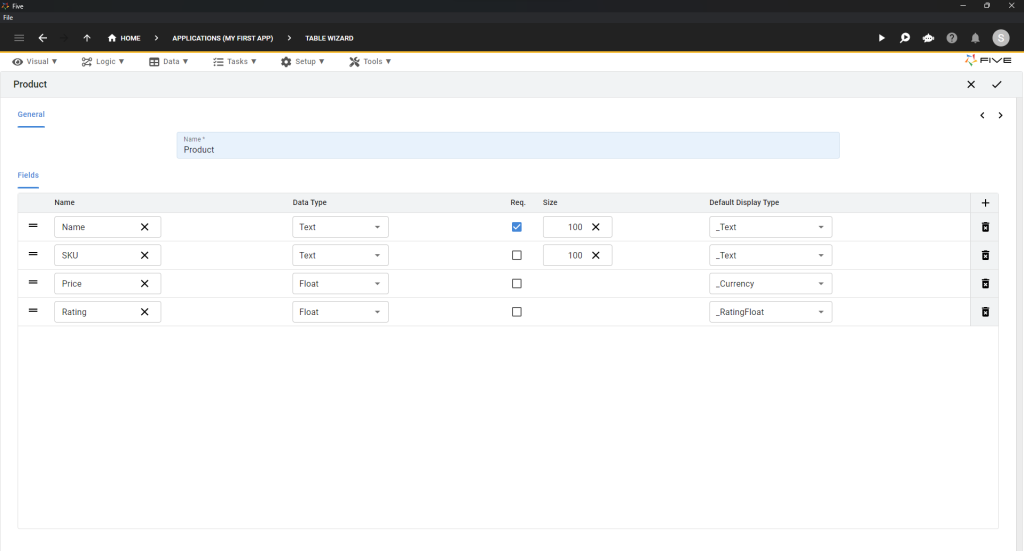
The Products Table
- Give your table a name inside the Name field: call it Product. To add fields to your table, click the Plus ➕ icon on the right side of the screen.
- Here is what your Product table should look like. Make sure to get the Data Type and Display Type for your fields right.
| Name | Data Type | Req. | Size | Default Display Type |
| Name | Text | ✔️ | 100 | _Text |
| SKU | Text | 100 | _Text | |
| Price | Float | _Currency | ||
| Rating | Float | _RatingFloat |
- Once your table looks exactly like what’s shown in the image below, click on the Tick ✔️ icon to save.
- For the Table Upgrade dialog, click on Save again.
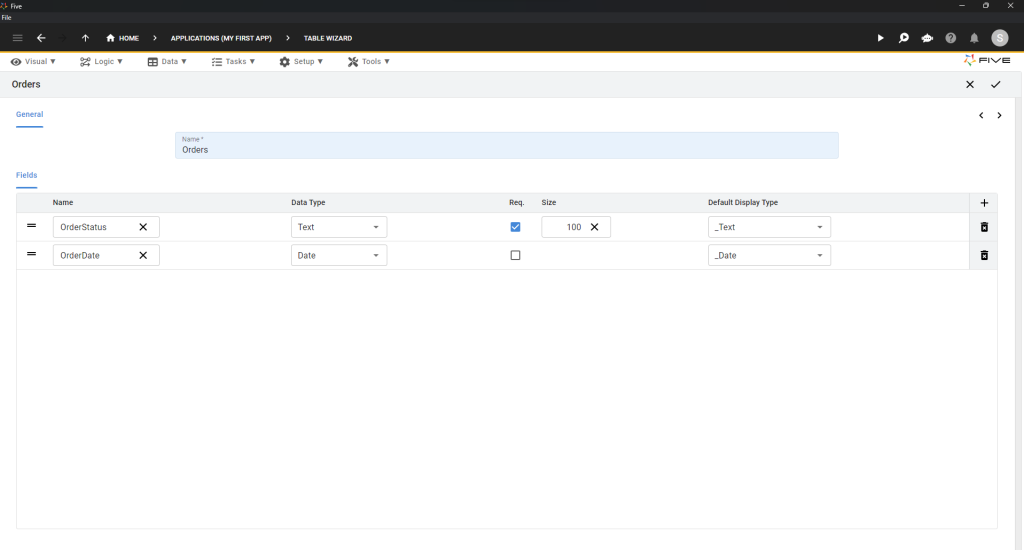
The Orders Table
Repeat the previous steps for your Orders table. Shown below is what your Orders table should look like.
| Name | Data Type | Req. | Size | Default Display Type |
| OrderStatus | Text | ✔️ | 100 | _Text |
| OrderDate | Date | 100 | _Date |
Click on the Tick ✔️ icon to save.
The ProductOrders Table
The ProductOrders table is a junction table between our Product and Orders table. It is used to establish a many-to-many relationship between Products and Orders and it does not contain any fields. It only contains the Foreign Keys of the Product and Orders table.
- To create this table, open up the Table Wizard.
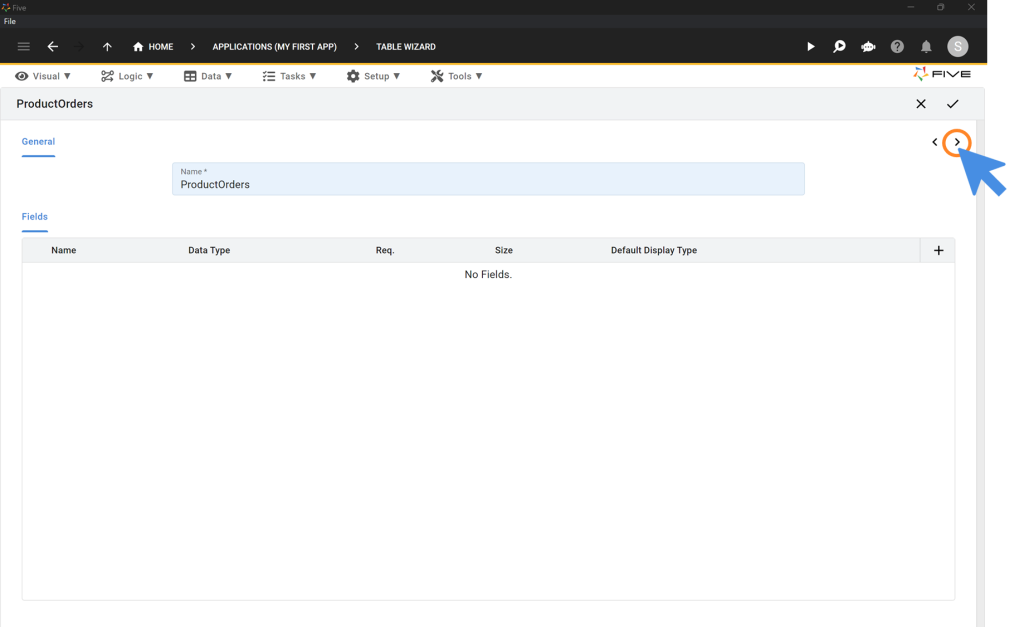
- Type ProductOrders into the Name field.
- Click on the Right Arrow > as shown in this image:
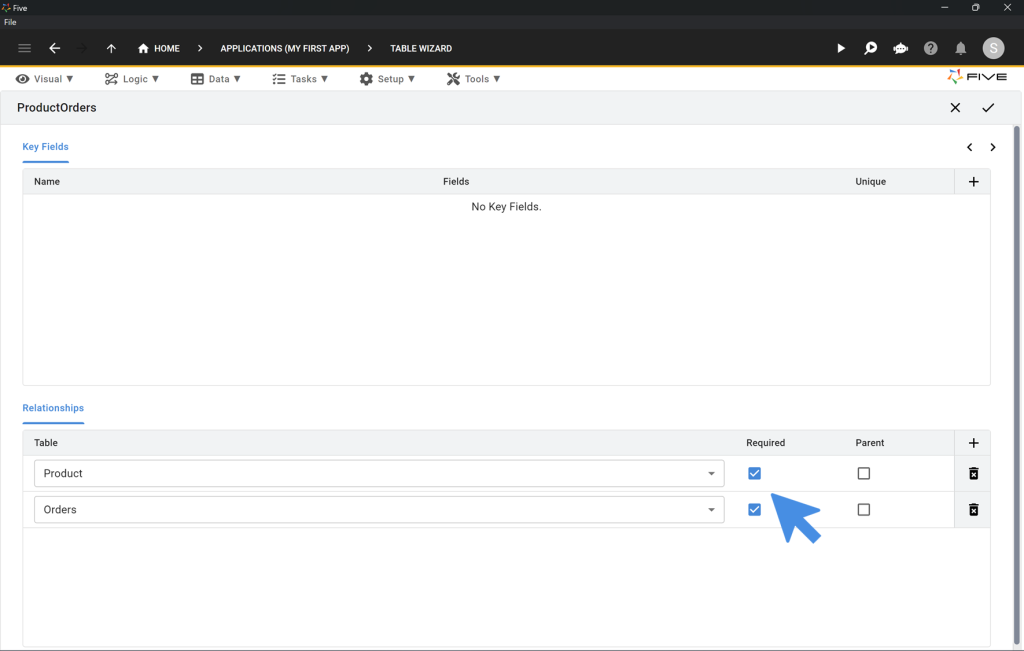
- Click the Plus ➕ icon in the Relationships area at the lower part of the screen.
- Add a relationship to the Product and Orders table and tick the Required box for both. Here is what this should look like.
- Once the relationships are defined as shown below, click on the Tick ✔️ icon to save.
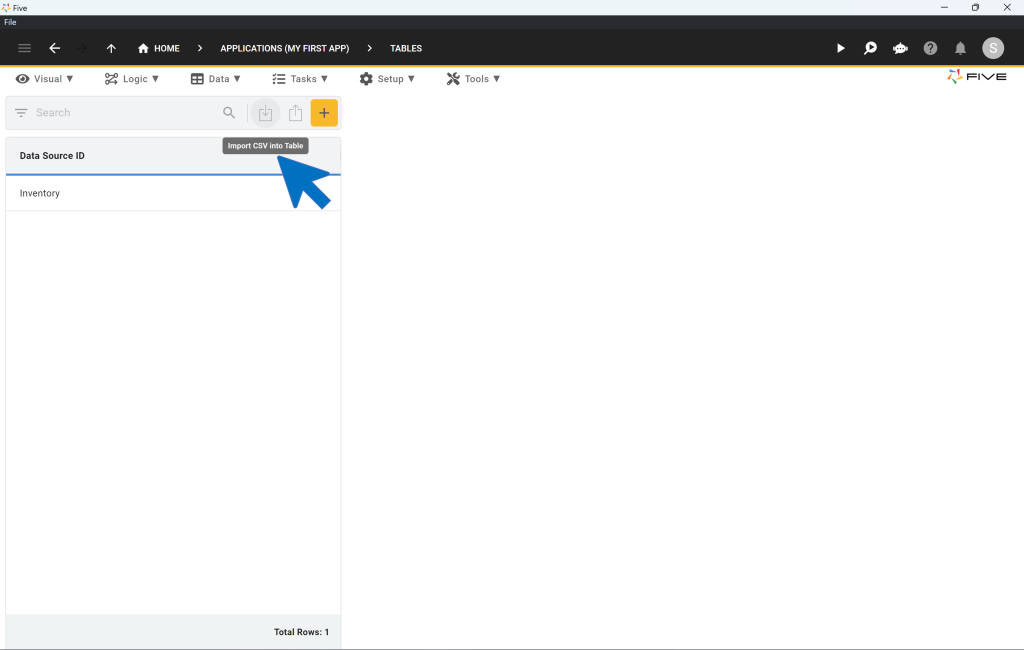
Step 3: Importing Data
- Import initial data using CSV files into your database tables (e.g., Products).
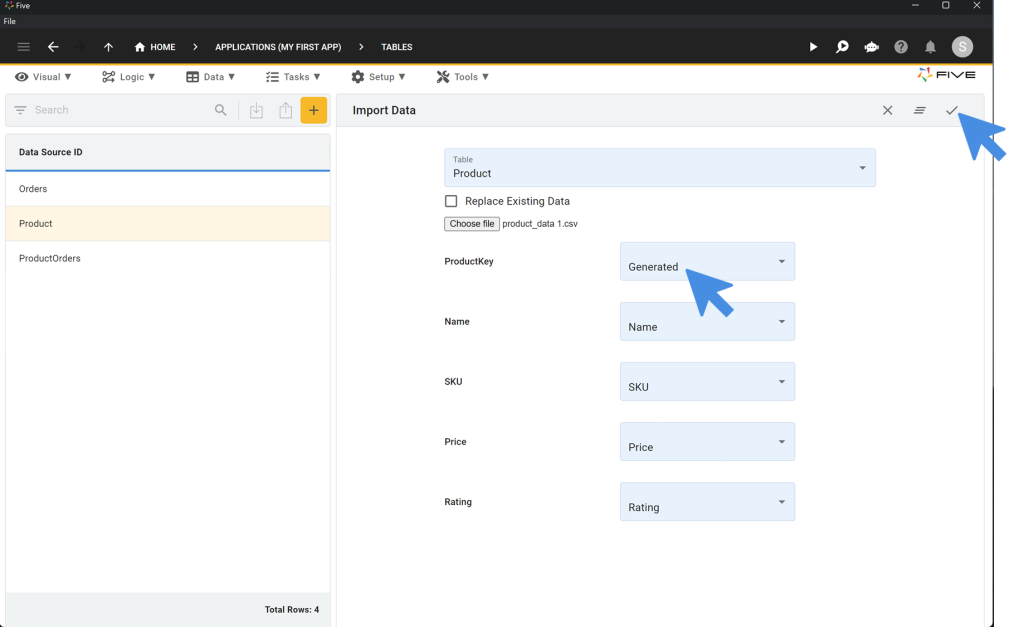
- From the dropdown menu, choose the Product table where we will be importing our data.
- Click on the “Choose File” button and select the CSV file available for download from the top of this guide.
- Select “Generated” for ProductKey. Five will automatically map the remaining fields from your database to the corresponding columns in the CSV file.
- Click on the ✔️ icon to confirm the data import. A confirmation pop-up will indicate, “CSV import completed successfully.” At this point, our SQL database has been successfully populated with data, and primary keys have been generated for each record.
- Use Visual > Form Wizard to create forms for data entry and management (e.g., Products and Orders).
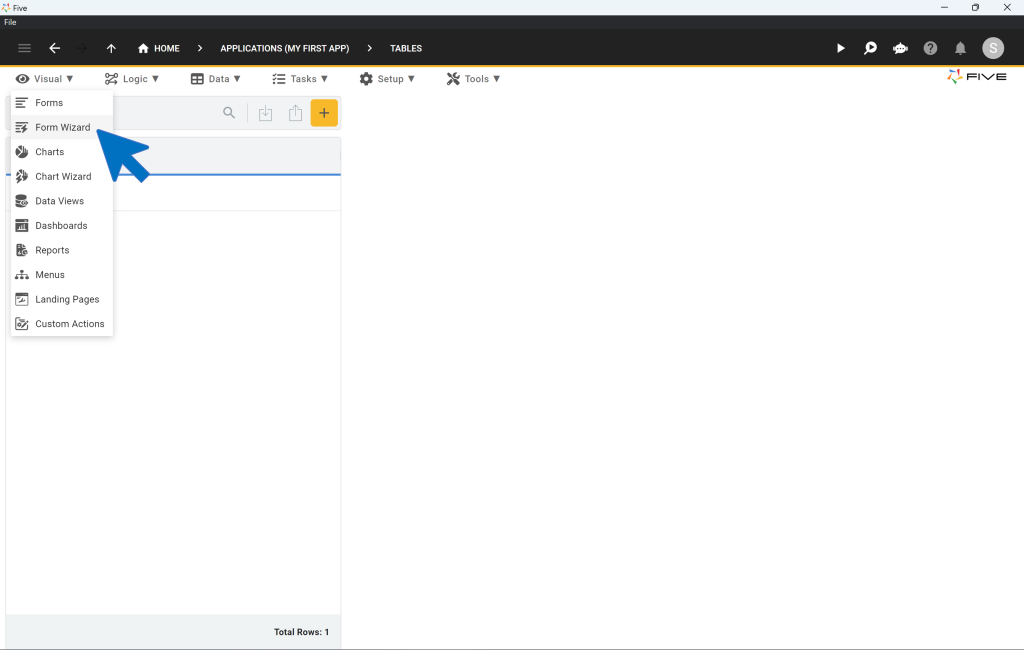
Create the Product and Orders Form
In the Main Data Source field of the Form Wizard, select Product.
Click on the Tick ✔️ icon to save.
After saving your Product form, repeat the same steps for Orders, i.e. select Orders in the Main Data Source field, and save again.
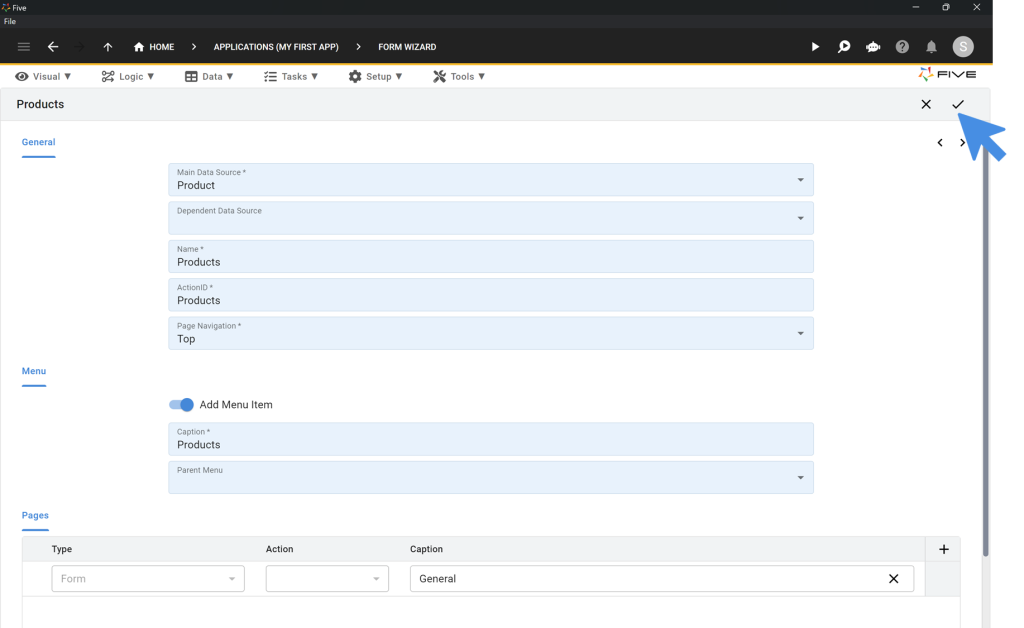
Create the ProductOrders Form
- In the Main Data Source field of the Form Wizard, select ProductOrders.
- Toggle the Add Menu Item (the first item in the Menu section) to off.
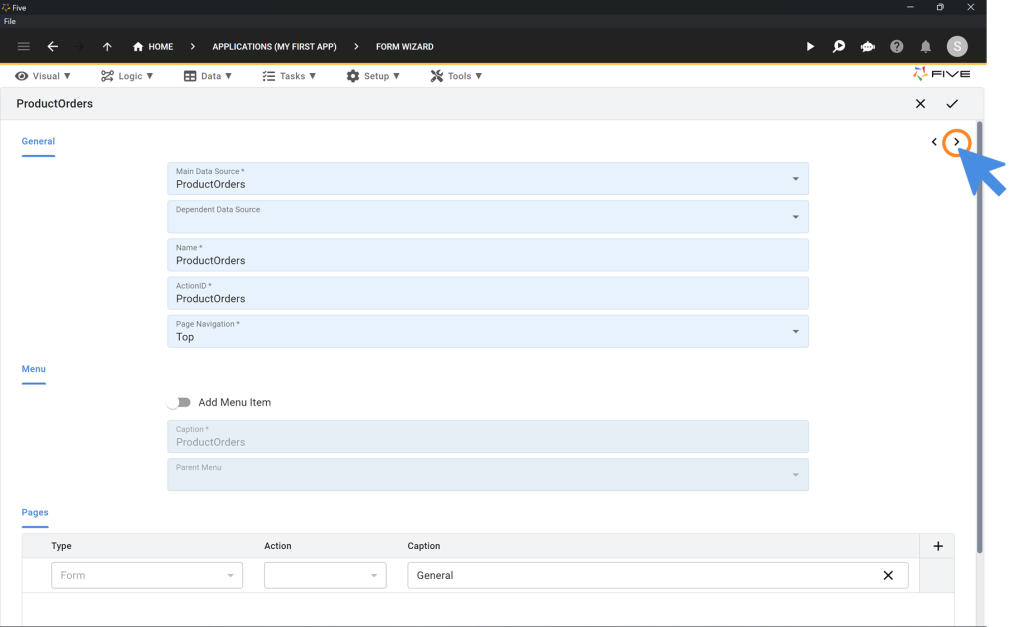
- Click on the Right Arrow > as shown here:
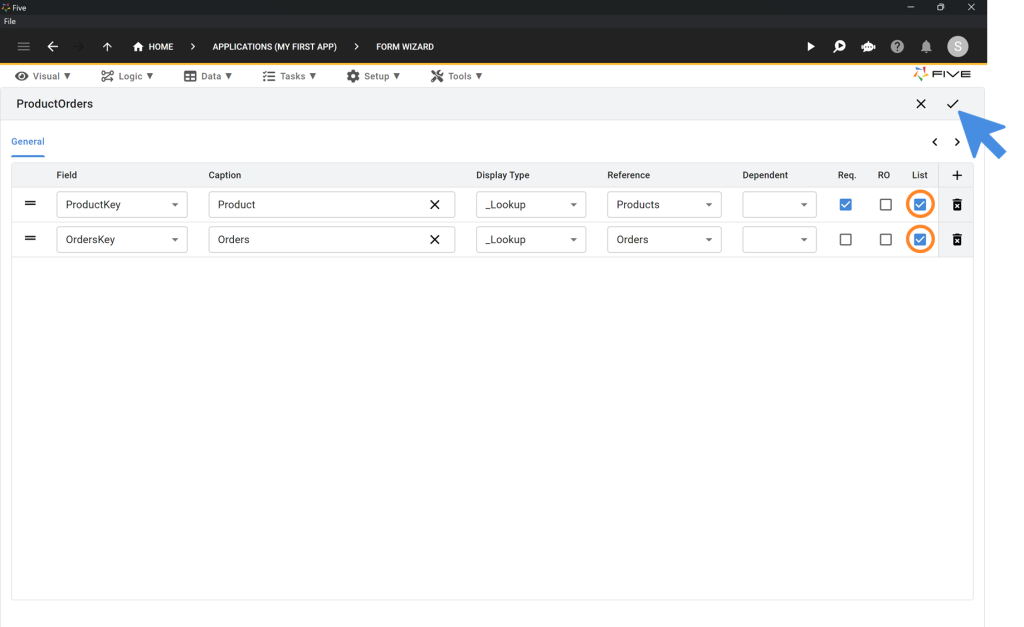
- Tick the Box for List for both fields: ProductKey and OrdersKey.
- Click on the Tick ✔️ icon to save.
Next up, let’s make our forms more advanced by adding a page to a form. If by now you are wondering what exactly we’re building, bear with us. We’re just a few steps away from previewing our application.
- Click on Visual > Forms
- Select the Orders form from the list on the left.
- Click on Pages on the right.
- Click on the Plus ➕ icon.
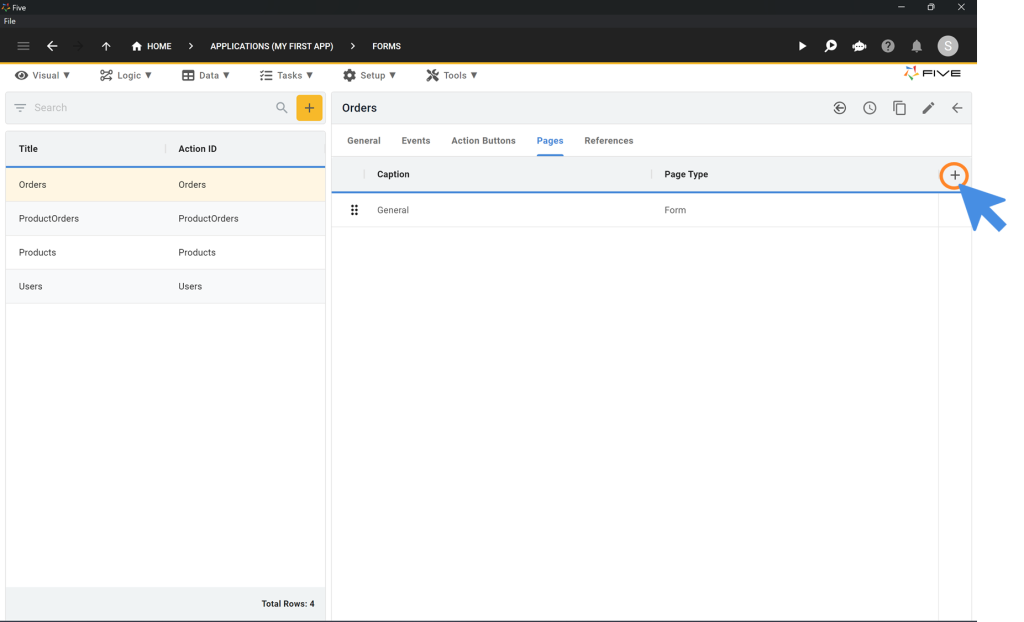
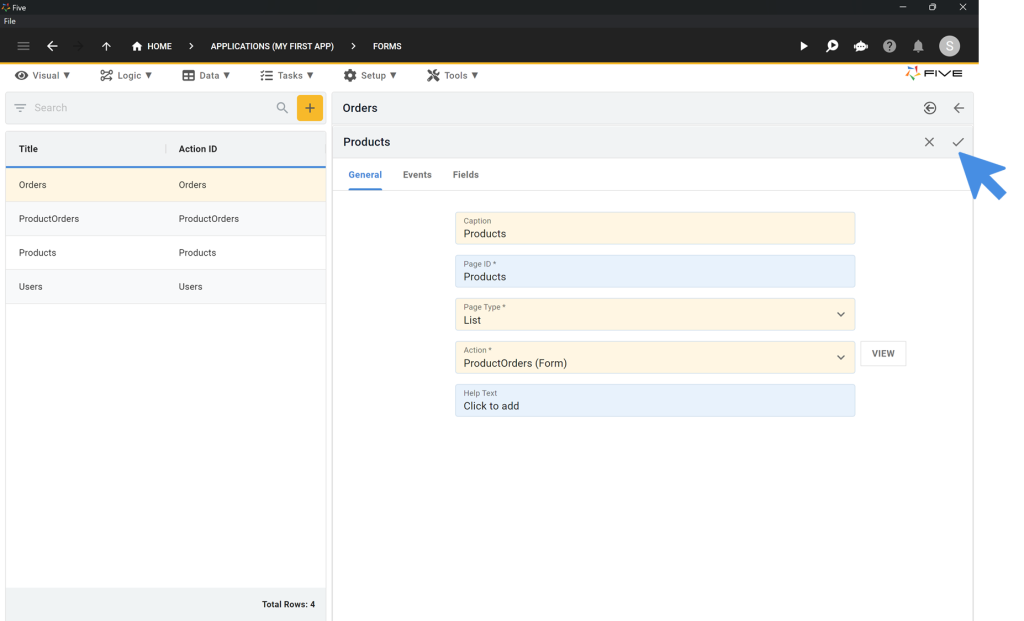
- Change the Page Type, i.e. the third field, to List.
- Type Products in the Caption field and select ProductOrders (Form) as Action*.
- Click on the Tick ✔️ icon to save. Here is what your screen should look like before saving. Save again to confirm the new page as part of your Orders form.
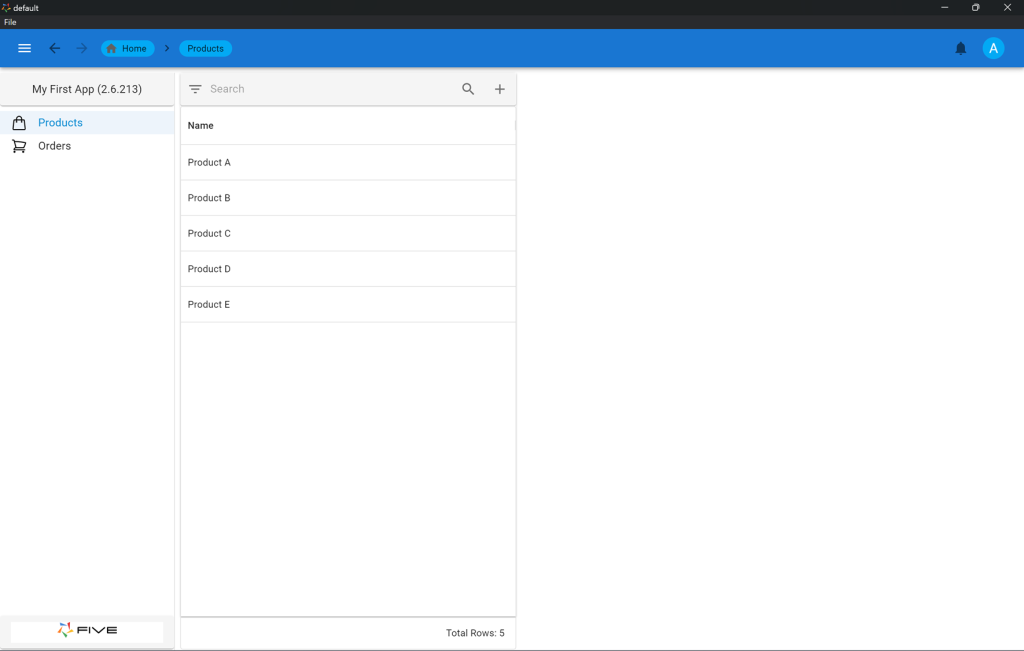
It’s time to run your application to see what we have developed so far. As shown above, you can always preview your application by clicking on the Run ▶️ icon in the top right corner.
Here’s what your app should look like:
Step 4: Generating Charts
- Utilize Visual > Chart Wizard to create visual representations (e.g., sales trends).
- Fill in all fields on the left of the screen that are marked with an asterisk *, and choose your X Value Column and Y Value Column, as shown in the image below.
- Save by clicking the Tick ✔️ icon in the top right corner.

Step 5: Creating PDF Reports For Our Business Portal
- To create a PDF report on our database, click on Visual > Reports
- Click on the yellow Plus icon.
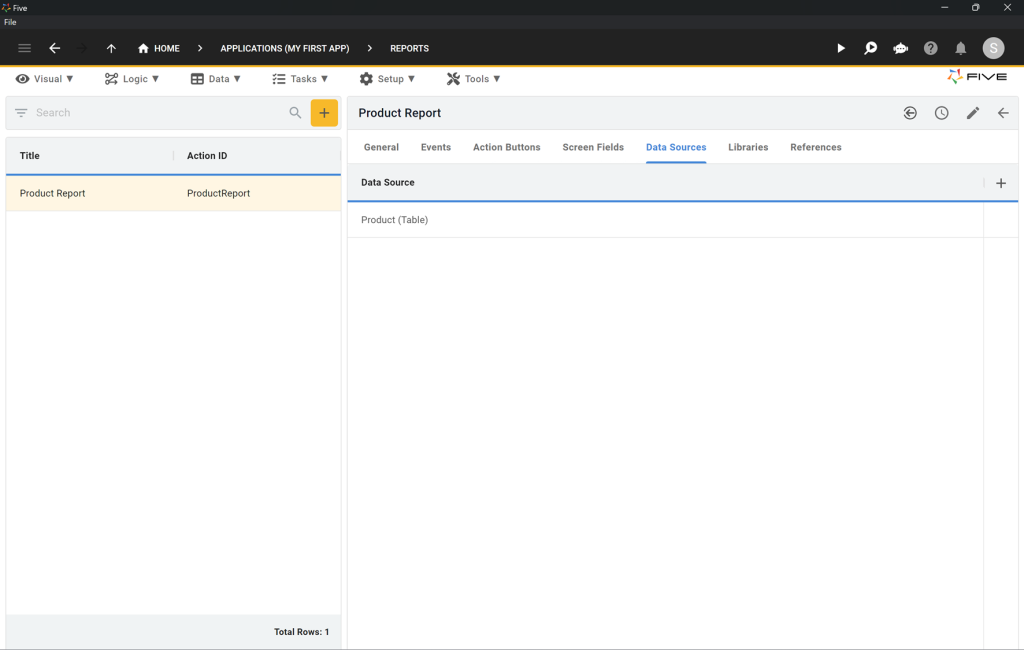
- Type Product Report into the Title field.
- Click on Data Sources.
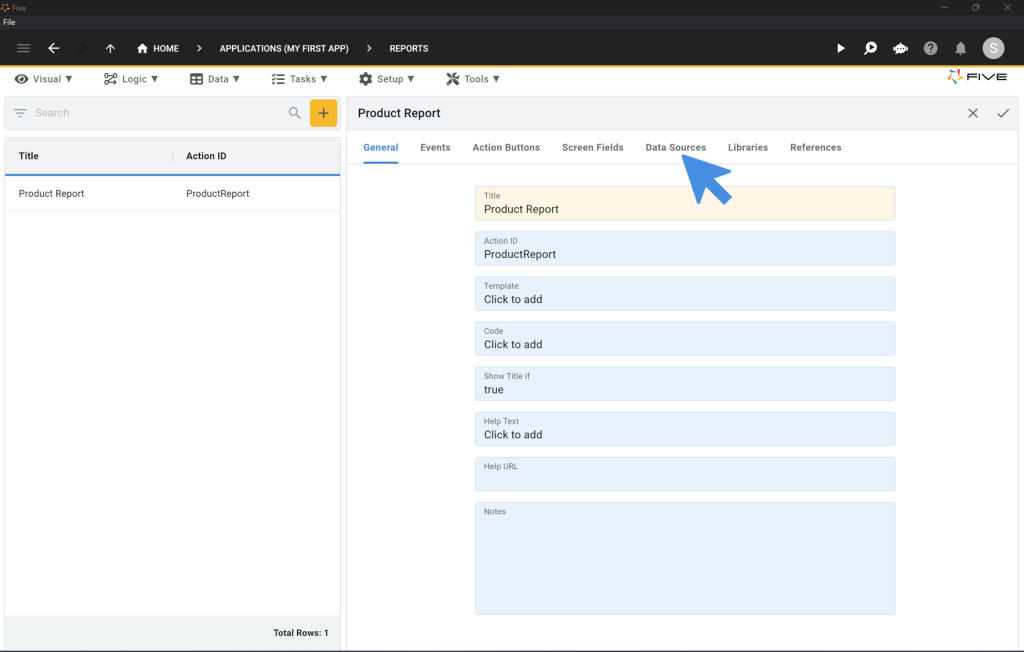
- Click on the Plus ➕ icon to add a data source.
- Select Product (Table) as a Data Source.
- Click on the Tick ✔️ icon to save.
- Go back to General.
- Click on the Template field that says Click to add. This opens up Five’s report template editor, where you can create report templates just the way you would in any text editor.
- Click on the </> icon.
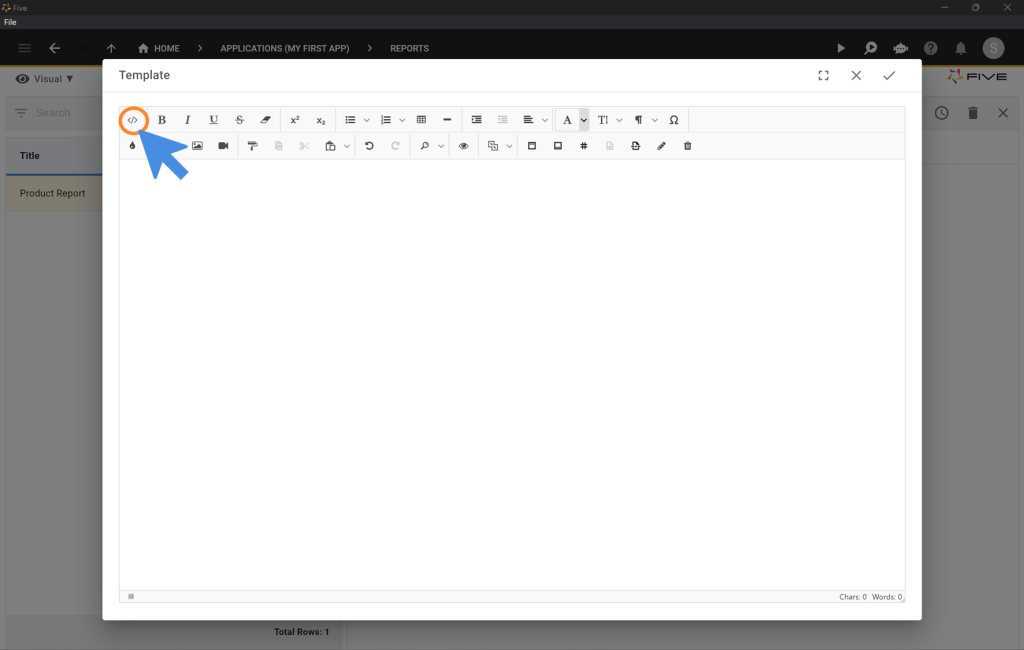
Delete all code in the code editor and replace it with the HTML here:
<style>
    .demo tr {
      background-color: lightgrey
    }

</style>

<div><img src="data:image/png;base64,iVBORw0KGgoAAAANSUhEUgAAAKMAAAAtCAYAAADC1tsoAAAABmJLR0QA/wD/AP+gvaeTAAAHlklEQVR42u2cbWxTVRjHLxvv8hJQM1HRgdB2dLyE3rYMQizQtRs4hA8V1iIqiQu+EBK/EAHZ5YOsiwtRfIkjSIIGWW9AhX2g3YAFPhiNiy8gbEMmuHUImYKArN0YOz6nux13d/d2ve29t3M7/+SfLO2559777JfnnOeck1LUABCiqLQWs7kgaKUrKCIiMeWX/vak2hAGLSZXk4W+0GyhEfgnEnUiUTm89d/keutrwZudu89PVqrf80bjyKCFXt9sMV3kIIz6NIk6kahySxvKAETEOZRbWs/aSy7aKYSGJdpnk9X8SrOZbhFAyNlUSaJOJA5jSf1GHox8N8B3W5a9ey5Dbp8AXak4iNjmgyTqRKLCWVACxqg7Hd66agDTZWNqhscFI01bpGAMWsyfkKgTiSqvpC6zHxj5boFh3AsAT++naBkG4F2RyIxeEnUiUTEMSgPIwjKAxL6Ps6Xd27A+Z3fzGNF5o4XeLQYjfL6NRJ1Iet7ora+TCSPfN+2lDeVOb8Ncfp8tNL1IYqh+k0ScKMa8saEyCRj5rnWU1BXZmPPj8PqiWEWNl3tIxIkktbTswtMAkUkpL9tVp4sUMmb6o77DtGkViTiRbKGt2RnJXB+0mpb0zYzzl5LIEskD8R1DDtqhW51UHy5XOlTP1/kw/mGdbyLRJZKREbOmoGJ9I2JmTEi2Lxiqy3tlR6t1psKPi3eK1oK3aODHBPd+ClzEs5RywKNS+C/FMVoS4/s08ErBu6hlGSAymaMBxO9RsU6Rbbsmq8nBh/F3qzVD4UDjF0QaWZjVCwTfi8kGDoFPgCekAMSR4APc870u0aZMwxjKgLFY/xkYIUa/QZEsa7MNBwhbe4DMyRmjcLDLBzCMc8C3eN+f5bKpVpoEPsW7/32wS6TdDwMORsTo3uJA7ERvz3hUqYgEzfR+DsYOFQLOh/EfcK2KzpIJ43jwcUGbP8G0BiBOA18Q3PsqeLZI21pemxvgRhUdF4h2APEeB+MpJaMC5xlXcDC2qgzjMY2HwHiGabyfv1fQ7l/w8yo+lxl8TXDPWFmZDyOT2oKFMWQChK0RELF3GDYp2X+tyTQCquobAGPjEIQxWkDgf3IXr20nVxQpLbyOe1fwXFX9zFcHBoyIMY4DAM89AFHfhbY9M1Xp+zRb6S9UOuX9f4AxqpfA7YJryrnsqYQ2c/NCfv/7wCP6yxcphxGfroEhme0BMTJEG75T415450XqlHeH3zhXIRjPcEWGWh6bJIxYeNH/puA6f5KVdjp4j6DPLhlg8WH8ADxdRUtVzoadvUDszoxqDB3UZZtttPBgLao2TQwFjIfCAWNXyG98dRBW01Iygq8Irv0FnMiI9BD4qKCvMLhQzkwqpdU0FCyrIkOyEMbter1ambhpAb0y+ndbddYCgLARjDh3tvuN7iECI8UtoAuXVFrA85Ps4y/wYrnT+pTBiLbPzALwbvUBkdGfVXVaAGuOiHWlA3RbAL4OHogPgAxkrxkiMEaz2jFBH3fAzyWYXS+BdYnUmCmBEQqWyQDdpT4gRmzYqSaMbYHsqeFA9mkRCPnGkBYkCONJlec7oxSGMTrf+1DQD66034hxzTKReee34ETXhrWaM2Y+ANFFpQN0x8VBxJlx5rwVB92TsJUGsb0qezXMD//uB8So28OBWfmDsJqWWwljMNIE7V7GNZ+gHQtOZmdL+2oaMuL7kiAW6y9H2+X5PHuch9YtVuSelaaxANfeOCHku7nt5NwnhhCMWPiUVJugz6+4Kj66VoniAHZgwwjHwV6MASL2e9G2ziPrpjh97tY8n5txwRwv4Wzon2UEqM7GCd89cG24yugN+7PsqMY2fIhlxqgWglsF/eLlti8Fn+HsuEGhe2oHI2KyFkBWDMeEkTEs5F/j9Hk2ApDIyRbW5B/xyPoJFISoYQBWEfhuDPju94Yvc/QQWPSOV3h+VRejCLgNzlfwfnwYr1Jq7u/DMs6OyLEwRt8mDqL+KmIEqR6Agsx4MgKkz30zr8LtiuetbtfoHgHIjkkAiJdyyturZrlunzA8rFAgByOMWPinZk6LgBgEz1P4XtpX05EChtFNh73nAsiEDD6zCDBeB38s9oTLK9boAMQQByRyVrg/L6gsGiv1RlCgLAXYgj3w+Y2tUD2zOEuGAnOmqQTEYIWR4qr3g7z+fwar8UNdB6iBcoQMbZoheQoZINzaA2M3kL8uZz29jiHh+V0okM0AdHcAvmq8jtgRmG3qk23VEV77c3FepDGMGRyQUashXLjg3ZSNVN/tSKU0nqvmvSp7V1JPaQPQnKz7Rz6QDp+7DT7b3D0fpdLwumCoavaziDWOpIiI1FQu654HEN7rlSG7fViNNUkiophy+grLRGDEw/aVXJ9nEYkQkXYzdShcAL5LokBC1sRrkqA0EikijbKjewm4SwJIhJeCcg+tfZxEikgrIPdLwcj52sqjG8aTSBGpLjvrmgjAtUjD6PGRKBFpWcy8IAFjp+NwoYFEiEjr4fprIYwOn+dTEhkizYULFbxnzV8Il3uggohIMTlY92s9lXSFp4REhChlwuuKcMTsTCRDsq7JJCJEKVUeu04f3acmIupP/wHYJhviTK/+pwAAAABJRU5ErkJggg==" style=""></div>
<div><br></div>
<h1>Report</h1>
<table style="letter-spacing: 0.00938em; width: 100%; font-size: 1rem;" class="demo">
    <tbody>
        <tr style="border-bottom: 2px solid black;" class="fiveReportHeaderRepeat-Level1">
            <td style="width: 28.1305%; background-color: rgb(153, 153, 153); color: rgb(255, 255, 255); text-align: left;">Name</td>

            <td style="width: 50.97%; background-color: rgb(153, 153, 153); color: rgb(255, 255, 255); text-align: left;">SKU</td>

            <td style="width: 18.254%; text-align: left; background-color: rgb(153, 153, 153); color: rgb(255, 255, 255);">Price</td>
        </tr>

        <tr class="fiveReportHelper" contenteditable="false">
            <td class="fiveReportHelper">{{#each @root.[Product].[Records] as | Product |}}</td>
            <td><br></td>
            <td><br></td>
        </tr>
        <tr class="" contenteditable="false">

            <td style="text-align: left;">{{Product.[Name]}}</td>

            <td style="text-align: left;">{{Product.[SKU]}}</td>

            <td style="text-align: left;">{{Product.[Price]}}</td>
        </tr>
        <tr class="fiveReportHelper" contenteditable="false">
            <td class="fiveReportHelper">{{/each}}</td>
            <td><br></td>
            <td><br></td>
        </tr>

    </tbody>
</table>
<div><br></div>

<div style="text-align: center;  display: flex; justify-content: center; align-items: center;">
    <div style="width: 150mm; height: 125mm; border: 1px dashed black; display: flex; justify-content: center; align-items: center;">   {{{_Chart 'ProductChart'}}}</div>
</div>
<div><br></div>
<div><br></div>
<div><br></div>
<div><br></div>

<table class="fiveReportFooter-everyPage" style="width: 100%; height: 10mm;">
    <tbody>
        <tr>
            <td style="text-align: right;"><span style="font-size: 12px;"><em>Page <five.pageNumber.current.arabic> of <five.pageNumber.total.arabic></em></span></td>

        </tr>
    </tbody>


</table>
Step 6: Final Touches and Deployment
- Go to Visual > Menus.
- Click on the yellow Plus icon.
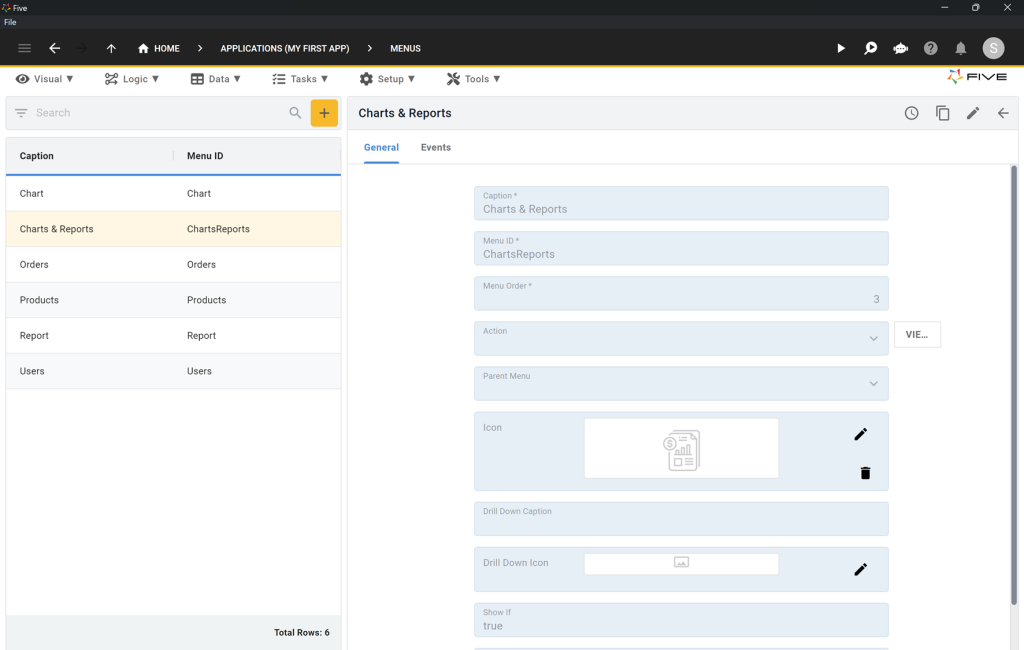
- We will first create a parent menu called Charts & Reports.
- Type Charts & Reports into Caption.
- Type 3 into Menu Order.
- Click on the Tick ✔️ icon to save your menu.
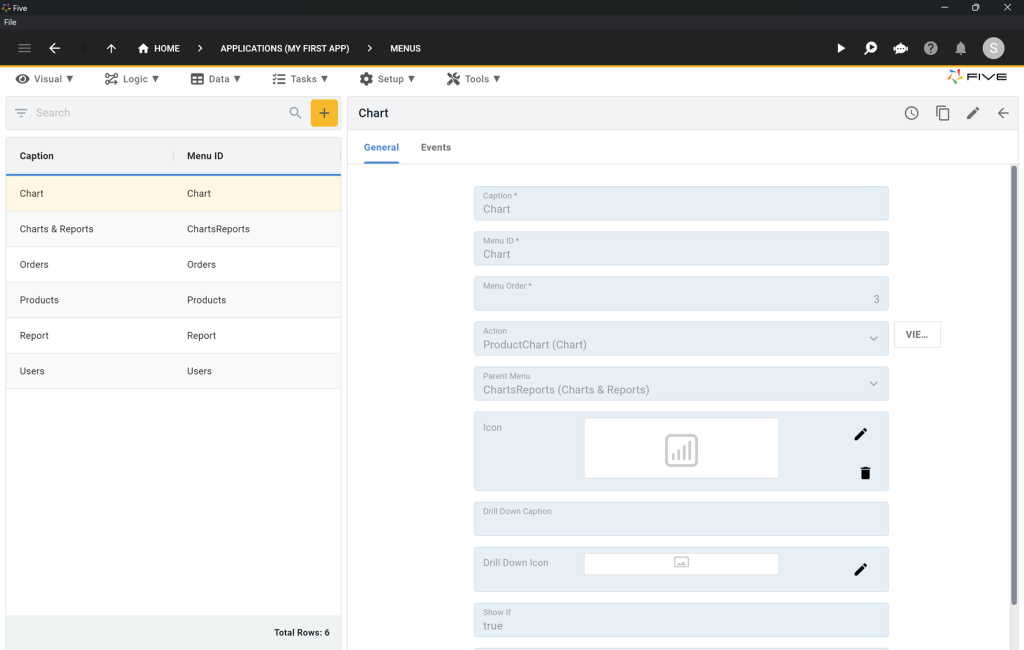
Next, we create new menu items for our chart and report each.
- Click on the yellow Plus icon.
- Here are the settings for your Chart menu. Make sure to fill in Caption, Action, and Parent Menu as shown.
- Click on the Tick ✔️ icon to save your menu.
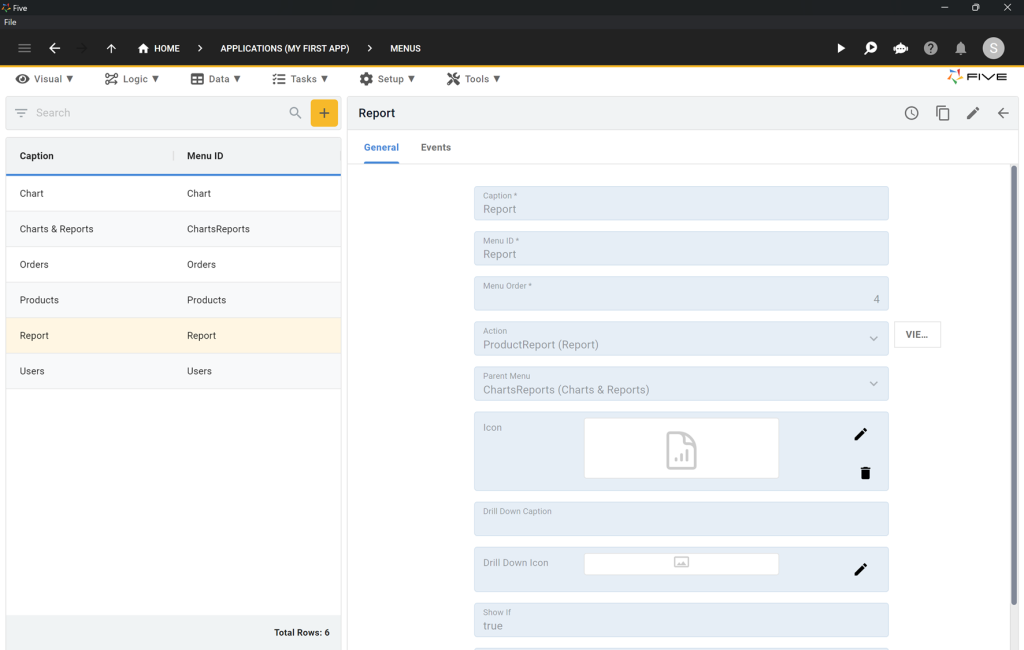
- Here are the menu settings for your Report menu. Make sure to fill in Caption, Action, and Parent Menu as shown.
- Click on the Tick ✔️ icon to save your menu.
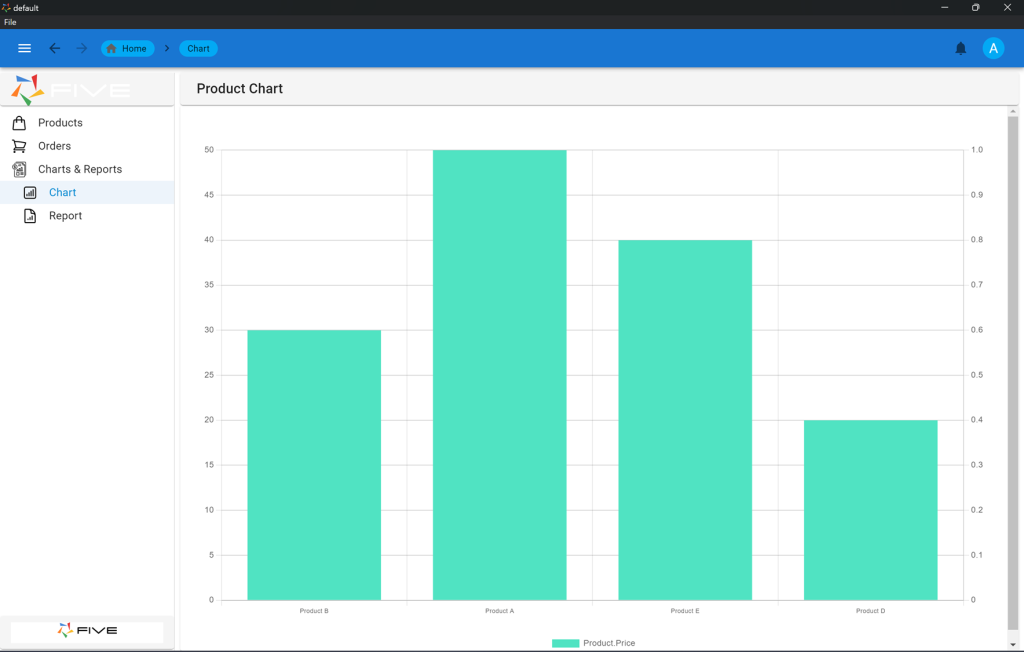
Run your app to make sure that your forms, charts, and reports are working. Here’s what your app should look like when clicking on Chart in the menu on the left. Also, test your report – you should be able to see a PDF document in your business portal.
Now, we’d like to add user management and logins to our app. Let’s find out how to do this in Five.
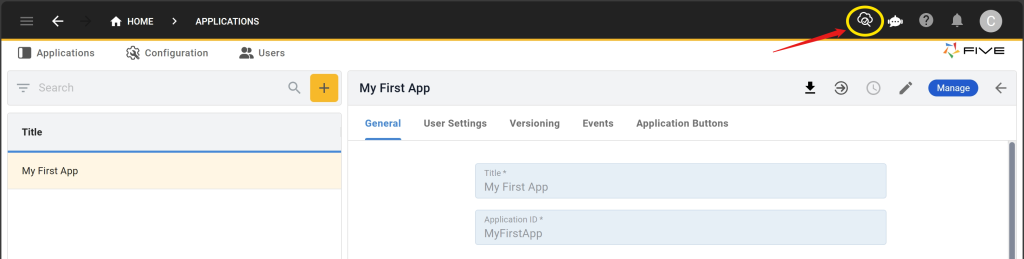
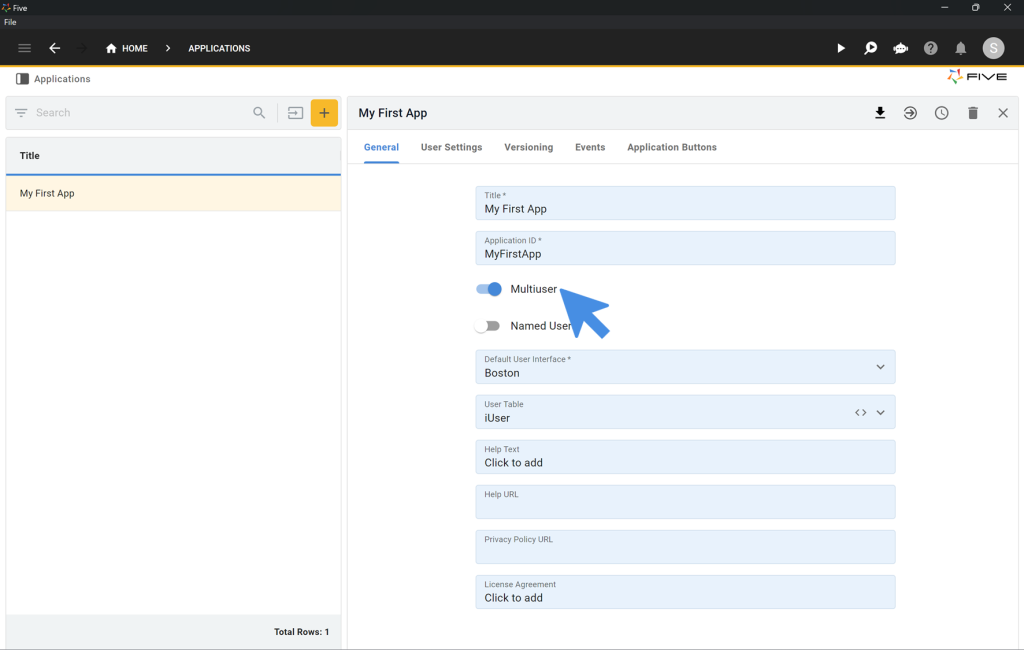
- Click on Applications (My First App) in the top navigation bar of Five.
- Toggle the Multiuser switch to on. This will add a login screen and user management to your application.
- Click on the Tick ✔️ icon to save.
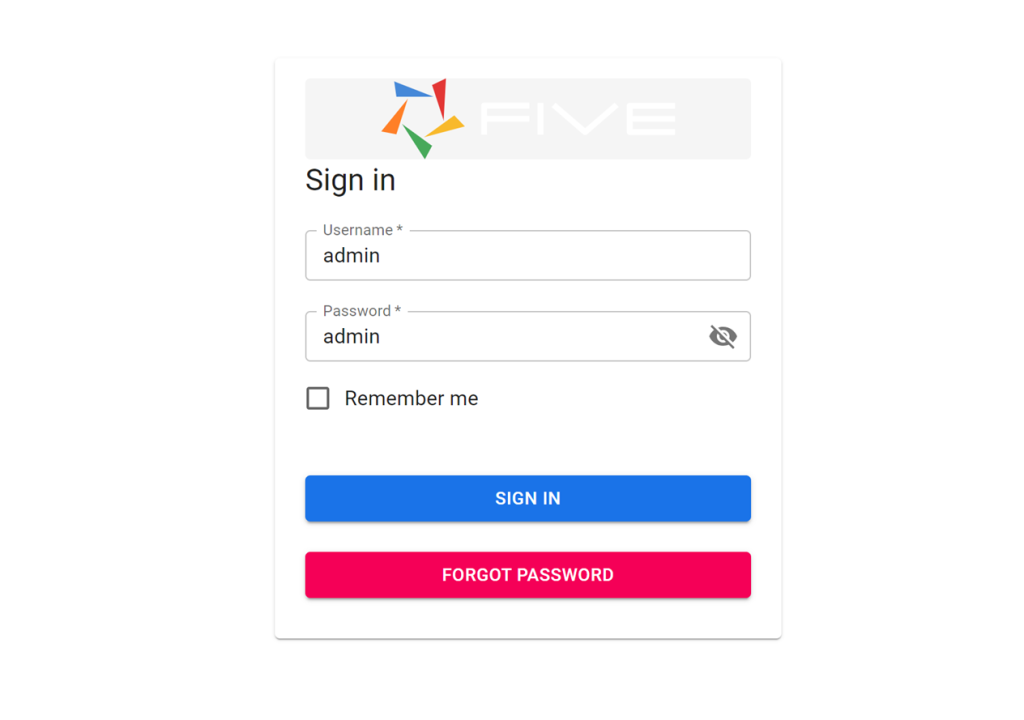
Run your business portal again. You will be greeted by a login screen.
Use user name admin and password admin to log in to your application!
Follow this full tutorial to continuing building you first web app: Code-Along: Build & Deploy a Full-Stack Web App
Finding Help in Five
In case you get stuck during the development process, we’re here to help! Continue developing your application by accessing these resources:
- Five’s User Community: Visit https://five.org to ask questions or get inspiration from other users.
- Five’s Documentation: Visit help.five.org to access Five’s comprehensive documentation.
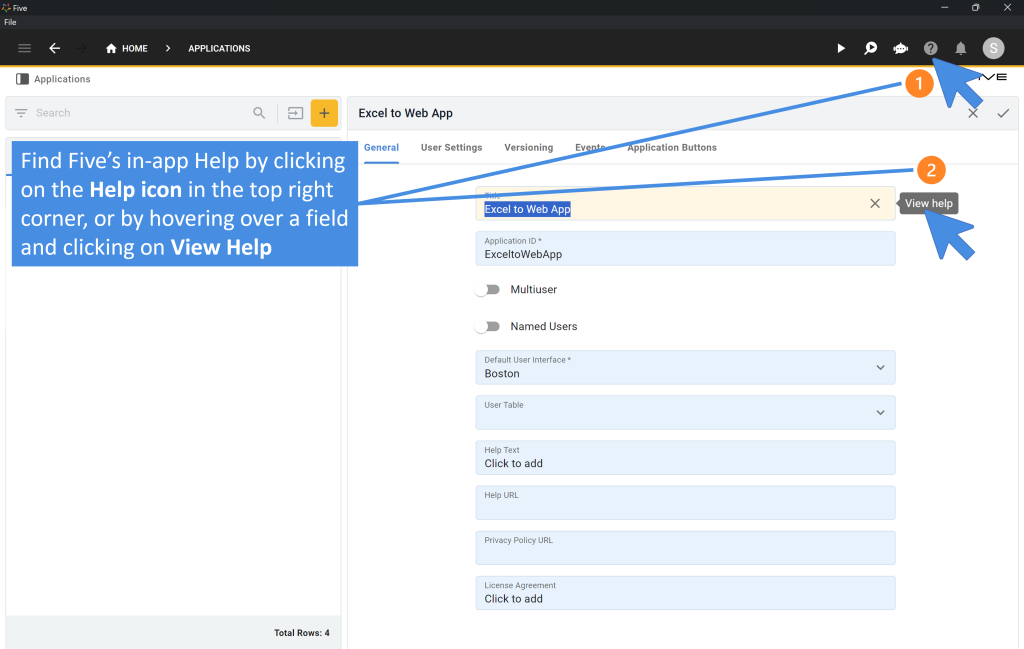
Five’s In-App Help
Last, find useful tips for your application development by clicking on Five’s in-app help available in the top right corner or on almost any field.