How to Build a Sales Tracking System [Quick Tutorial]
Sales tracking is so important because it provides insights into performance, identifies trends, and helps strategic decision-making.
Now, you might be wondering, “how do I set up a sales tracking system?” We’ll walk you through the basics:
- What exactly is a sales tracking system?
- What are some good tools to help you track sales?
- How can you build your own custom sales tracking system?
By the time we’re done, you’ll have a solid grasp on how to track your sales. Let’s dive in!
What is a Sales Tracking System?
A sales tracking system is a tool that monitors and analyzes your entire sales process. It’s like a digital dashboard for your sales team, capturing vital data at every stage – from initial leads to closed deals and follow-ups.
This system does more than just count sales. It provides valuable insights into:
- Who your potential customers are
- How they interact with your business
- Which products or services are selling best
- How your sales team is performing
By collecting and organizing this data, a sales tracking system helps you spot trends, forecast future sales, and identify areas where you can improve your sales strategy.
How to Build a Sales Tracking System
Building a robust sales tracking system doesn’t have to be complicated. Here’s a step-by-step approach:
- Use a Centralized System: Ensure all sales data is captured in a single, centralized system to avoid data silos and ensure data consistency.
- Automate Data Entry: Minimize manual data entry by automating the capture of sales data from various sources like directly from your website.
- Track Key Metrics: Monitor important sales metrics, such as conversion rates, sales cycle length, average deal size, and sales pipeline stages.
- Visualize Data: Use charts, dashboards, and reports to visualize sales data and identify trends and patterns easily.
Remember, the goal of sales tracking isn’t just to collect data – it’s to use that information to make smarter decisions and grow your business.
How Do You Track Sales Data?
Tracking sales data involves several steps, from capturing data to analyzing it for insights. Here’s a step-by-step guide to building a sales tracking system using Five:
Building a Custom Sales Tracking System: Prerequisites
This guide will walk you through the process of building a custom sales tracking system using Five (a rapid application builder). By the end of this tutorial, you’ll learn how to develop an external web application that tracks your sales activities. Here’s what you’ll need to get started:
- Five Installation: Get free access to Five which allows you to build custom online database applications. To get started, sign up here.
- Sales Data Source: Ensure you have access to your sales data, whether it’s from an existing CRM, e-commerce platform, or other sales-related tools. Today we’ll be connecting to Shopify.
Once you are equipped with Five, you will connect it to your sales data source and treat it as a data source for your web app. This enables you to build forms, charts, dashboards, and reports on top of the data.
If you don’t want to follow this full tutorial you can download our free sales tracker template here.
Step 1: Configuring Your Sales Data Source
To configure your sales data source, follow these steps:
- Log into Your Sales Platform: Log into your existing sales platform (such as your CRM or e-commerce platform) and identify the API or data export options available.
- Create an API Connection: If your platform provides API access, create a connection to allow Five to interact with your sales data. Configure the API access scopes for the data you wish to track, such as leads, opportunities, sales transactions, and customer interactions.
- Generate API Credentials: Generate the necessary API credentials (such as an API key or access token) and save them securely for future use.
Step 2: Configuring The Shopify API
For Shopify users:
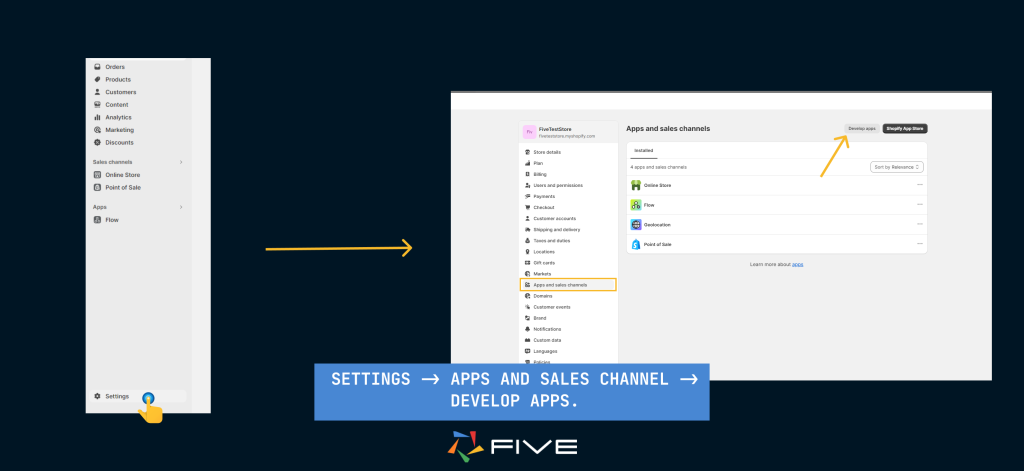
Log into your Shopify admin dashboard and navigate to Settings -> Apps and Sales Channels. This area shows all the applications currently installed in your store.
To create a new custom application, click on the ‘Develop apps’ button located at the top right of the page.
If you’re having trouble locating this option, refer to the screenshot of Shopify’s backend admin console below.
Assign a name to the application (for this guide, we’ve named it ‘fiveteststore’, and we will use this name throughout).
Then, go to the ‘Configuration’ section and specify the API access scopes for the data you want to share with an external system, such as Products, Orders, Inventory, etc.
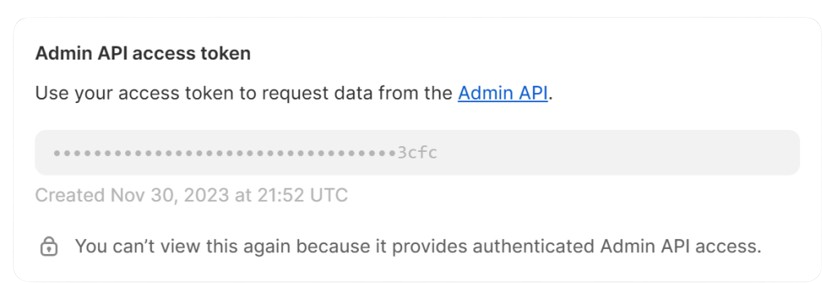
After completing the configuration, go to the ‘API Credentials’ tab. Shopify will prompt you to install your application. Once installed, Shopify will generate an Admin API access token. This token is only displayed once, so make sure to save it in a secure location for future use.
Step 3: Integrating Shopify with Five
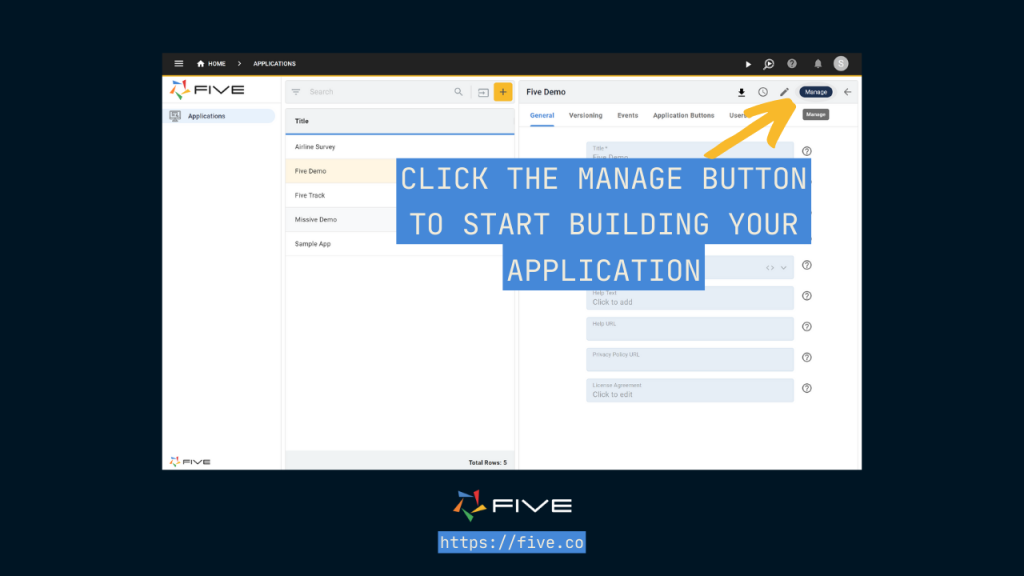
First, launch Five and click the yellow + button to create a new application. Give it a name and press save. Then, select Manage to start developing your application. This is the starting point for creating your custom app using Shopify data.
Next we will use the Shopify API that we have just set up.
1. Begin by clicking on Data -> Connection Wizard.
The Connection Wizard in Five makes it easy to link to REST APIs and set up API endpoint mappings, simplifying your integration tasks.

2. Inside the Connection Wizard, click on the Read List Mapping tab. Here, enter the URLs for your API. The URL structure is:
https://{your_store_name}.myshopify.com/admin/api/{api_version}/products.jsonReplace {your_store_name} with the name of your store and {api_version} with the latest version of the API which you can find here.
(Note: For this guide, we’ll be retrieving product details from the store. Make sure you have granted product access to the API during Step 1.)
3. Add your URL to Five’s Connection Wizard. It should look something like this: Now, add your Admin API access token as a header.
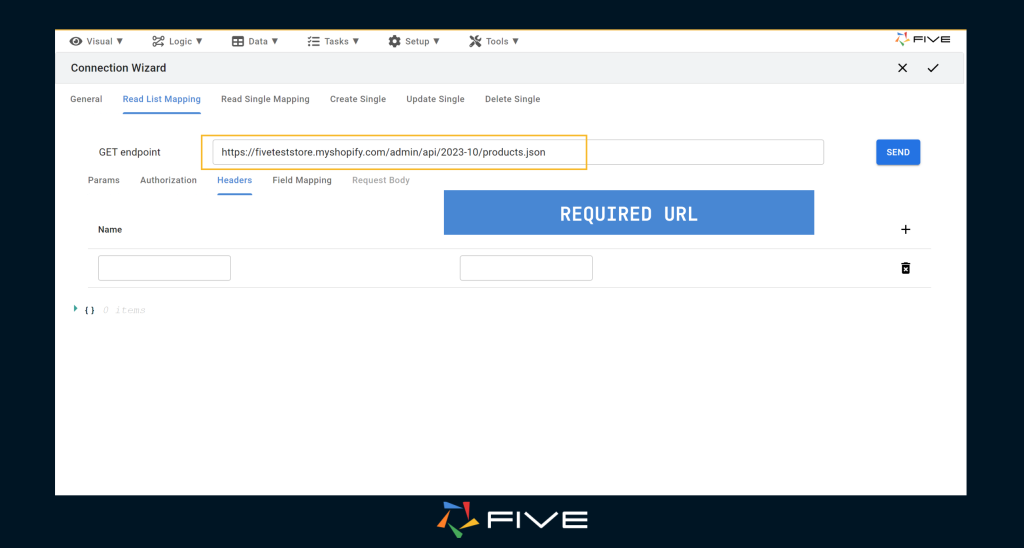
- Click on the Headers Tab just below the URL field. Use ‘x-shopify-access-token’ as the name and paste your Admin API access token as the value.
- Click ‘Send’, and a list with details of all your products will appear.
- Next, navigate to the ‘Field Mapping’ tab to see how Five interprets your data. Five converts the JSON it receives from Shopify into a format similar to a traditional database table, which is very useful for querying this data in SQL. In Field Mapping, you can modify the data and display types of your fields. Five will automatically recognize the ID field as the primary key. If it doesn’t, make sure to tick the checkbox labeled primary key next to the ID field.
- Repeat this process for the other actions – ‘read single’, ‘update’, and ‘delete’ – using the following URL format:
https://{your_store_name}.myshopify.com/admin/api/{api_version}/products/:id.jsonThis URL format is necessary because these actions require a specific product ID. By using the :id variable, Five can dynamically handle this requirement.
Step 4: Utilizing the Shopify API as a Data Source
Our custom app is now successfully linked to our Shopify store, allowing us to use the Shopify API within Five for various features such as forms, charts, data views, and reports.
Now we will develop a form to create, read, update, and delete products from our store.
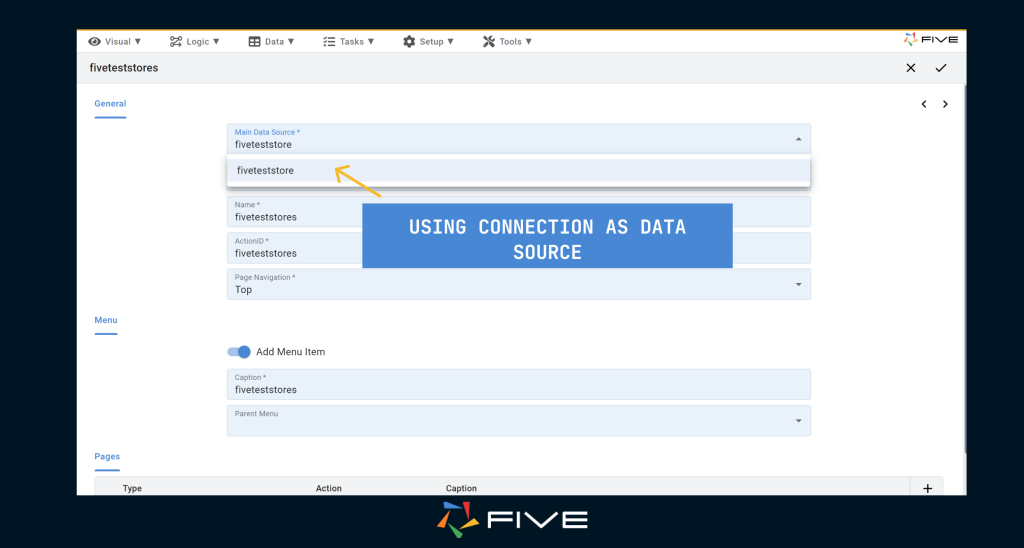
In Five, navigate to “Visual” -> “Form Wizard”. Select your connection in the primary data source lookup.
Five will automatically populate most of the details for you. At this stage, you can adjust any settings as needed.
Click save to store the form, and then you can run your application by clicking the Run button in Five’s top navigation bar.

Clicking the Run button will open a new window on your computer, where you can preview the application you have developed in Five.
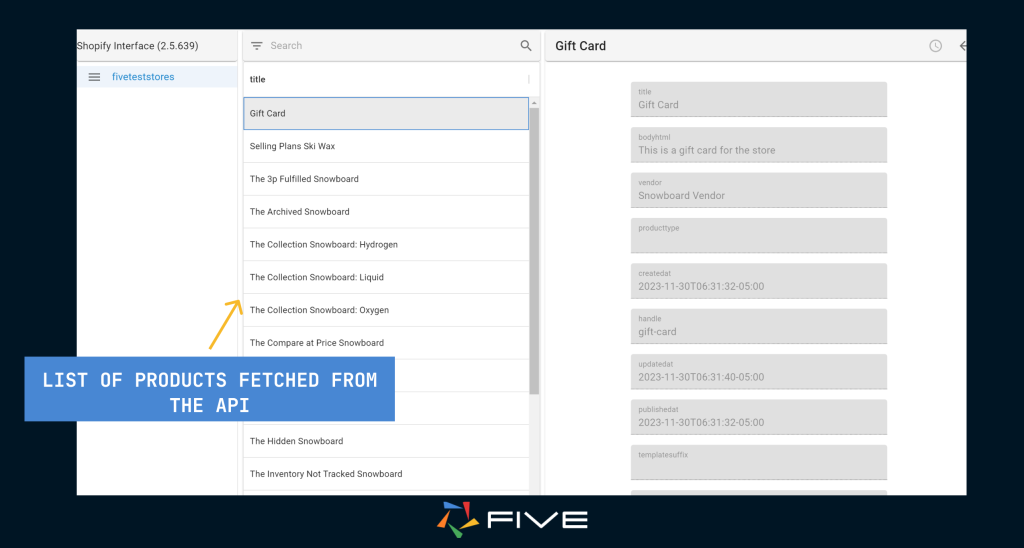
In your end-user application, you now have a form that contains all of the products from the store.
You have successfully created an entire custom app with a fully functional GUI that lets you interact with your stores sells in just a few clicks. You can click on each record to view their details, even make changes, add new records, and delete them as well. To add charts for further analysis check this article out.
Conclusion: How to Build a Sales Tracker Tool
In this tutorial, you learned how to integrate a Shopify store with Five using the Shopify API and the Connection Wizard. You developed an external web sales tracker tool capable of interacting with your store data and performing CRUD operations on your products.
This integration allows you to leverage Five’s capabilities to access, analyze, and interpret your Shopify store data. Additionally, you can use Five to create other features such as charts, data views, and reports to enhance your sales tracking and management.